Our Unbelievable Journey
A couple getting out of the rat race through flipping homes and investing in real estate.
MAXIMIZING SPACE IN A SMALL HOUSE

One thing Zella noticed about the back entry of this rental was how wide the hallway was and how small the kitchen space was. So, she “suggested” I build in a pantry closet with shelving to allow for storage space. I want to share how I accomplished this and the end result of this specific process. We believe it would add value to the property, not so much in financial gain, but to the tenant by maximizing the space.
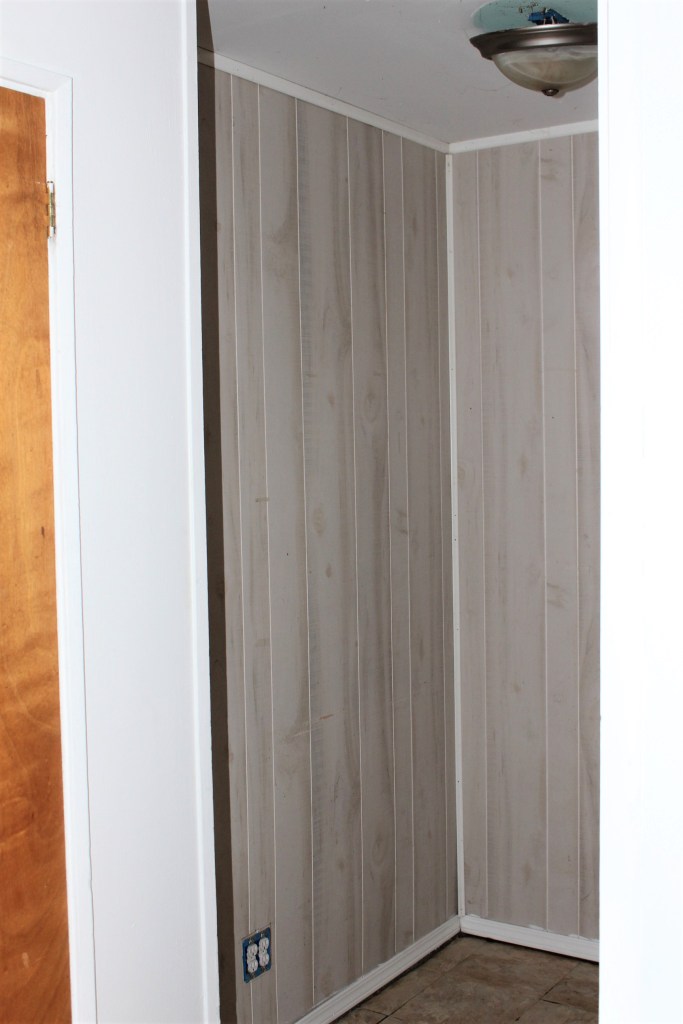
Obviously that “awesome” paneling had to come down first, so we pulled all of it out along with all of the molding. Once the paneling was down we found that no drywall was ever installed, the paneling was put up directly over the stud walls! At this point, there was no other option but to add drywall in the hallway. Then I could proceed to build the frame for the closet.
During the planning phase of this project we noticed that we were not going to be able to carry the closet all the way back to the back door. You can see in the after photo that we had to leave a little nook back in the corner in order to leave a little space to be able to change out the back door when that time comes. If we went all the way down, as we intended to, it would make changing out the back door very difficult.
I installed the foot of the walls by using a masonry bit and a Dewalt 7.8 amp hammer drill to drill into the concrete floor of the house. I secured the foot of the wall to the floor using Tap-con screws. After the foot of the wall was installed, I built the rest of the framing for the walls up to the ceiling.


Once the framing was in, we installed new drywall over the closet frame and started the drywall finishing. Mudding in such a confined area is never fun, bet we managed to get all of the joints taped and finished. At this point we also had an electrician at the house changing out all of the switches and outlets and installing new lights, so we had him move the hall light about 18 inches towards the front of the hall to make everything a little more symmetrical.
After the walls were in, we installed a bi-fold door. This was my first time framing in a closet and I made a few mistakes during the process. One of the biggest mistakes was not taking the drywall and mud thickness into consideration. You want the rough opening to be 36″ wide x 80″ tall, but after hanging and finishing the drywall I ended up with a rough opening of 34 3/4″ wide x 79″ tall. This meant that I had two options for the closet door. I either had to order a custom door to fit my opening (and wait two weeks for it to come in!) or I was going to have to customize a door to fit. A custom door was also more than two times the cost and we really didn’t have the “extra” time. so I decided to just buy a door and cut it to fit.
This style door comes hollow, built on a frame of solid wood or pressed fiber board. In order for me to make the doors work I cut equal parts off of both sides and from the top and the bottom. Once I had the doors cut to size, I took the rest of the pressed fiber board out and cut solid wood to pieces to fit inside the doors. Once the doors were reinforced I drilled holes for the installation hardware and hung them.
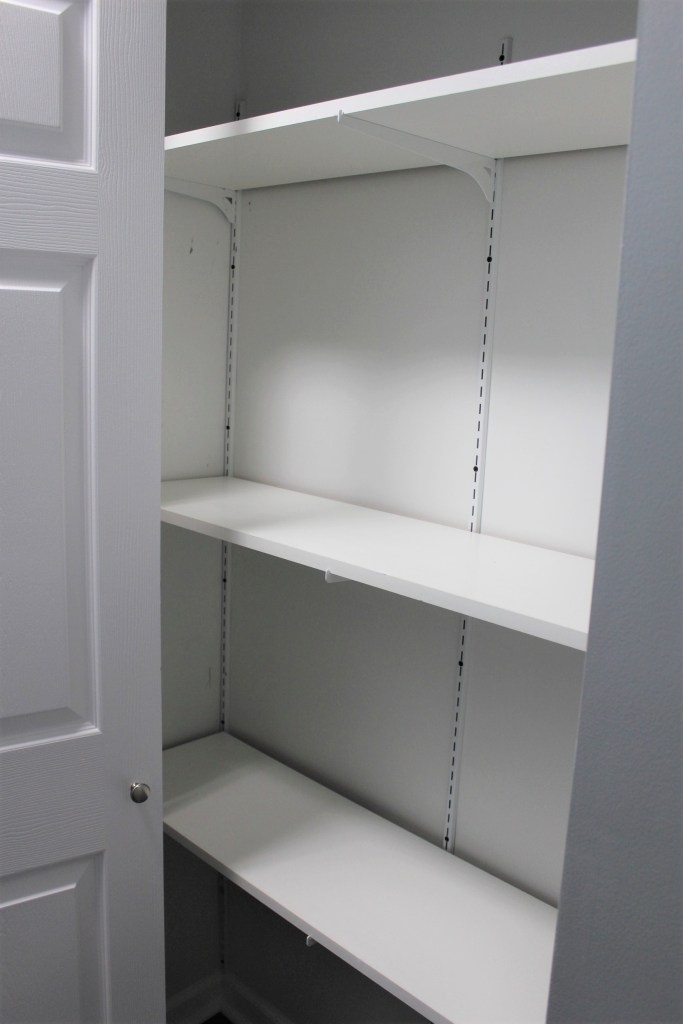
After the door was installed I went to Lowes and bought
- 3 BlueHawk Shelf Bracket Tracks
- 9 BlueHawk Shelf Brackets
- 3 BlueHawk Melamine 11 inch Shelves in 8 foot lengths
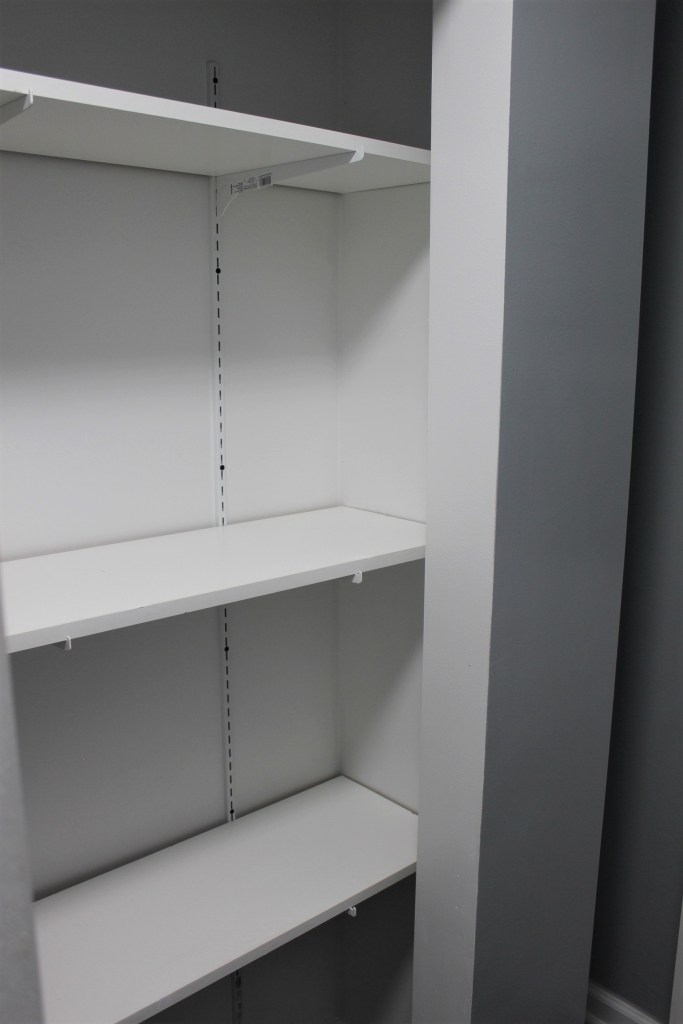
I mounted the tracks on the studs in the closet, cut the shelves to fit inside and mounted them using the shelf brackets.


Tools I used for this project:
- Tape Measure
- 4 foot level
- Speed Square
- Square
- Hammer Drill
- Cordless Drill
- Cordless Circular Saw
- Miter Saw
- 6 inch Drywall blade
- 8 inch Drywall blade
- 12 inch Drywall blade
- Pancake Air Compressor
- Brad Nailer
Be sure to subscribe and follow along to our blog and thanks to all of those who have already done so! We appreciate your support!
FACING OBSTACLES

We decided to take out the tub and surround in the bathroom rather than refinishing the tub with an epoxy kit. The kit and time needed to redo the tub wouldn’t be worth it to us to handle it that way, but we had considered doing so in the beginning.
After Danny got the tub in, he moved onto the surround. It was TOO DEEP and was covering up part of the window! Without removing the window, replacing with a shorter one, adding additional exterior siding, etc, it would have taken way too much time and money to go that route! Danny had to think outside of the box on how to make both items work…

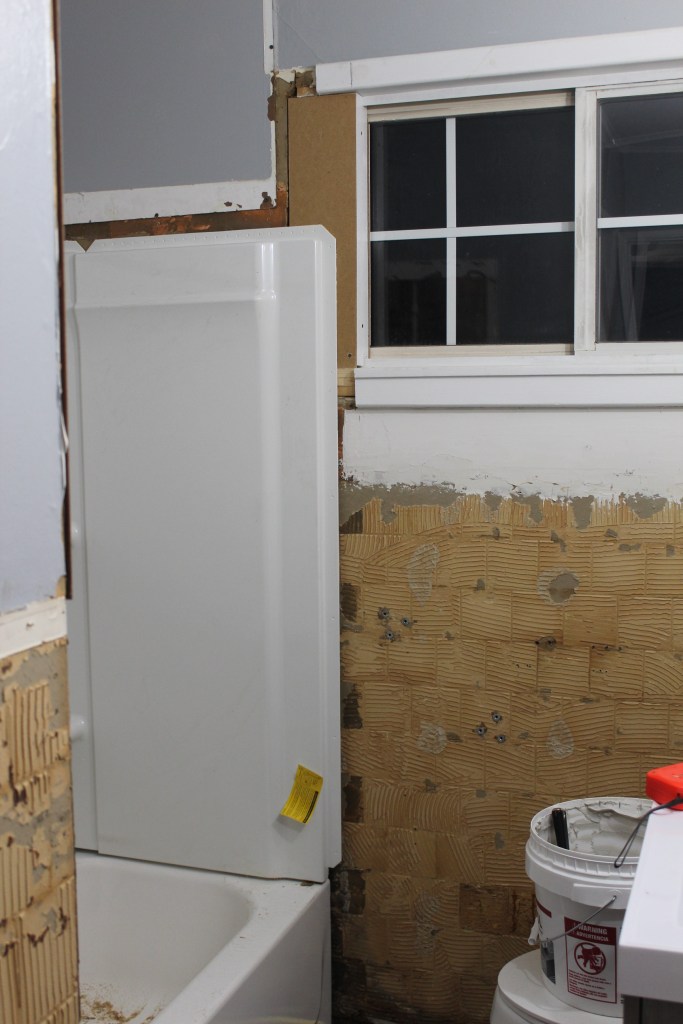
In order to make the surround work in the space, Danny decided that framing in about 6 inches of the window to allow the surround to be installed properly and would keep us on the same time schedule. He cut two 2×4’s and notched them out so they would fit inside the window frame. He then put drywall over the 2×4’s and finished out the side facing the window as well.

Once we had the wall built in, it was important that the joints look like part of the original wall. After they were finished, we capped the visible part of the new wall section with white vinyl molding, caulked and painted everything to match.
When the bath tub surround was in and the window frame filled out, we had another major problem!
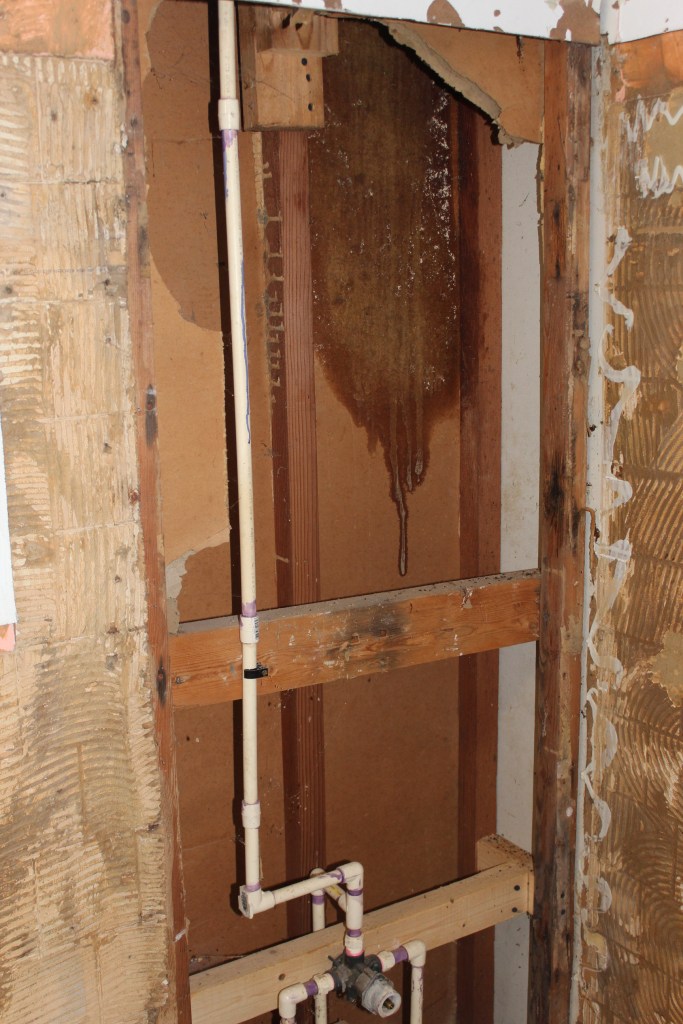
When Danny got the new tub faucet installed, he went to test it out and it wasn’t draining properly. It was extremely SLOW…it was something that he couldn’t figure out or fix and we were put against TIME that we didn’t have!
On Wednesday, I contacted a plumbing service and they were able to go out right away. They advised that the drum trap was outdated and needed to be replaced. In doing this, they had to hand dig under the tub to replace part of the galvanized pipe and the drum trap. Luckily for us, they were able to do so after two days so we could still move forward with getting our new tenant in by Friday!
Be sure to sign up to subscribe to our blog to receive the latest posts! Thanks to all of those who have already done so and have supported us along the way!
TRUTH AND BALANCE

TRUTH
Apologies for the delay in posting! We want to be transparent through the process of renovating this rental property. We’ve had a lot of delays and hiccups along the way, especially when working in the bathroom! We hit the ground running in August, but we’re beginning to get tired and ready to be done with this one so we can take a BREAK!! These last few weeks have been some of the hardest when trying to get finished up with a rental! Tempers flair, frustrations rise, patience wanes, and exhaustion comes flooding in. The major slowdowns have been with the bathroom remodel (stay tuned for details on those stories and how we handled them in our future posts).
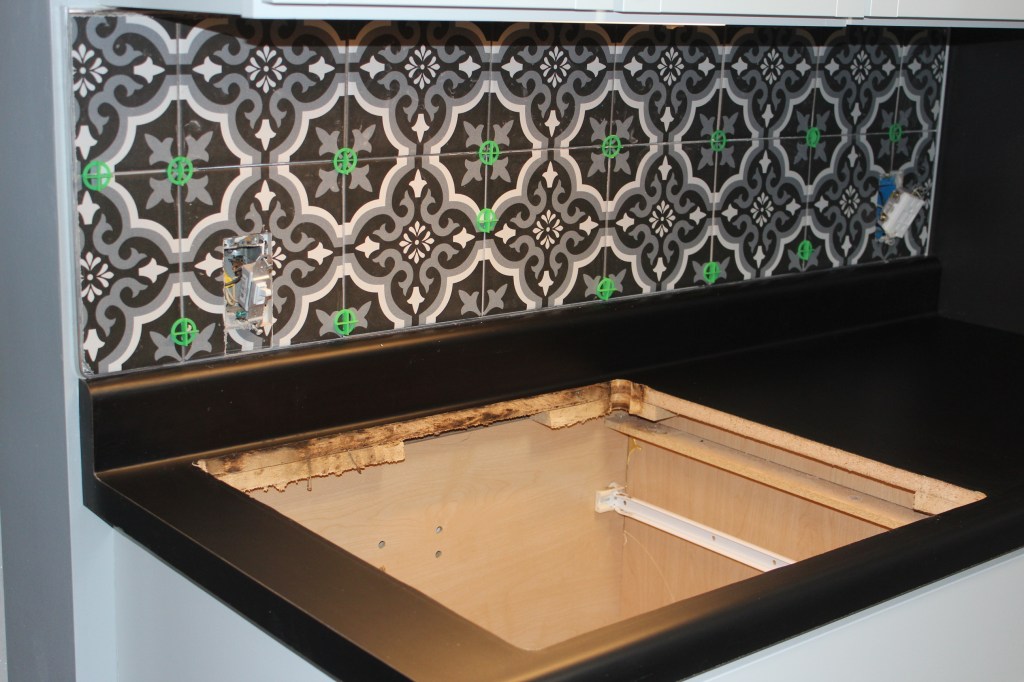
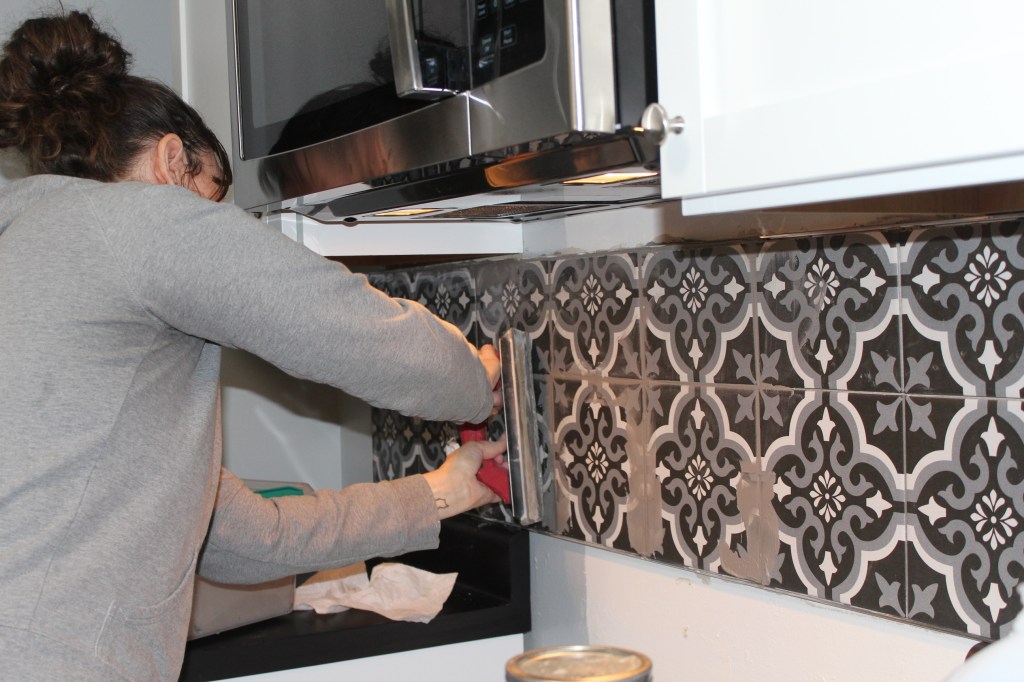
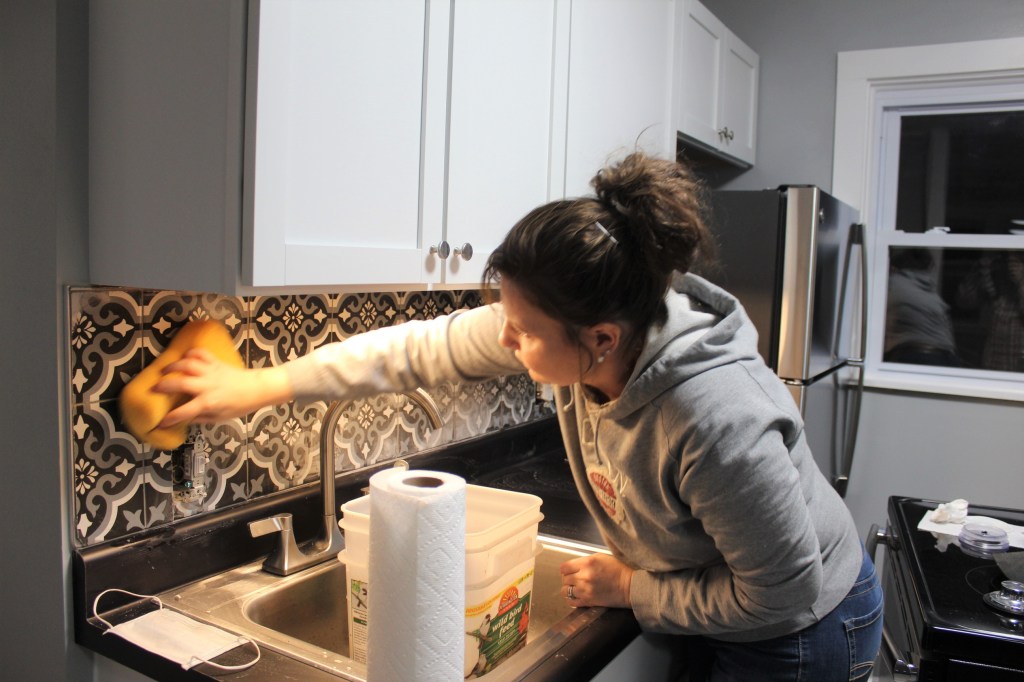
Onto kitchen backsplash! We used 8X8 Mohawk “Montrose” tiles from Menards. We love putting REAL backsplash up in the kitchen to bring the “quality” of the home to a higher standard. No peel and stick or cheap stuff here!
When tiling, planning is key. Take the time to lay the tiles out to see how they will fit. Notice that the tile on the left end matches the tile on the right end.
Definitely invest in the spacers. Spacers help keep everything in line and spaced uniformly. You will want those grout lines to be clean and straight.
Use a finished edge to give your tile a clean and professional look. It’s hard to see in the picture but there is an edge that surrounds the tile that gives it a nice clean edge.
BALANCE
We made sure that with the holiday, we would carve out time with our family. I made dinner for everyone and we played a fun game of Monopoly. Although Danny and I hit it hard and grind it out, balance is important. We took the day off from working on the house, but we went back out the next morning and got going again! The balance in it all has been exceptionally challenging this time around.
With Christmas approaching, we haven’t been able to put our energy on the things we value the most. We hope to pause for a bit after finishing this rental and enjoy more family time. After all, that’s why we do what we do in real estate!

Be sure to follow along with us by subscribing to our blog to receive the latest updates! Thank you to all of you who are supporting us on our journey!
3 WAYS WE MAKE THIS WORK!

I wanted to share some insight and perspective on “how we do it?” We both work full time, pretty demanding jobs and have a home and pets to care for. This effort of working, renovating homes, and taking care of animals and our home takes a lot of TEAMWORK! It takes BOTH of us to make this work.
When I get home from work I:
1. Let the dogs out. Feed & water everyone. Take care of the litter-boxes.

Molly & Remy 
Suki, Charlie, Peter, Jack, & Felix
2. I cook a quick meal such as stir fry, spaghetti, Mexican food, etc. & pack it to go.

3. Do some light household chores, including dishes and taking out the trash.
I spend about an hour taking care of the items listed above. I pack up our meal and head over to the house to get started with working. My goal is to get over to the rental house by 5:30-6pm.
Danny goes straight to the property after work, changes out of his work clothes, and gets started on the rental renovation. Once I meet him at the house, we eat dinner together, I change and also get to work .

On the weekends, Danny usually has breakfast, coffee, and heads over to the property to get started. I stay behind until about lunch time, cleaning, doing laundry, making our meals, then I head over to the property. Most weekends, I run solo. I get our errands and grocery shopping out of the way it free up time for Danny to continue working on the house.
Once I finally, make my way over to the property, I work on things to help get Danny ready to do the major projects. Some items I handle include demoing, cleaning work spaces, hauling items out, painting, caulking, and more!
This is just a glimpse of “how we do it” when working full time and managing our own home with pets…we hope this helps let you know, it is possible!!
Be sure to subscribe to our blog to receive the latest posts and thanks to all who are following along with us on our journey!
BASEBOARDS, FRAMING, PAINTING….OH MY!

As Danny is our main builder, kitchen and bathroom installer, and our main contractor, ALL of the painting and caulking comes to me. Painting in general, can be a daunting task. Even if you are just painting a bathroom or bedroom it can feel overwhelming to some, but my job is to paint and caulk the house in its entirety.
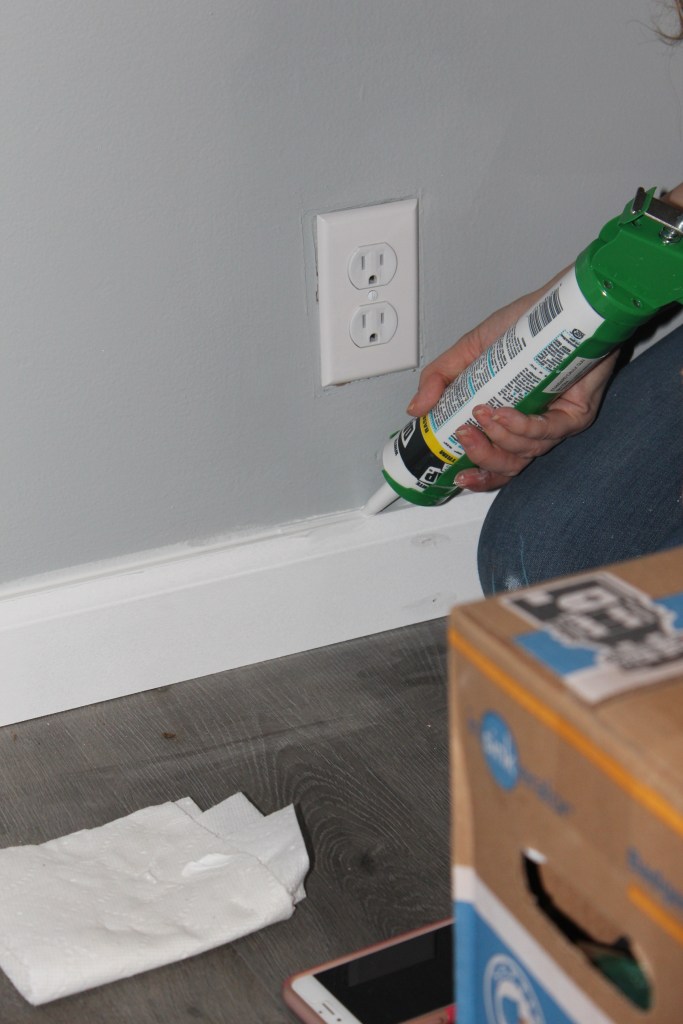
Caulking Baseboards 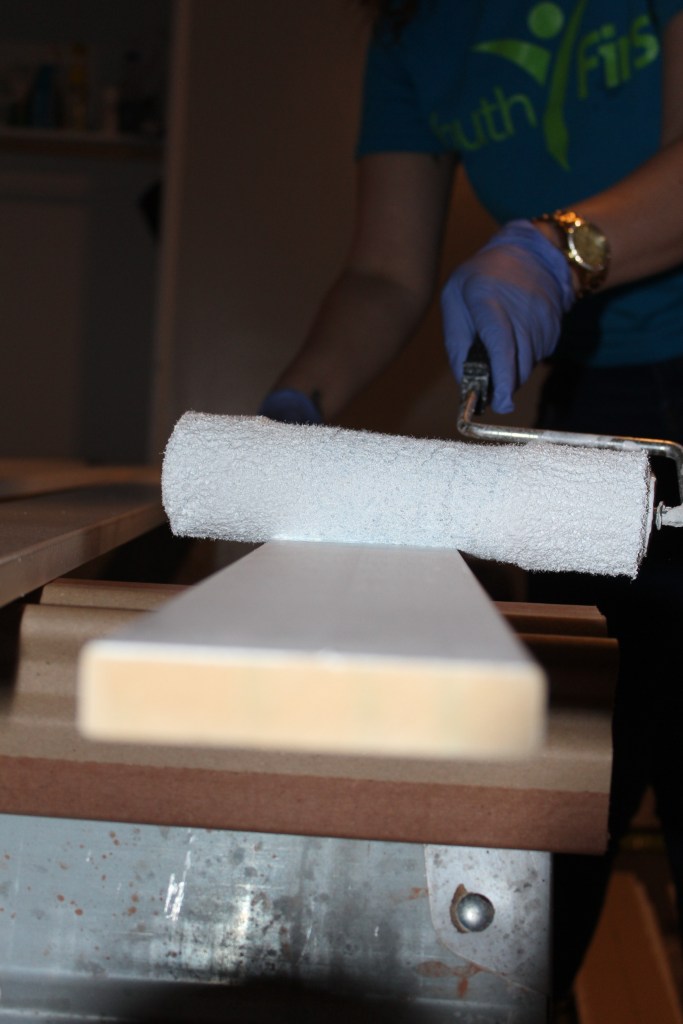
Painting Window Frames
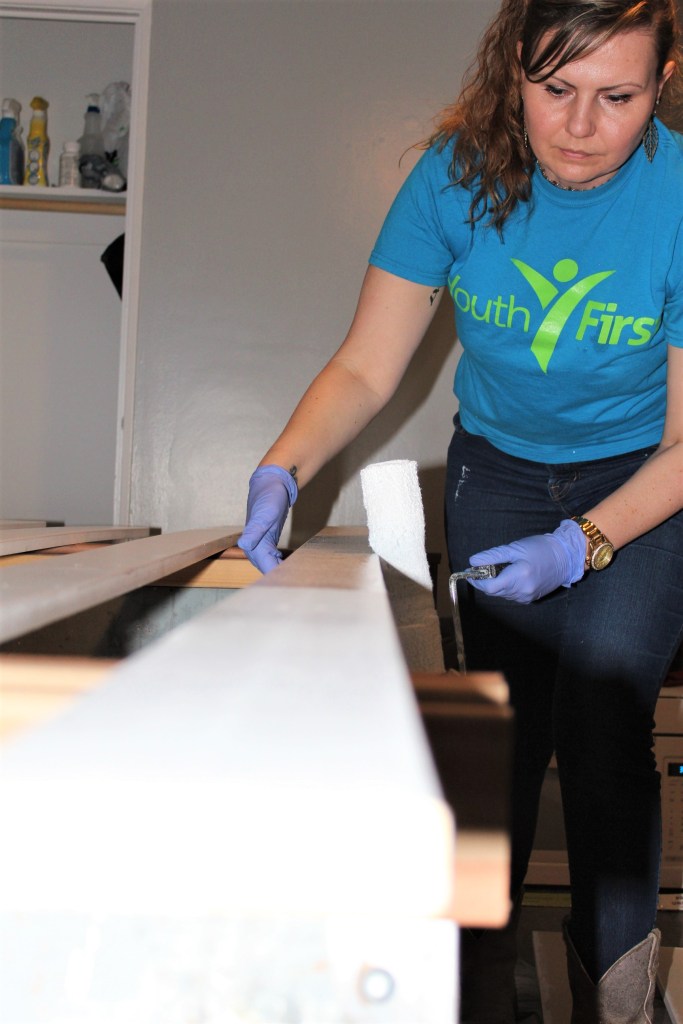
In beginning the painting, I started on the ceilings, moved to the walls and closets, to finishing with the window frames, baseboards, and doors. Painting is never really finished. There is always touch ups and something else to paint or caulk. One of our previous posts, mentioned painting baseboards, in this picture, it looks similar to the one below, but they are frames for windows.
Painting in the living room 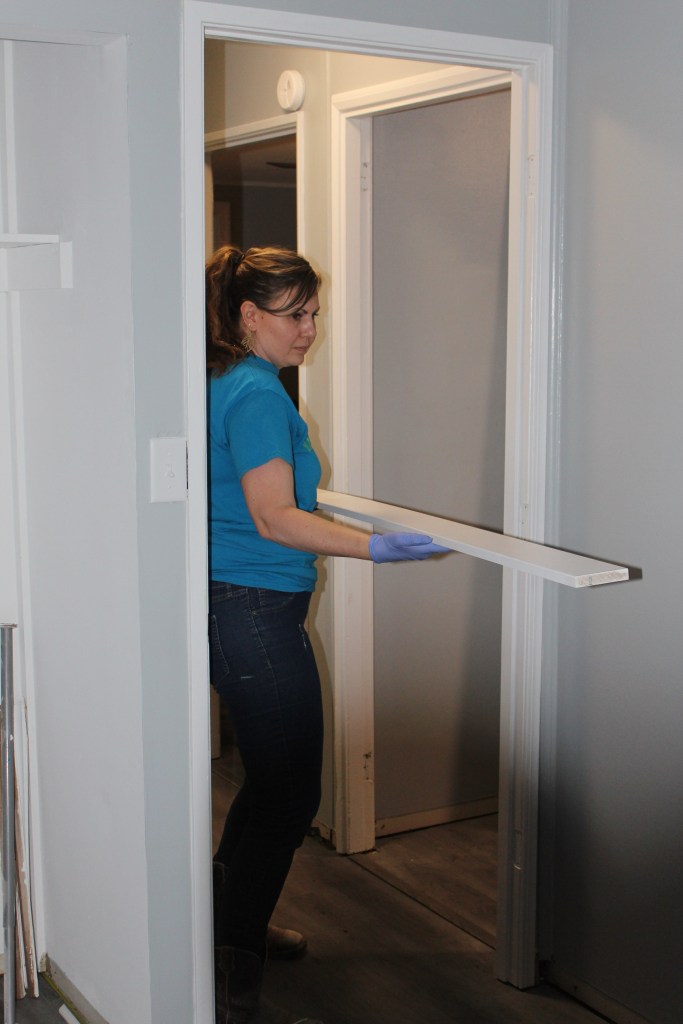
Carrying into the bedrooms to dry
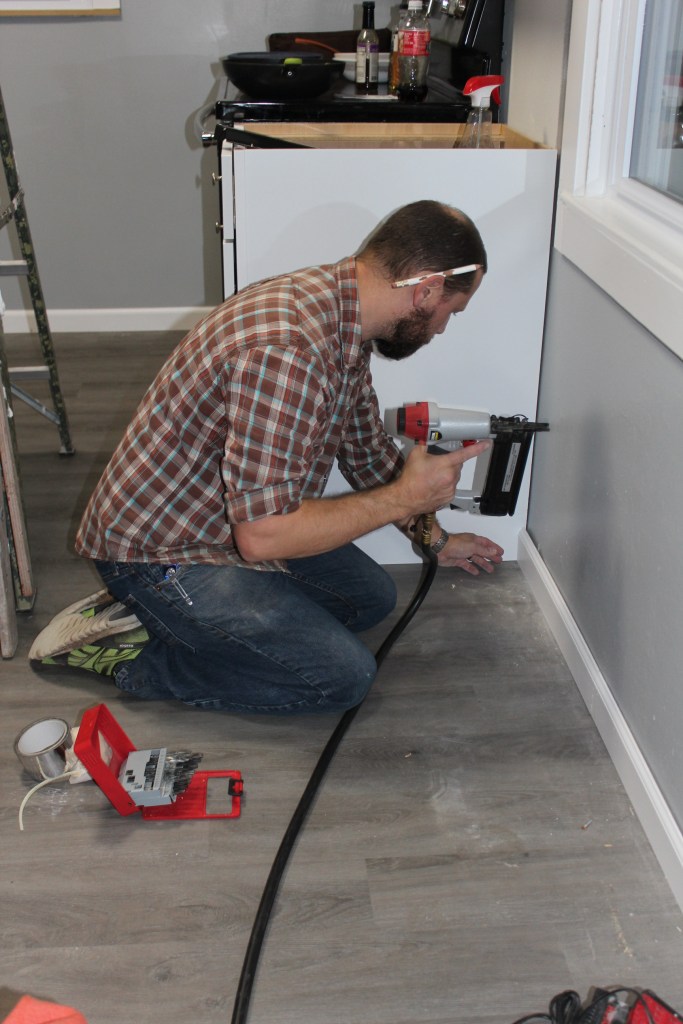
Danny nailing down the baseboards
Danny always picks one corner in the house and installs the first baseboard. Once that first baseboard is laid in, he just follows the walls through the rest of the room and continues on to the next room and so on. Once he’s finished with the baseboards, he moves on to the window frames. This is one of the projects where steady plodding brings prosperity (which is also our motto in life!). It’s also one of those projects that really makes the house feel like it’s coming together when completed!
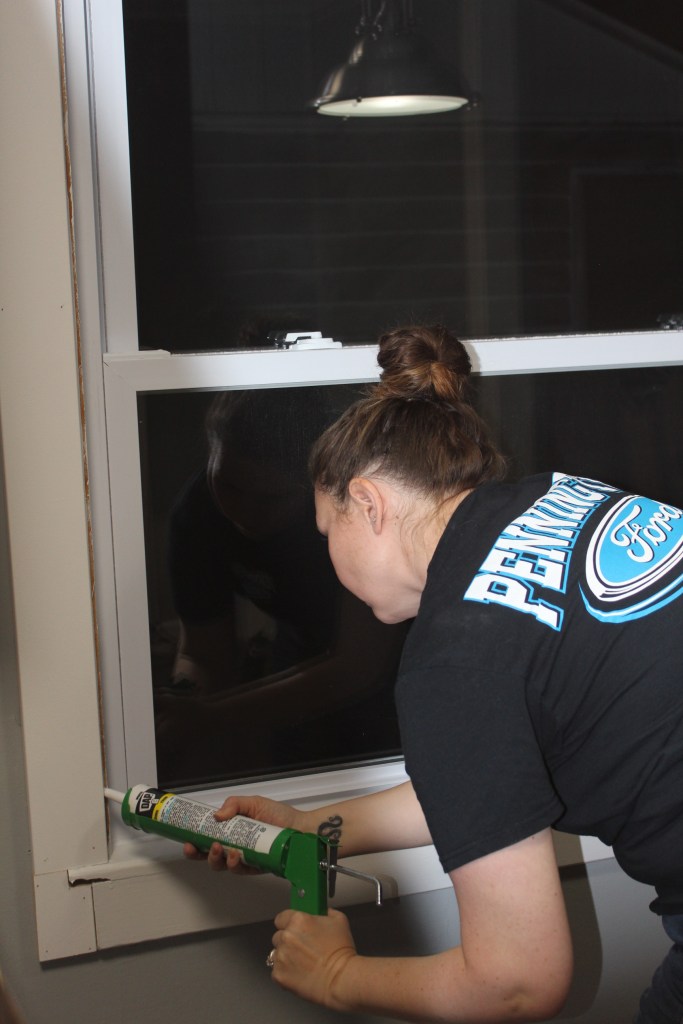
Caulking Window Frames & filling in nail holes 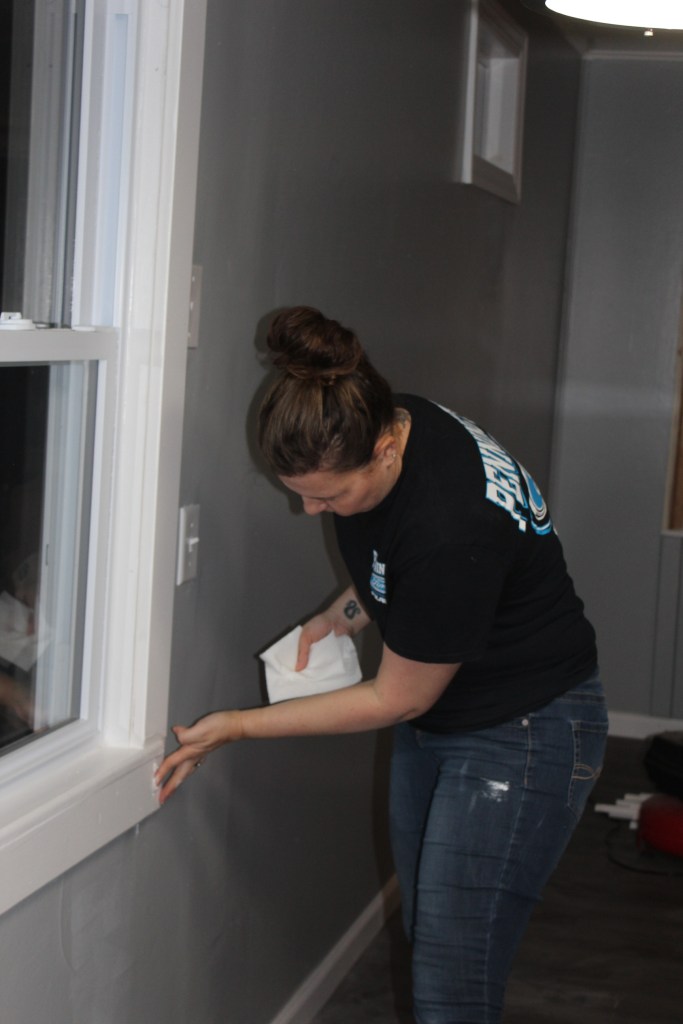
Teamwork makes the dream work. Zella always comes in behind me after I have the baseboards or window frames installed and caulks over the seams and fills in the nail holes. Once the seams and holes are caulked, the flooring and walls really look complete!
Be sure to subscribe to receive the latest notifications of our blog posts! Thanks to all who are following along!
INTERMISSION….PROJECTS PROVIDED BY DANNY

I want to share some tips and tricks that makes installing cabinets a little easier to do, especially when you may be lacking the help from a second person. What I do is use 2X4’s to help stabilize and hold the cabinets in place while leveling it out and drilling the screws in. I usually just cut two 2×4’s to the correct height (about 54 inches from the floor ) so I have a surface that will help me keep the cabinets up on the wall. This is an effective way to hang cabinets if you are trying to do this project by yourself.
Before you set the cabinets up on the wall you will need to find where the studs are. I usually just use the knock method. Simply knock on the drywall and move left or right until you hear a change in the tone of the knock. The area where the stud is located will be a higher tone than the hollow parts of the wall. I then just use a small drill bit and screw into the wall to make sure I will be hitting a stud.

After you find your studs put a small mark on the wall underneath the line where the bottom of the cabinet will sit. Make sure to have your level, drill and screws ready to go. Once you have the cabinet up on the 2×4’s you will still need to hold the front of the cabinet up, so your doing all of this with one hand.
Lift the cabinet up onto the two 2x4s that you placed against the wall. Tilt the cabinet back against the wall and grab your level while keeping pressure on the front of the cabinet to keep it against the wall. Open up one of the doors and place the level inside of the the cabinet. If the cabinet needs to be raised on one end to make it level, I like to use a wood shim. Once you have the cabinet level, grab your drill and put the screw on the bit. (A magnetic bit driver really helps in this scenario.)

Marking off stud locations 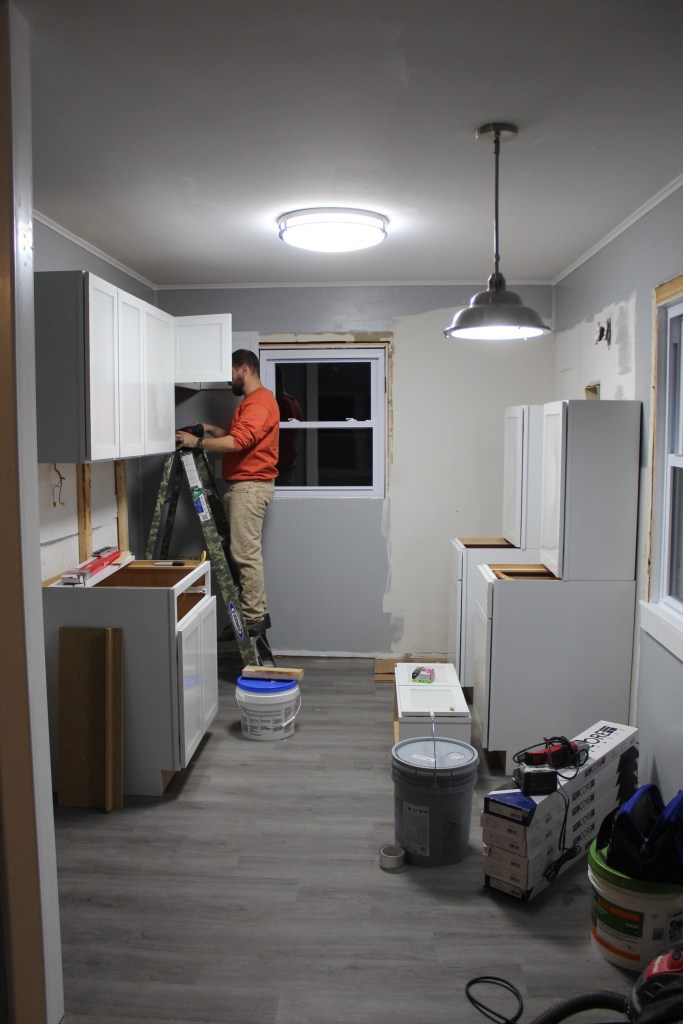
One side is almost done!!
Once your first screw is in and you are sure you screwed into a stud, grab another screw and run another one in mid way up the cabinet. If you hit studs both times your cabinet will be secure enough to let go of it. Grab your ladder and run the third screw into the top portion of the cabinet.

Another way to hang these cabinets by yourself is to build a four legged jig. I use this method if we are doing bigger install projects, but on these small kitchens I generally just use the 2 2×4’s.

Continue this process with the next cabinet. Once the second cabinet is hung, you will want to tie in to the first cabinet with a screw to make sure they pull together nice and tight.
Be sure to subscribe and follow along on our blog! Thank you to everyone who is supporting us on our journey!
CHALLENGES, DELAYS, AND HICCUPS ALONG THE WAY…

In trying to keep things honest and transparent, we’d like to share some of the issues we’ve come into. It’s slowed down our process of flipping down by at least 3 weeks. First, we ordered laminate countertops from Lowes weeks ago and they FINALLY came in (Yay, right?)…No!
Come to find out, they only ordered laminate tops not the actual COUNTER?! On top of the counters being put off another 3 weeks out, we’re a few inches shorter than we’d like them to be. We could have went with 24in cabinets, but instead we ordered the same size cabinets that were used in to original kitchen, which were 18in.
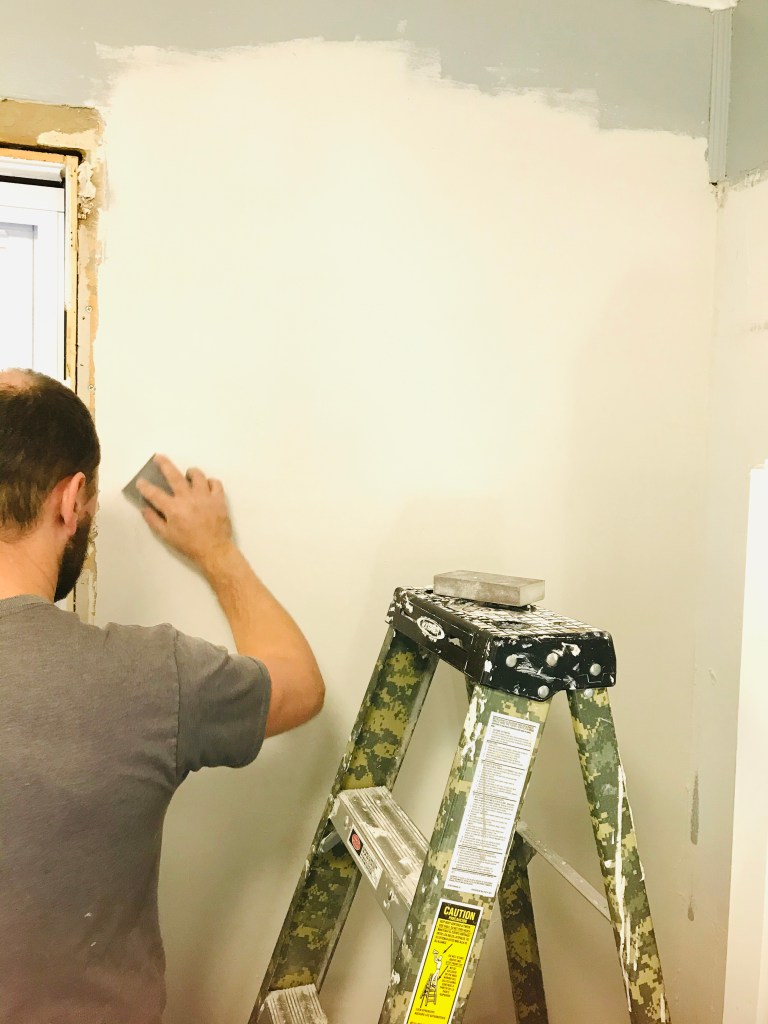
We didn’t pay attention to the fact that the cabinets and counter tops before did not extend to the wall, but stopped about 6in short. In only measuring previous cabinets at 18in we failed to consider they wouldn’t be up against the wall. Thus, Danny had to add a skim-coat on the wall because it is exposed and needed a lot of work to smooth it out. With a wall that was full of divots, scrapes, nail holes, and marks it just made sense to give the wall a new top coat. A few of coats of drywall mud and the wall looks 100% better!
In addition to the countertop issues and delays, appliances right now are hard to come by due to Covid. Plants from the manufacturers outside the US, have been closed due to the virus, delaying parts and orders from coming in. We’re supposed to have our order this week, but was told last week, the refrigerator was on back order until February. Of course, with preparing to complete the rental in November, we cannot wait until mid-next year for a refrigerator.
Luckily, we were able to find something through the clearance section and get it on time! We did have to compromise on what we had initially had in mind, but in order to get it in time, we made this one work. You have to be willing to be flexible in this business!
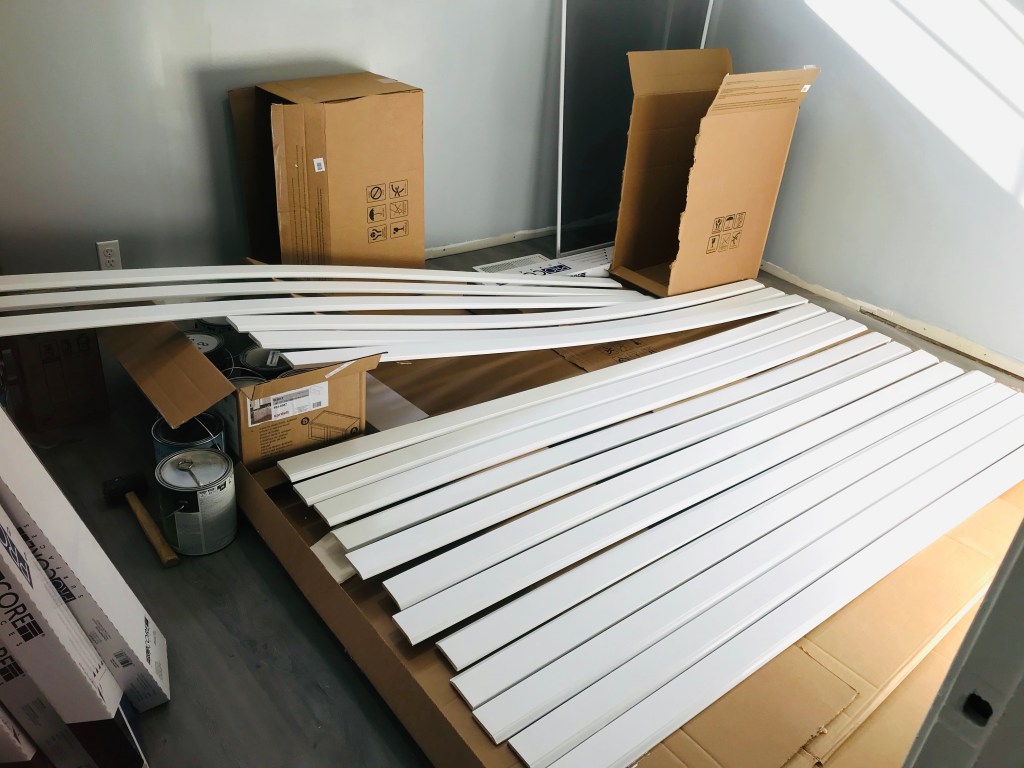
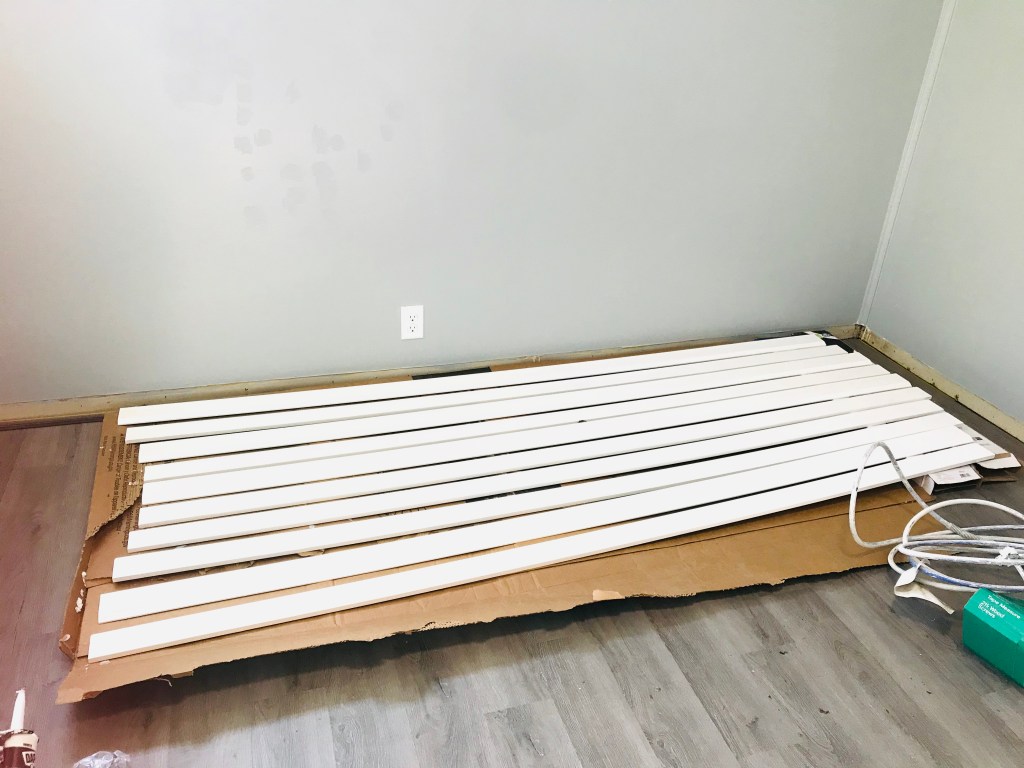
We had picked up our baseboards from Lowes and began setting up for me to use the paint sprayer outside. Danny unloaded the truck and brought the baseboards around back. I laid plastic out and placed the saw horses on top. I set the base boards out and we were getting ready to spray, when…you guessed it, it began to rain. So, we packed it all up and brought it all inside. As we scratched those plans, I pivoted and finished painting inside. When the stalls come, you find other things needing done and keep moving!
Moving towards positivity…we got our appliances in!! Super-exciting news, HOWEVER; the handles were put on the wrong side of the refrigerator and unfortunately, when you open the door, it would hit the window if kept that way. Danny flipped the handles and hardware to make the doors open the opposite way.
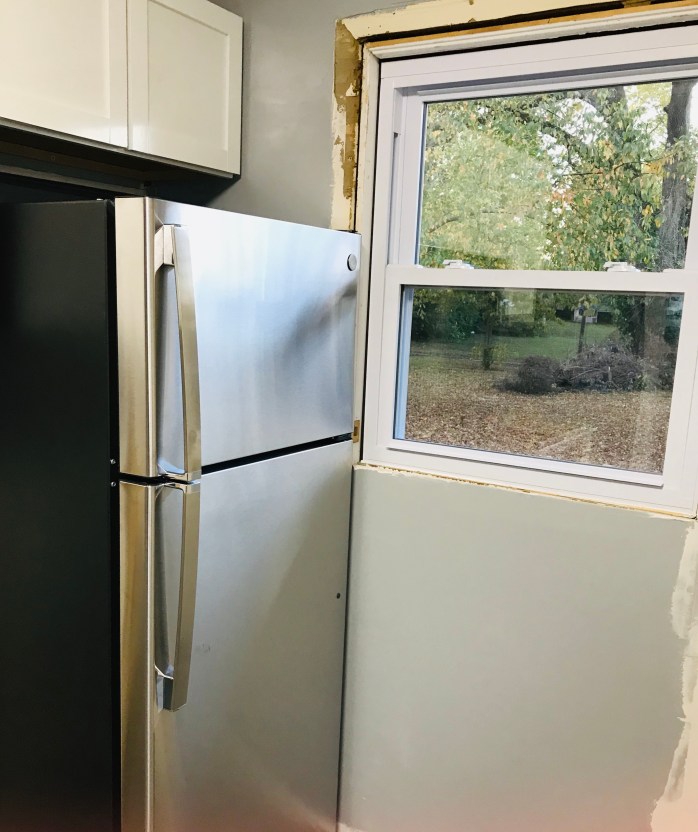
Handles opening into the NEW window 
Danny switching the handles to open the other direction
To receive the latest blog posts, make sure to follow along and subscribe! Thank you to all who are following along.
WHOO HOO! DOORS AND WINDOWS…

Luckily, during our truck fiasco, we were able to utilize and hire out some much needed help! Having window installers and an electrician was priceless while looking for a new truck and dealing with transportation issues. The electrician came out to help install new lighting and switch outlets/switches. In addition, we had 5 windows replaced in the kitchen and living room, which was also WELL worth it! These professionals were able to get these repairs done in a day, whereas; for Danny and I, it would have taken a lot longer and taken up valuable time away from us.

BEFORE

BEFORE 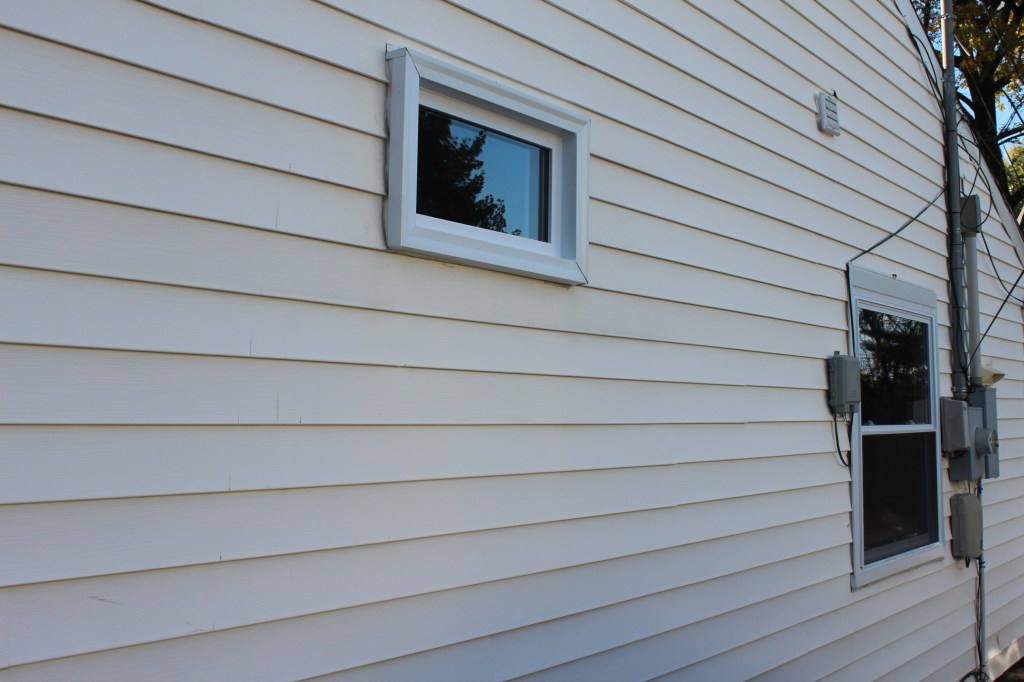
AFTER-NEW WINDOWS
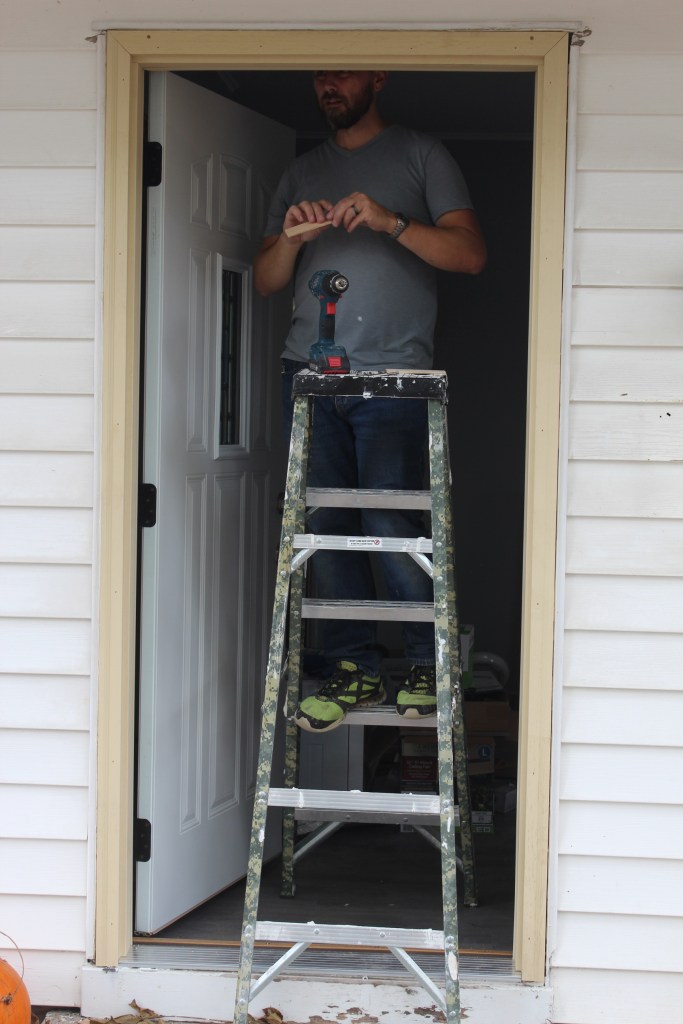
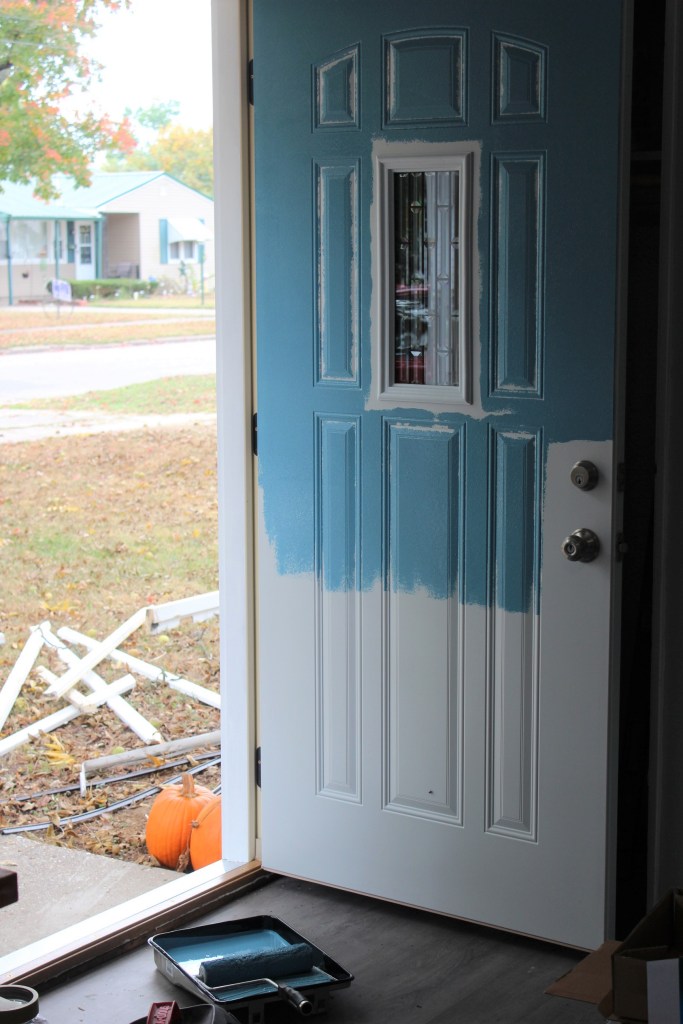
We we able to replace the back and front exterior doors, as well as, a new storm door for the front. When searching for doors, we have a few “go to’s” we consider.
A storm door for the front instead of the screen door so that it last longer, looks better, & holds up better over time.
A 2 in 1 window/back entry door combo. This allows for fresh air to come in, but the screen is high enough up so that the screen doesn’t rip.
When looking for a front entry way door, you want one with a window, to let natural light in. If the glass is clear or too large, you’ll detract from privacy.
We also do not like the out-dated, half moon doors or solid steel doors for entry ways. You can get a nice, modern glass-style door for around the same price as the others.
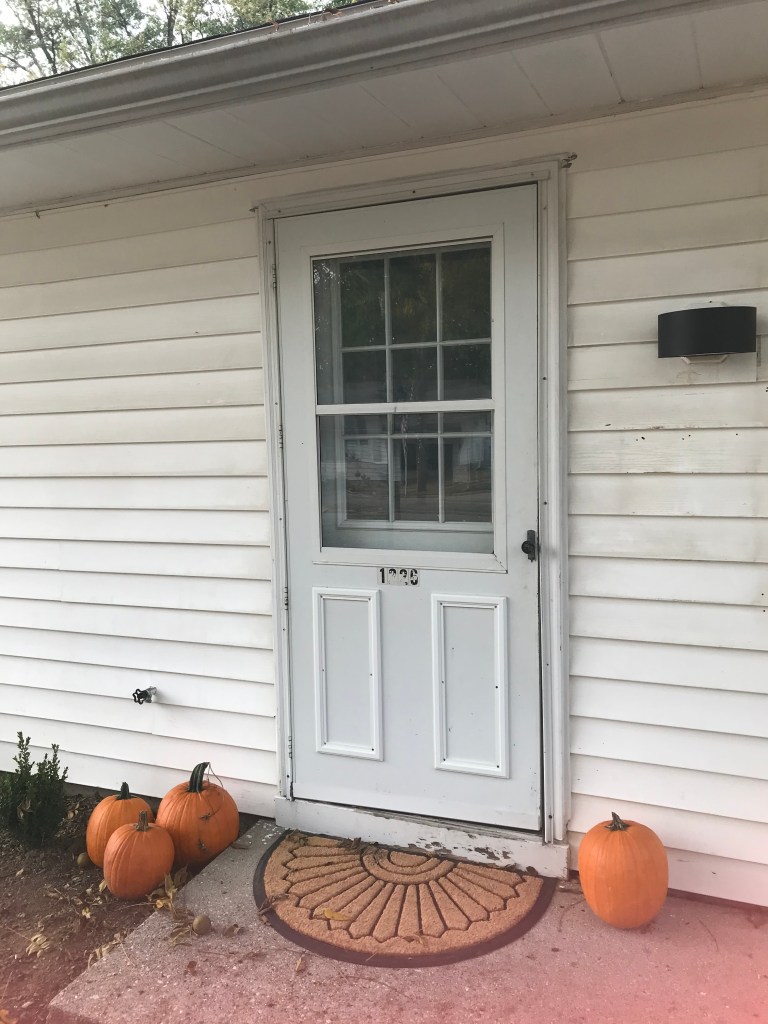
BEFORE– Front Door 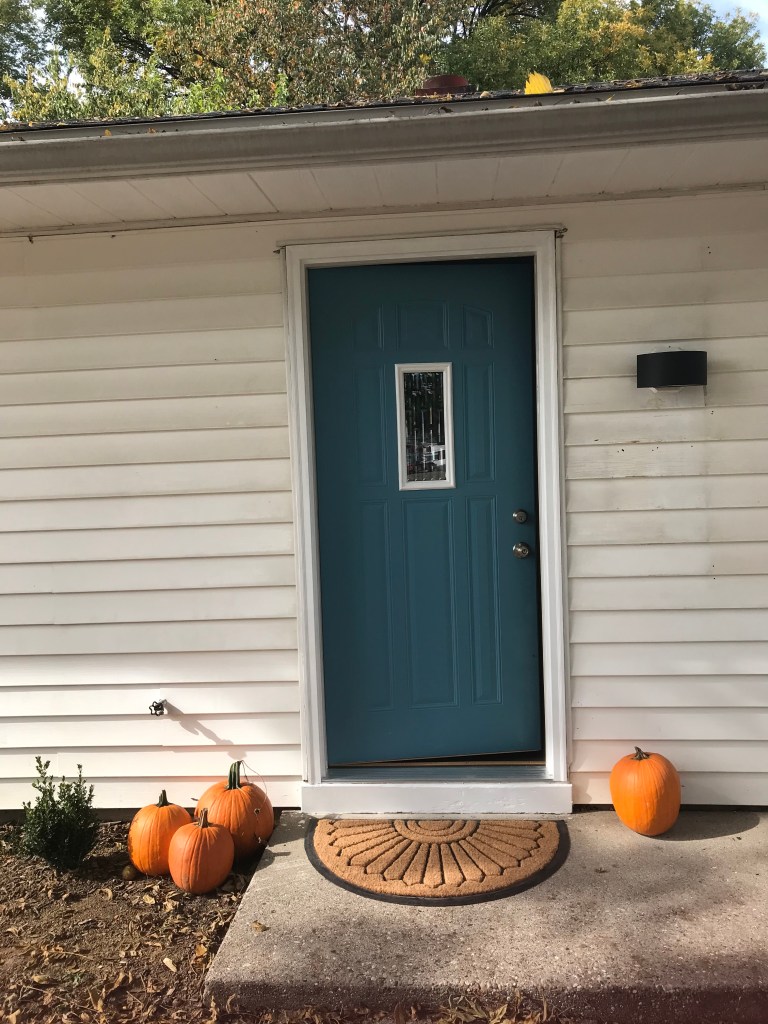
AFTER- NEW FRONT DOOR

BEFORE–BACK OF HOUSE

After- New Window & Back door
Next big help to us will be our new appliances being delivered!! We always consider placing new, stainless steel appliances inside our new rentals. Once the appliances come in, we can install the cabinets, countertops, sink, backsplash, etc!!!
With all of our renovations, we include new appliances, including stainless steel refrigerator, overhead microwave, dishwasher, and stove. Reasons to consider this:
Higher rent received.
Higher quality provided in your rental.
Knowing that your appliances will last years before becoming an issue or needing repair.
Make sure you subscribe to receive the latest posts! Thanks for following along!
INTERMISSION…PRESENTED BY DANNY

We are not immune to bumps in the road and unforeseen problems. This is not specific to renovation issues directly, but indirectly. You see, there was a post made a few weeks ago about our transmission going out in our work truck. The problem with having a broken down truck, is the limiting ability of being able to haul things and purchased items back and forth during a renovation.
We want to be transparent through the process and share that while we are doing as much as we can with renovating, there was a wrench thrown into the mix by searching for a new truck and borrowing my father-in-law’s truck to pick up much needed items for the house.
I think the important thing to remember here is to be flexible and adaptable to the curve-balls that life can throw. We are fortunate that we have family close enough to be able to ask for help or to borrow a vehicle. In a time where life has placed a roadblock in front of you, you need to have the perseverance to push through and figure out a solution to the problem at hand.
As with all businesses that are just in the beginning stages, investing in a vehicle is a big purchase. The second issue with this purchase is that not only is this a business purchase it is a personal purchase. We were looking for an inexpensive and affordable truck that will be a workhorse but will also be refined enough to fill in for daily personal needs.
By using my father-in-law’s truck, we were able to pick up kitchen cabinets, exterior front and back doors, and a storm door for the front. One additional hiccup was I must have forgotten my measurement or mis-measured, because as I was putting the new back door in, IT DID NOT FIT. SO, back to pickup my father-in-law’s truck, pickup the door, return and exchange to Menards, back to the rental with the correct door. I lost a few hours for that error.
We settled on a 2009 Ford F150 Supercrew FX4. We looked for a truck with less than 150,000 miles and under $13,000. This truck will help us haul what we need to haul and refined enough to use for vacations, business lunches and general transportation. One other important note is that Danny works 30 minutes away and I work 2 blocks from where we live. Most men would not want to be emasculated by letting his wife drive the truck while the husband drives the Hyundai Elantra. However, in an effort to be as economical as possible, I will commute in the Elantra while Zella will use the truck as a daily driver.

NEXT UP…FLOORING!

So we decided to go with Wood Plank Vinyl Flooring because it looks great, is relatively low maintenance, and is pretty durable. SO for a rental, this is perfect! We picked up ProCore Legacy Oak Vinyl Plank Flooring at Lowes, and also decided to use SMARTCORE Soft and Sound Underlayment for this project.
Laying flooring is not as simple as putting the underlay down and clicking floor pieces together. It does take some prep work and planning. However, I have found that laying these vinyl floors are pretty simple and fun to do.
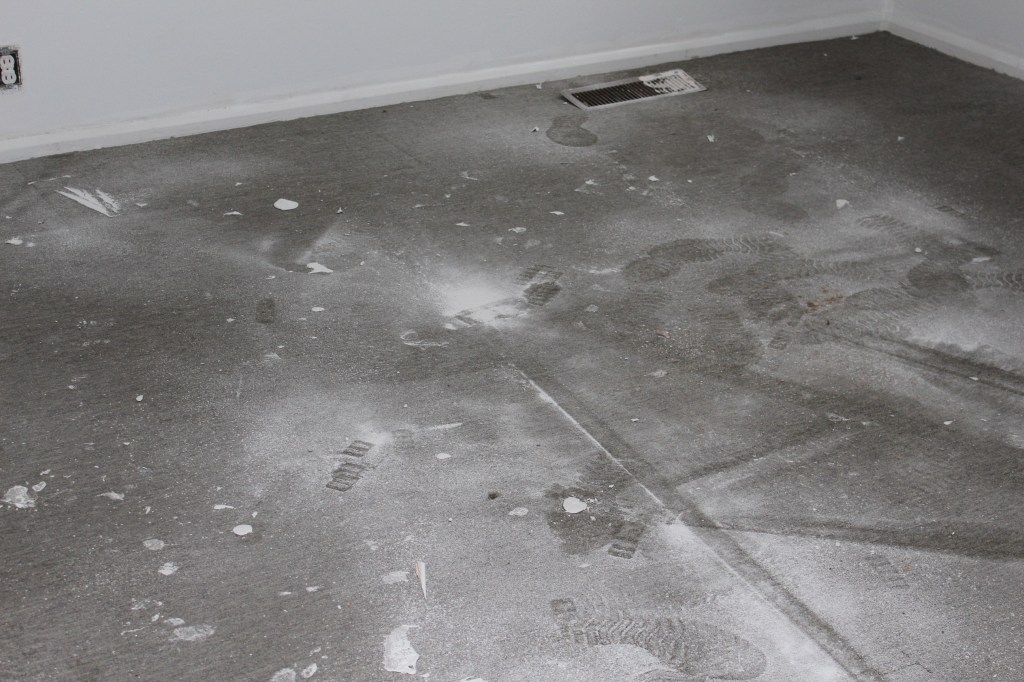
First thing to do is to get the floor back to “bare”. This means previous flooring (in this case carpet) has to come out and pad has to be completely removed. You need to get to a flat, clean, bare floor and make sure there is nothing sharp left on the floor. In this project, we noticed that there were old tiles that were previously installed. We decided to keep these tiles and just lay the floor over them. Keep in mind, it is REALLY important that you have a flat surface! We had to fill in some areas that had missing or broken tiles. To address this problem, we purchased cheap vinyl tiles called Armstrong Flooring at Lowes. We glued them in the places that needed to be leveled out.
You will also want to remove the baseboards before beginning to lay flooring.

Living Room-Before 
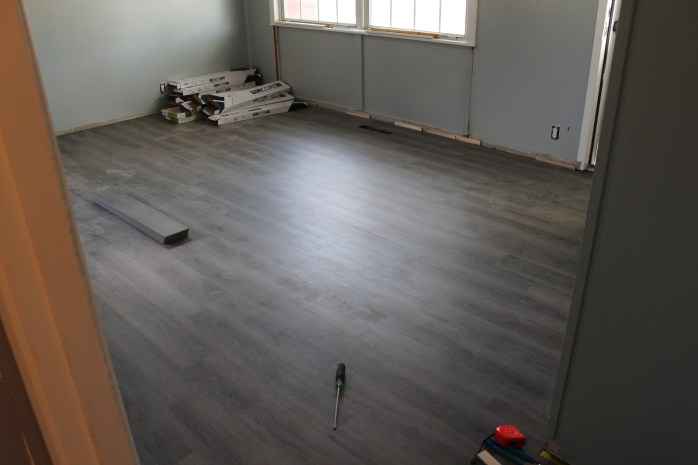
New Flooring
Next we swept the floors, picked up trash and Danny used a ShopVac to vacuum the floors to clear any loose debris. If you happen to leave sharp particles behind, it could cause uneven wear or holes in the new floors!
Once the floors were clean, we cut and laid the underlay. Danny planned out the flooring process starting in the Living room. He laid out the planks to see where and how they would fit together side to side. He also looked at how they would lay front to back of the living room.
When making your flooring purchase don’t forget to buy the underlay tape. This helps to tie the underlay together and keep it in place so it’s not shifting underneath you.
Bedroom- Before 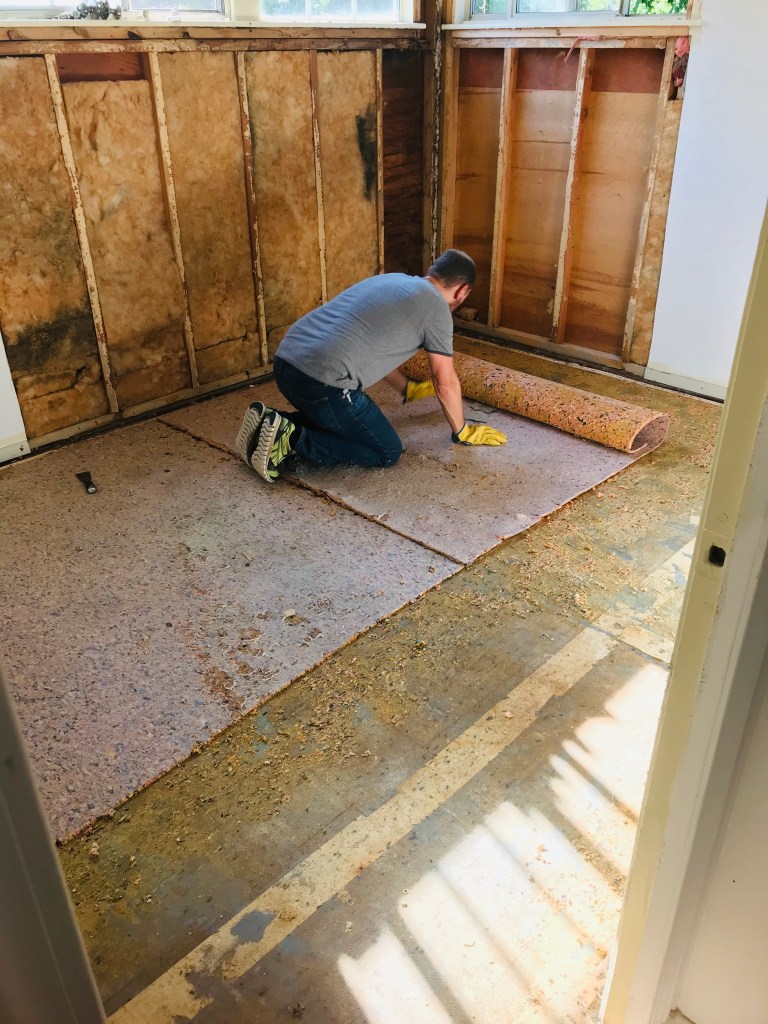
Bedroom-Before 
Bedroom-New Flooring
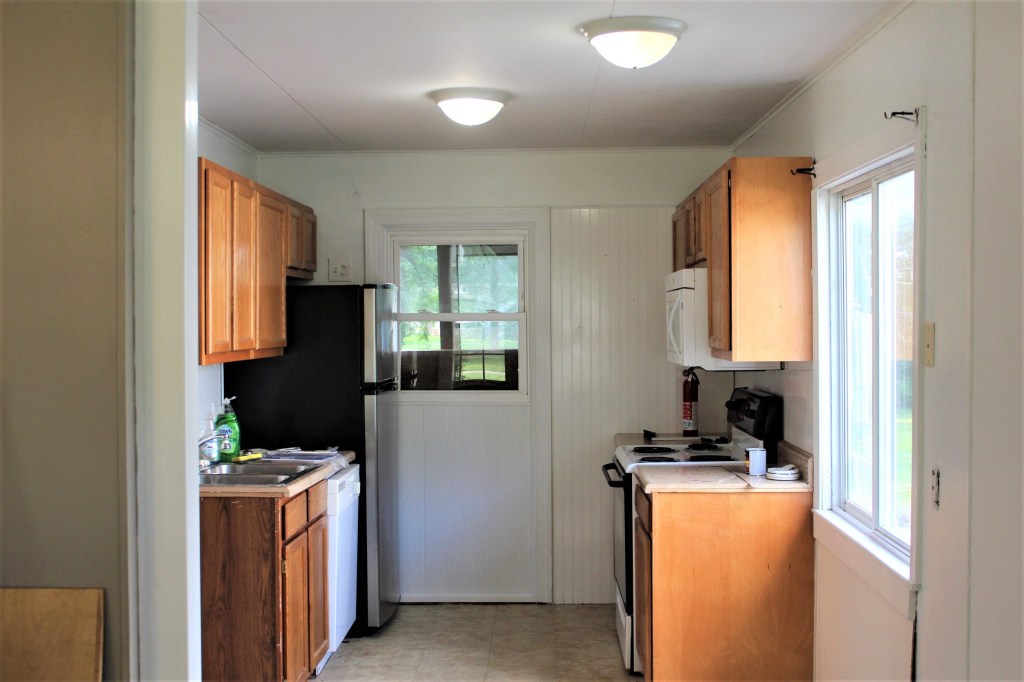
Kitchen- Before 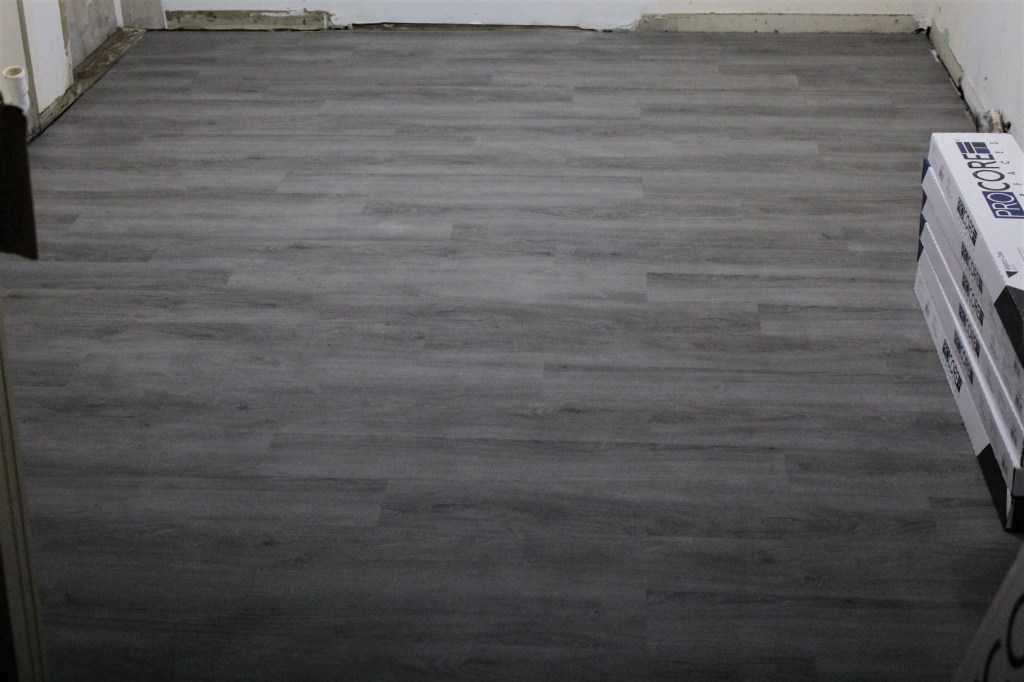
Kitchen-New Flooring
Once the plan was laid out, we started laying the new floor in the living room. One of the things that makes these floors easy to lay is that to cut a plank to fit, you simply score it with a razor knife (I used a Kobalt) and snap the excess off. Make sure to shim the edges to keep a gap of 1/4 to 3/8 inch to allow for expanding. You will also want to stagger each row by at least 6 inches so the seams don’t follow a straight line.
A worthwhile investment and items needed for this project
Speed Square
Fine point marker
A good boxcutter with plenty of replacement blades
Tape measure
White rubber mallet
Oscillating Saw to cut off the door frames.
A pair of knee pads. (This will take a toll on your knees and ankles!)
Once your all geared up and ready to go, I suggest watching a couple of YouTube videos to get yourself familiar with the process. Danny watched a helpful YouTube video to see how to lay flooring called “Fix This Build That“, “How to Install Vinyl Plank Flooring as a Beginner | Home Renovation” https://www.youtube.com/watch?v=6KEthELQfro
Be sure to follow along and subscribe on our blog to receive the latest posts! Thank you to all who follow along!
