Our Unbelievable Journey
A couple getting out of the rat race through flipping homes and investing in real estate.
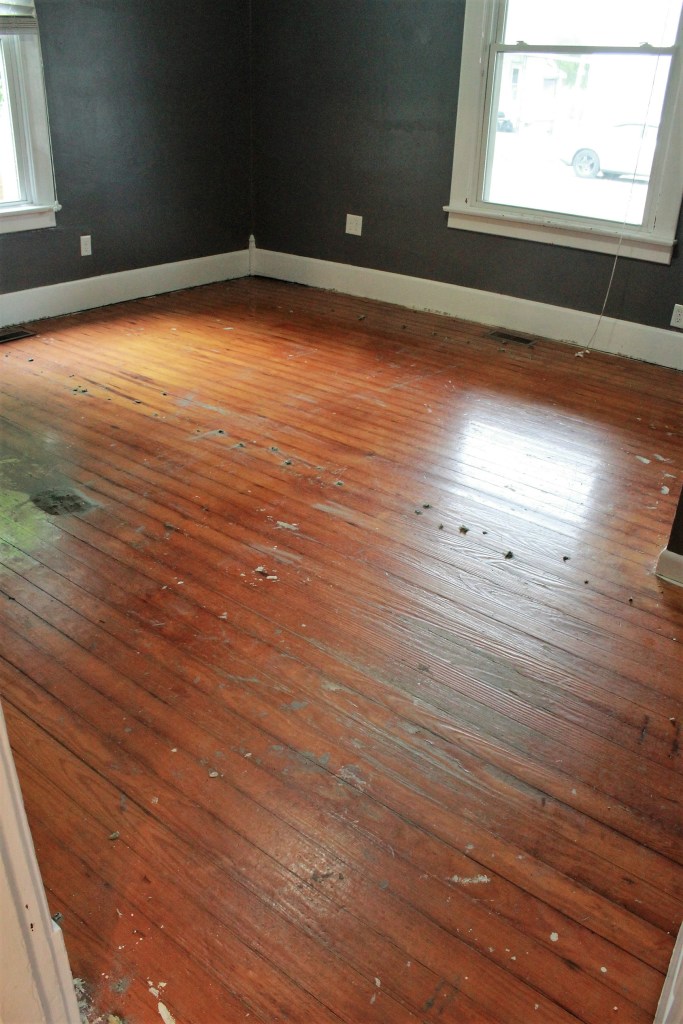
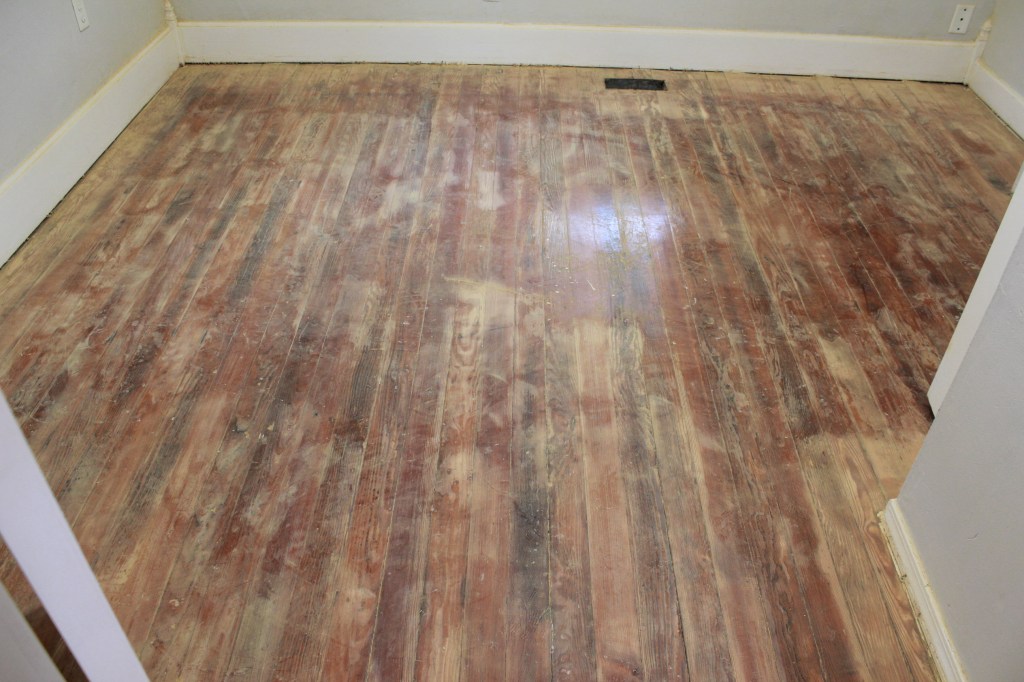
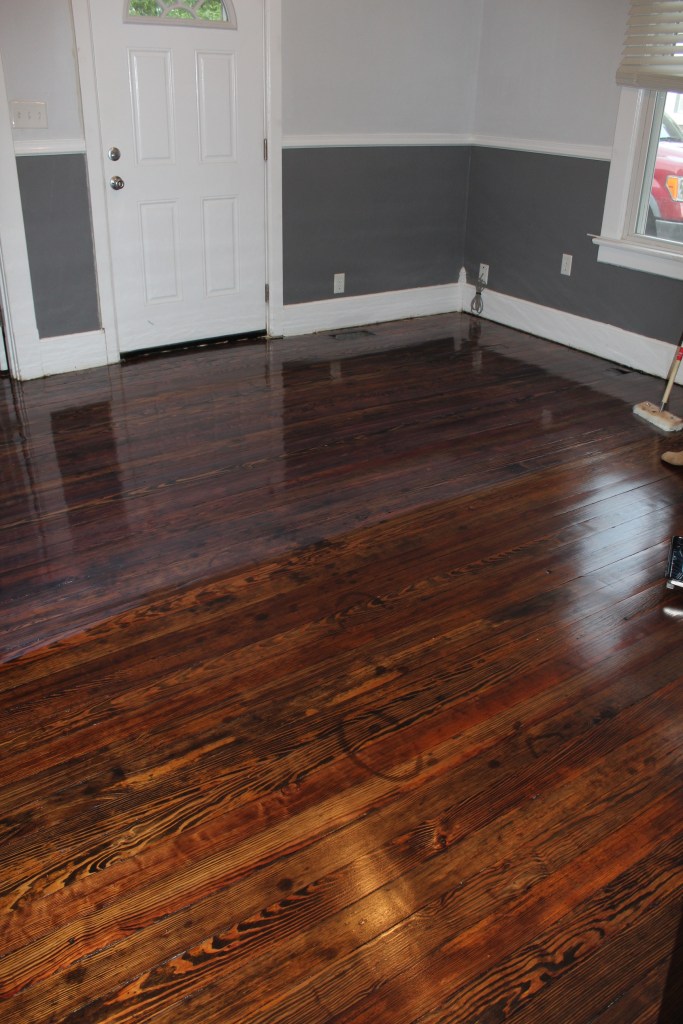
SURPRISE! HARDWOOD FLOORS

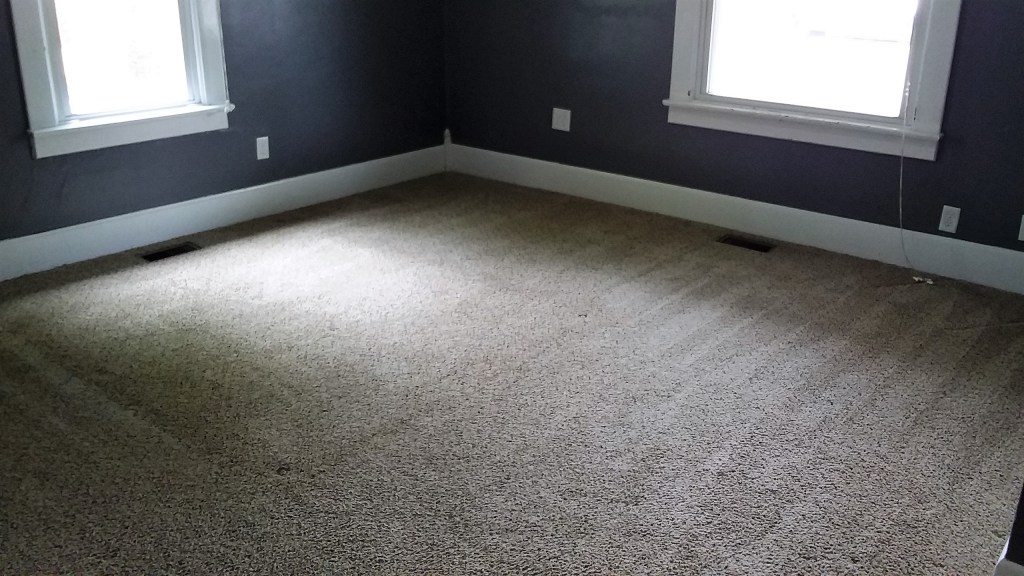
When one of our rentals became vacant, we had already planned to pull out the carpet and replace it with our “go to” vinyl plank flooring. To our surprise, there were hardwood floors underneath! We knew we had to refinish them without question. The house has 12 and 13 ft ceilings and was built in the early 1900’s. To have the flooring redone with the tall ceilings would create even more character and value!
Refinishing hardwoods is about 80% prep work (removing carpet tack strips, pulling staples and nails, sanding, more sanding, removing all of the dust, etc) 5% staining, and 15% applying polyurethane!
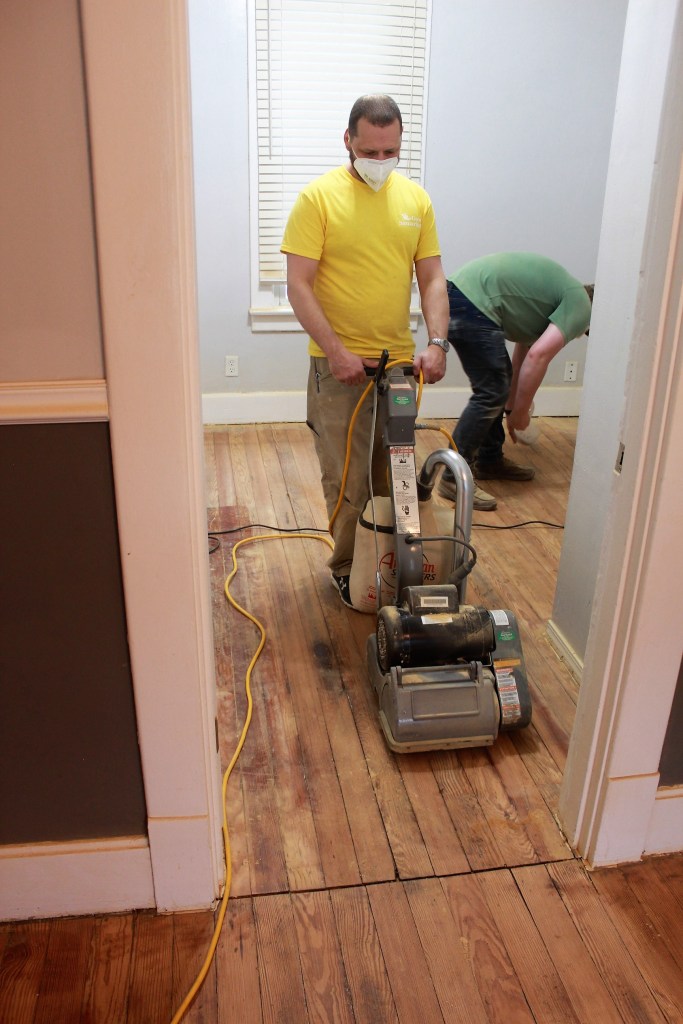
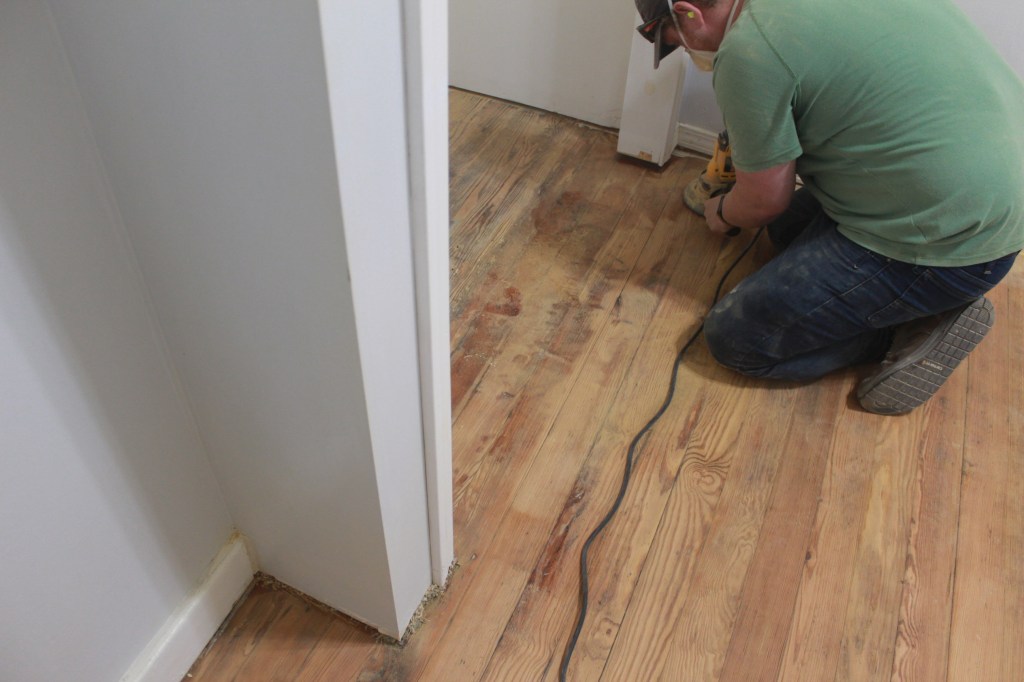

We rented a drum sander and an orbital sander from Menards. The drum sander was used to remove the previous poly coats and color from the wood. After the color was stripped back we used the orbital to smooth the floors out and remove any major imperfections. We used a handheld disk sander and a random orbital sander to sand the edges of the floors. Luckily this time around, we had a friend (and former tenant and resident) helping us sand the floors!

After sanding, we had to wipe down EVERYTHING! Dust gets in every crack and crevice. You need to remove the dust so it doesn’t end up in the polyurethane! It gets everywhere! We started at the tops of the walls and slowly worked our way to the floors. Once everything above the floors was cleaned we wiped the floors with mineral oil to remove the dust from the floors.
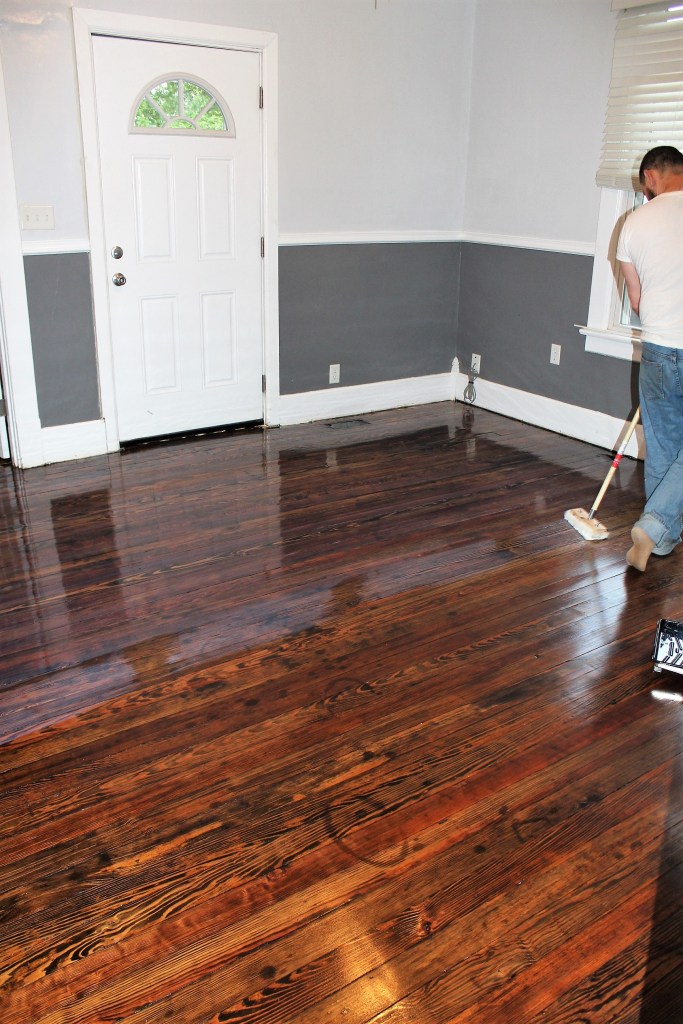
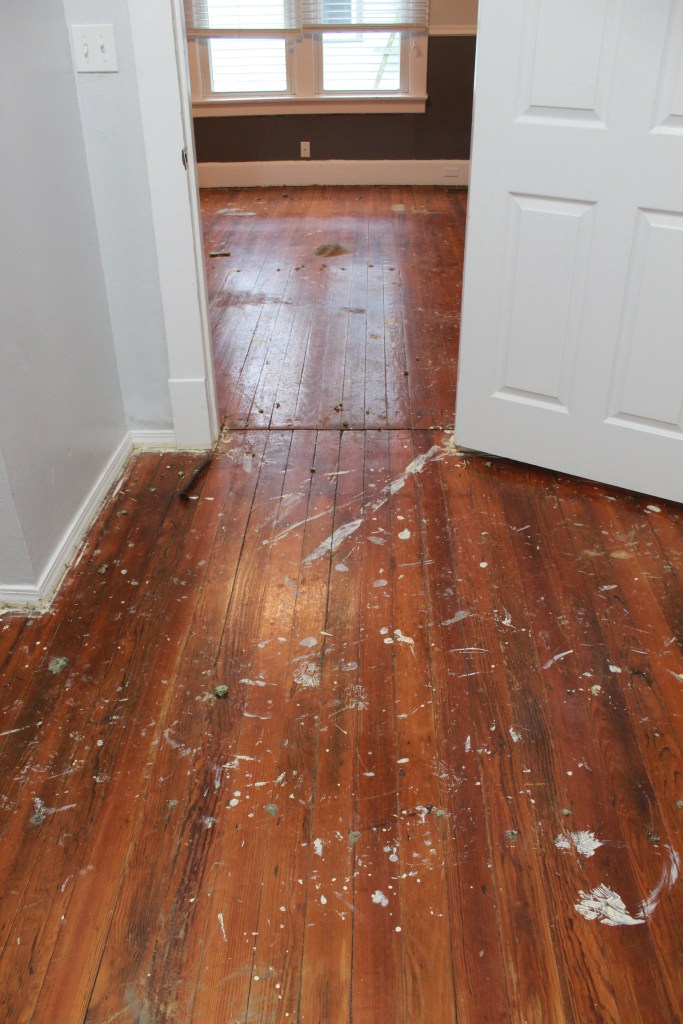
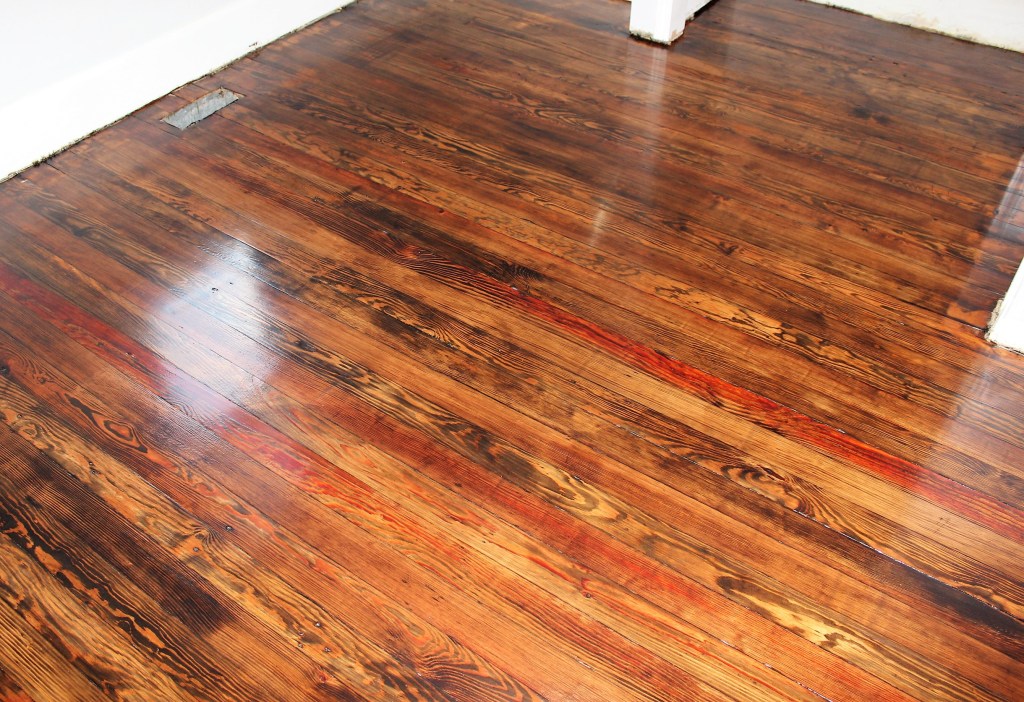
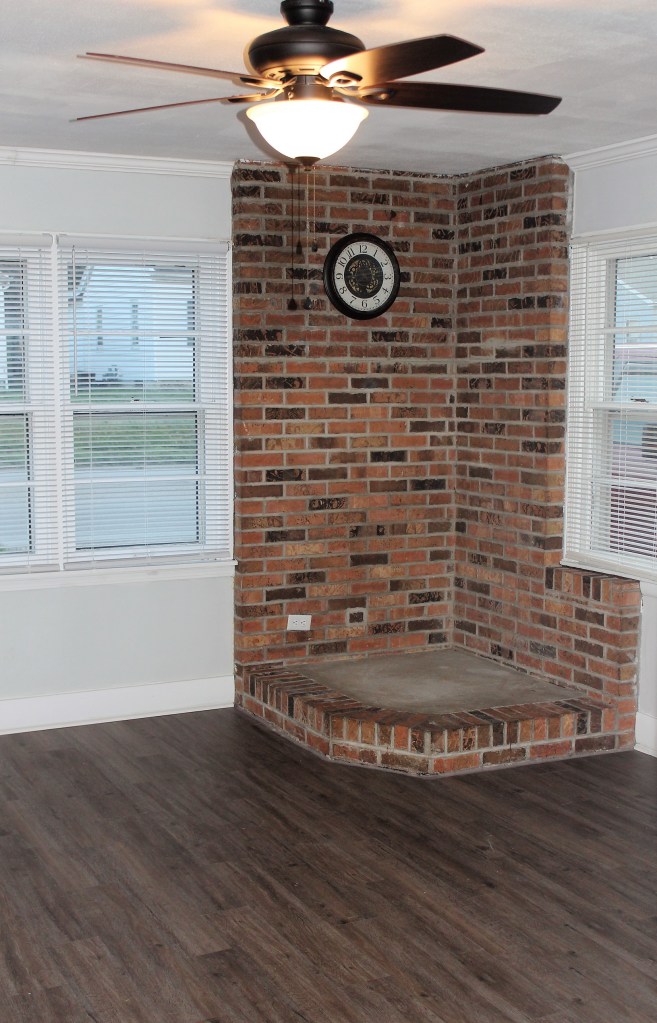
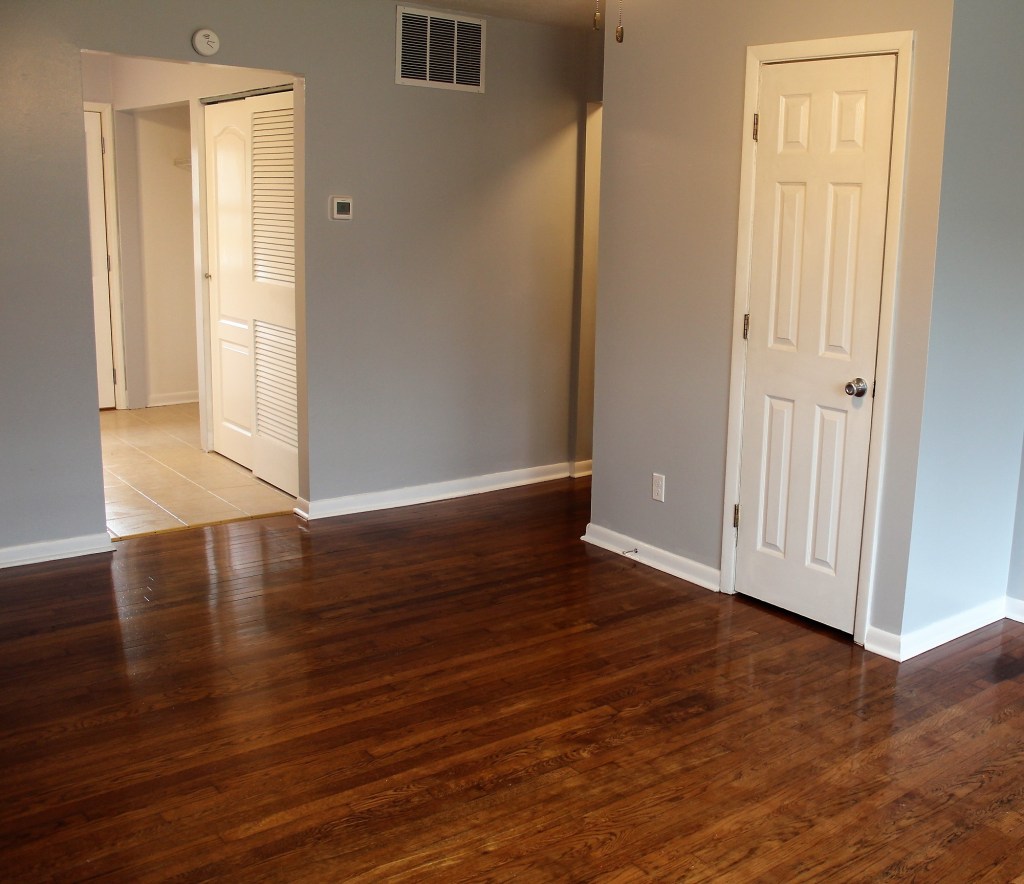
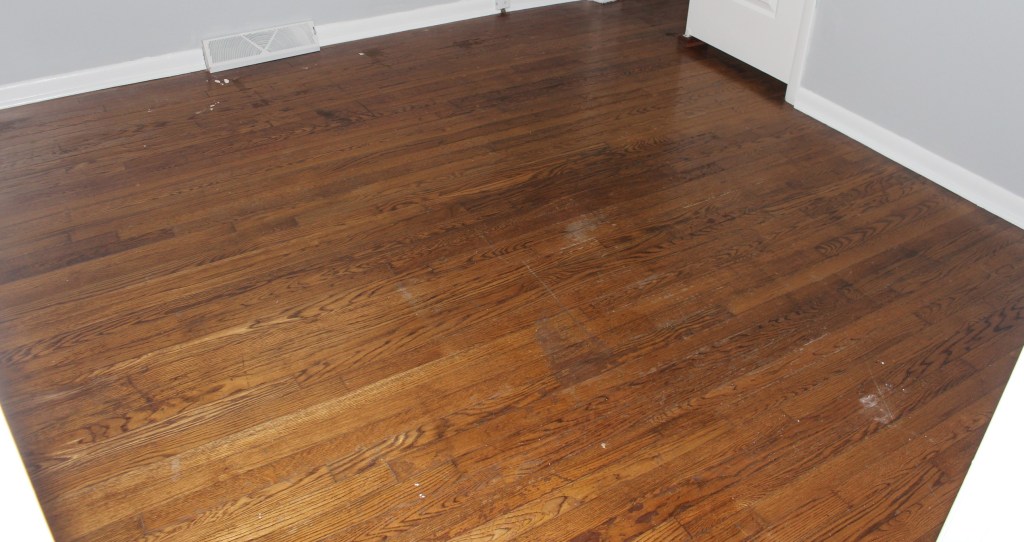
Top tip. If you get water on your naked flooring it will leave marks that show once the stain is applied. Notice the bucket mark in this picture! The only way to remove that mark would be to sand the floor back and re-stain, so this time it stays (it adds character). If we would have sanded the water marks before we stained it would have “erased” those marks! We used Minwax Dark Walnut from Menards for these floors. We applied stain using the lamb’s wool applicator and wiped it up almost immediately. This gave us the sharp color contrast in the wood grains.

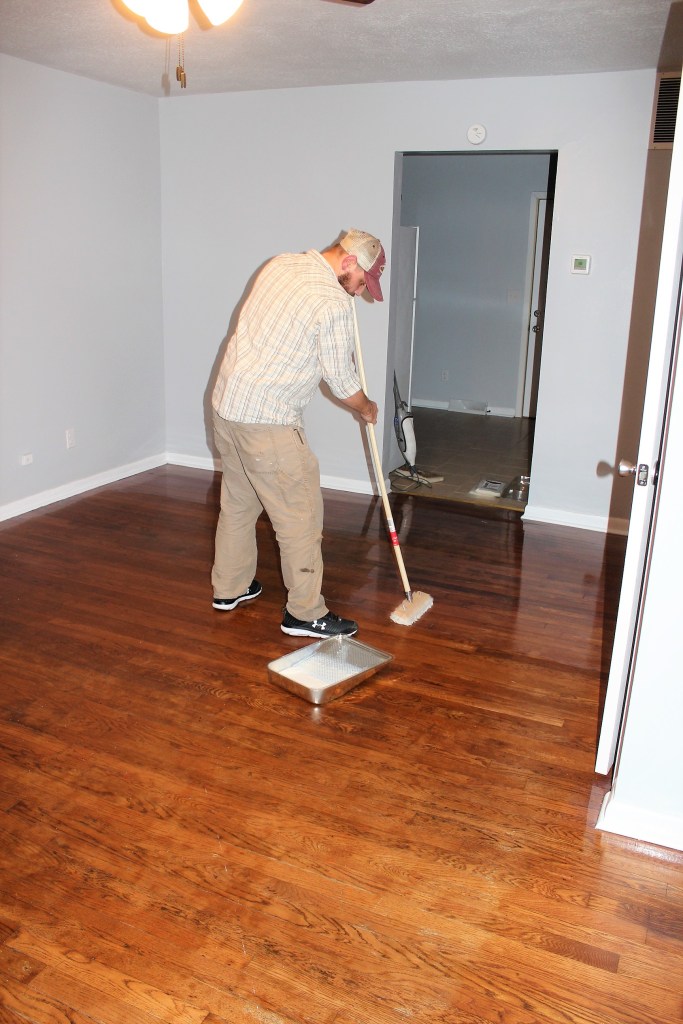
We let the stain dry for 24 hours and then started applying coats of poly. Remember, three thin coats is always better than one thick coat. We used Verathane’s water based semigloss polyurethane which has a dry time of 2 hours. IMPORTANT TIP, as you apply more coats, it may need more time to fully dry because the wood has already absorbed through the first couple coats, thus, creating a sealed barrier.
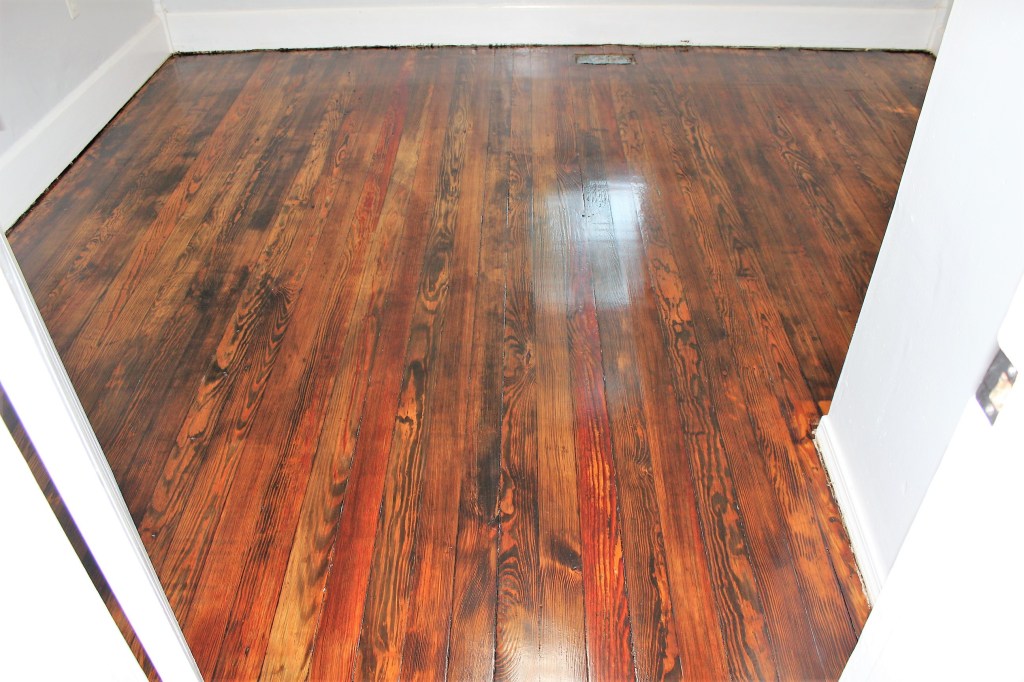
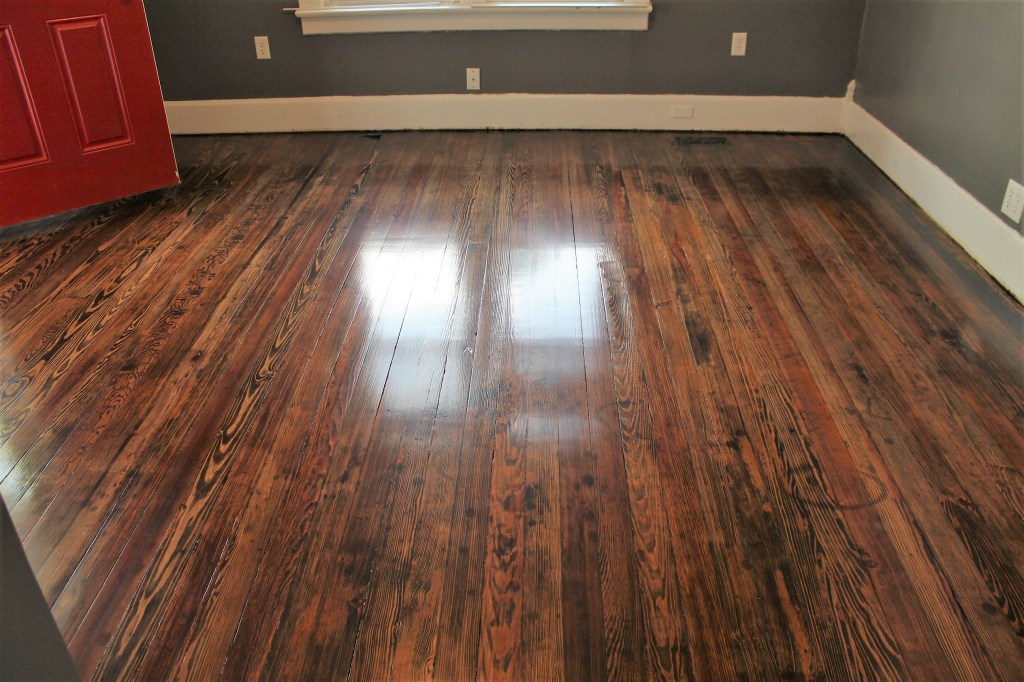
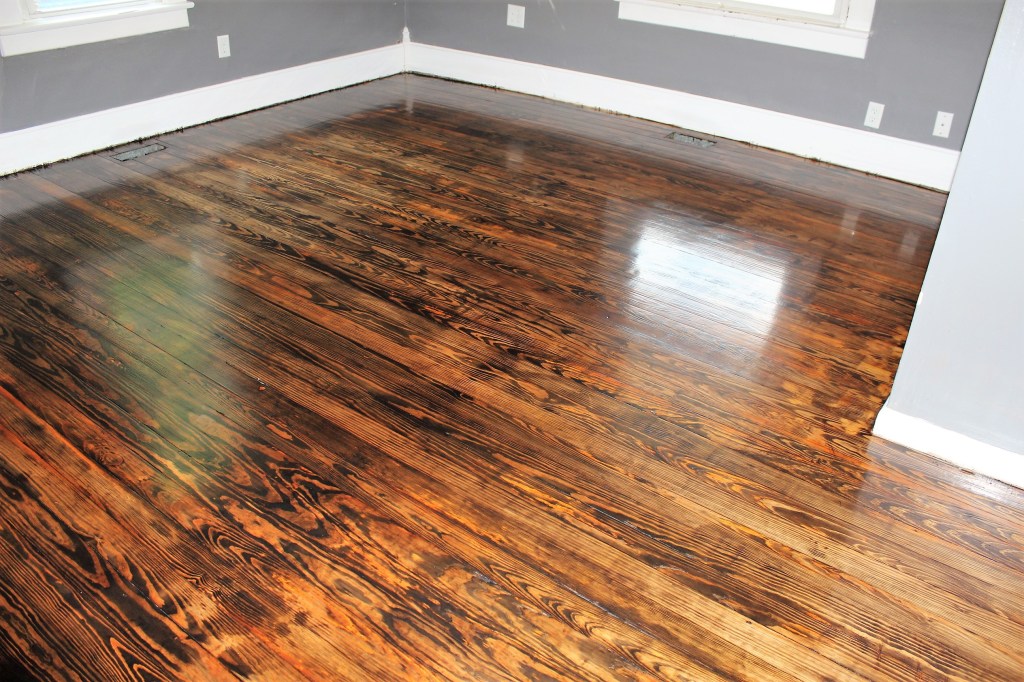
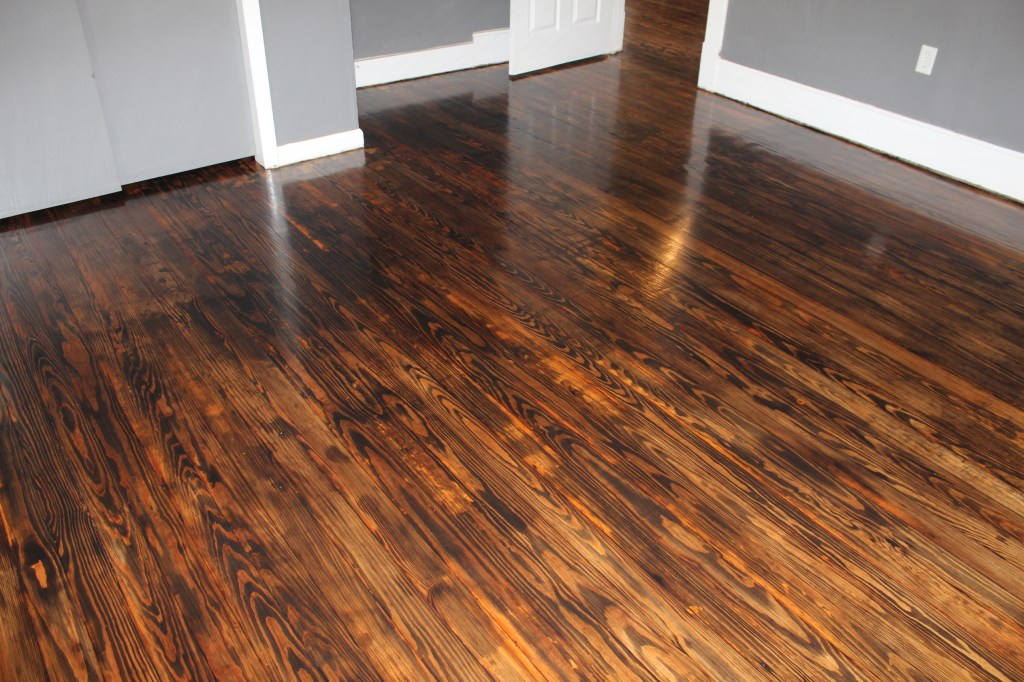
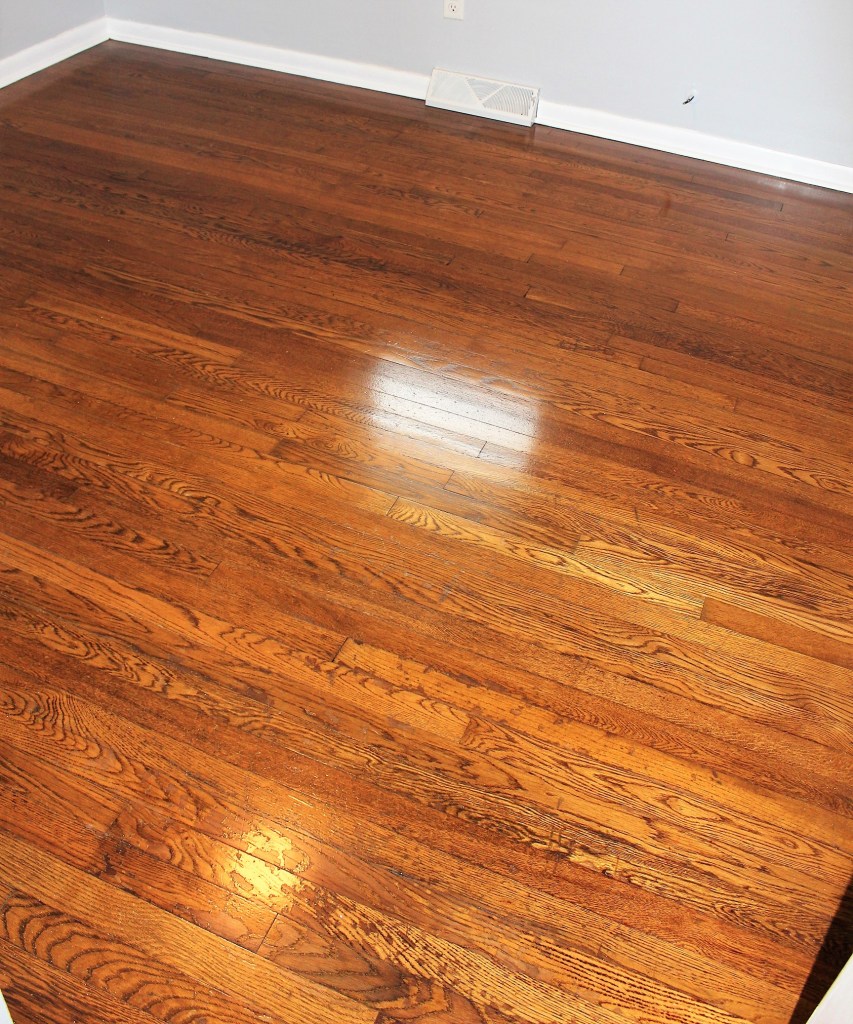
We would apply a coat after work each evening. Friday and Saturday we were able to apply 2 coats which finished out this project with 7 coats of poly on the floor. This should give us a nice thick barrier that will look good and last for a long time. You’ll notice in our afters, the wood is different colors. This is because there is different wood grades being used in each room.


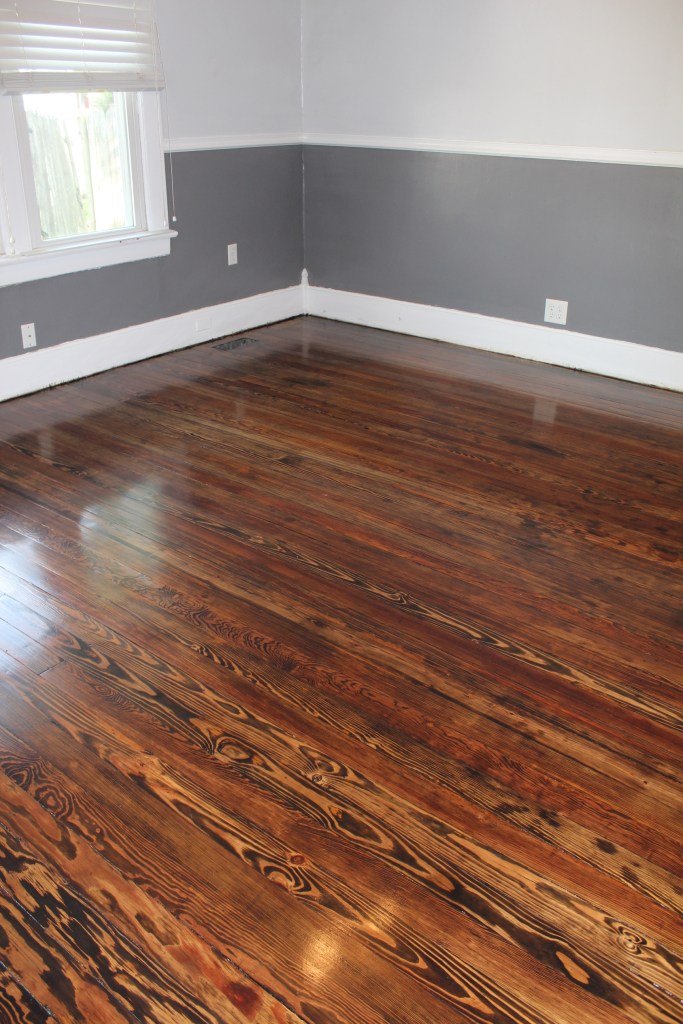
Vinyl floors would have cost us approximately $2,800, whereas, redoing hardwoods cost us around $1,200 (plus a lot of sweat equity!) If we have a choice of redoing hardwoods, we will do it every time! The value added is priceless!
Be sure to subscribe to our blog for all of the latest posts via email! Thanks to all who have and already are supporting us on our journey! We appreciate your support!
MOVING FROM THE PAST TO THE PRESENT WHILE RENOVATING

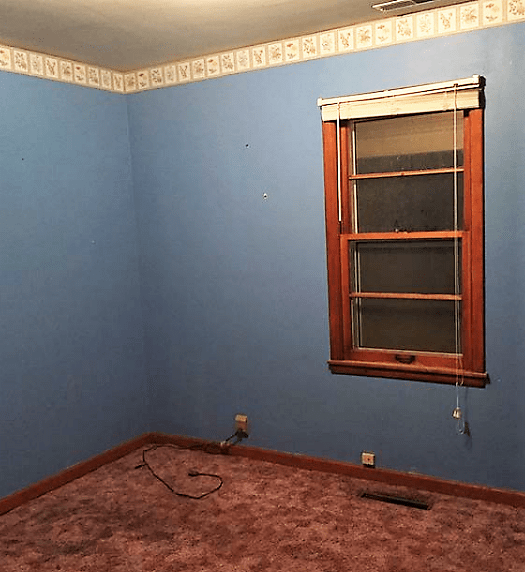
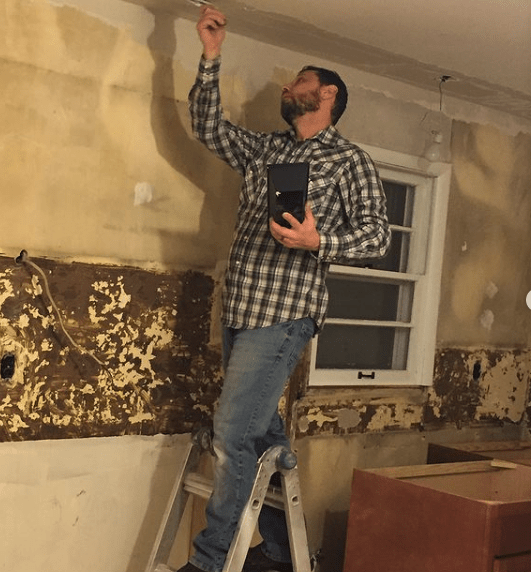
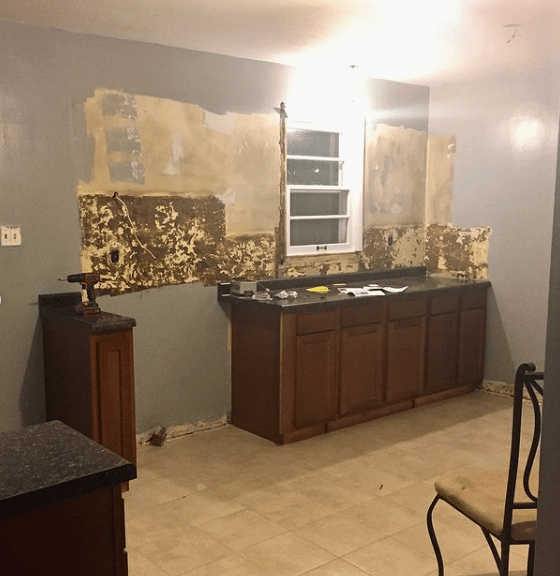
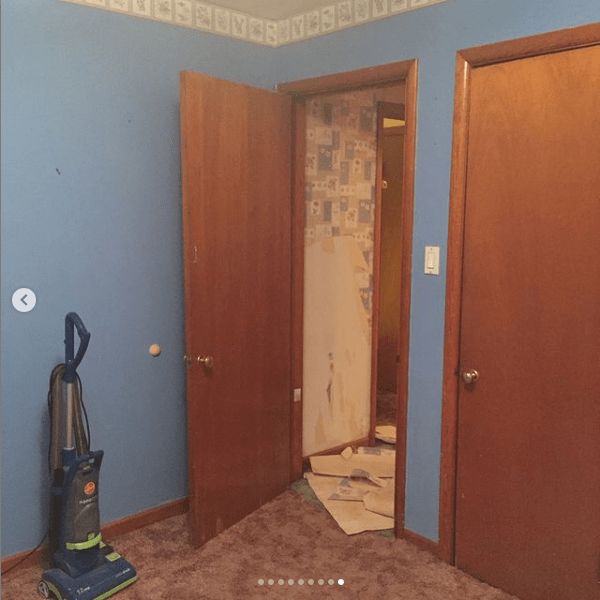
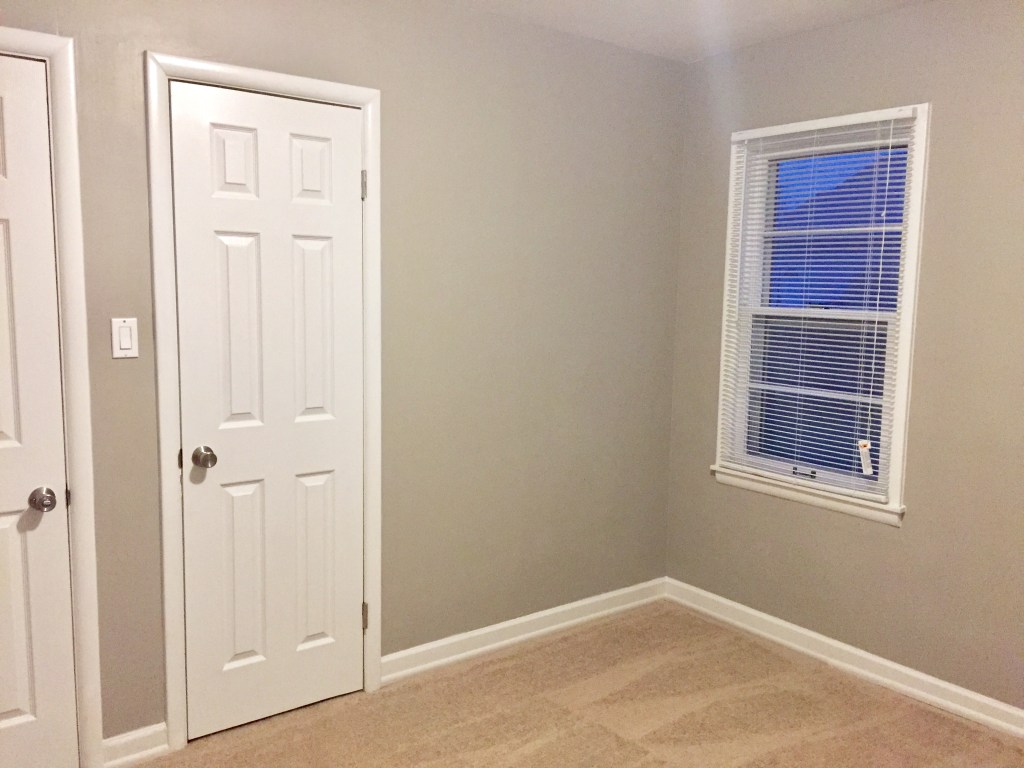
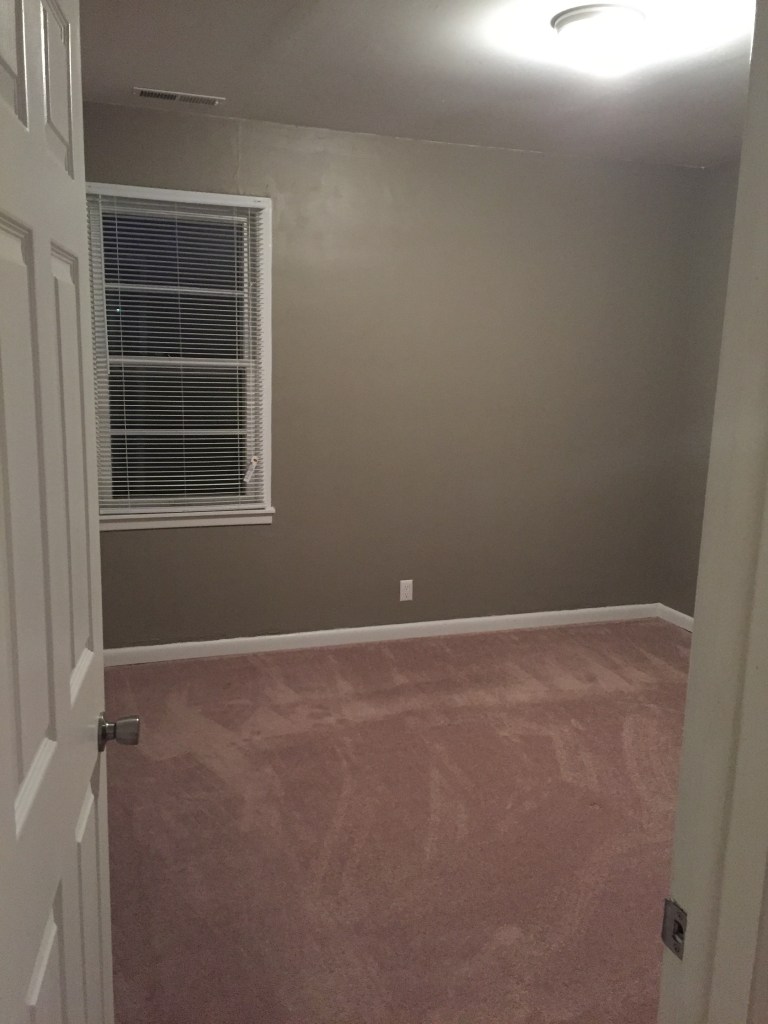
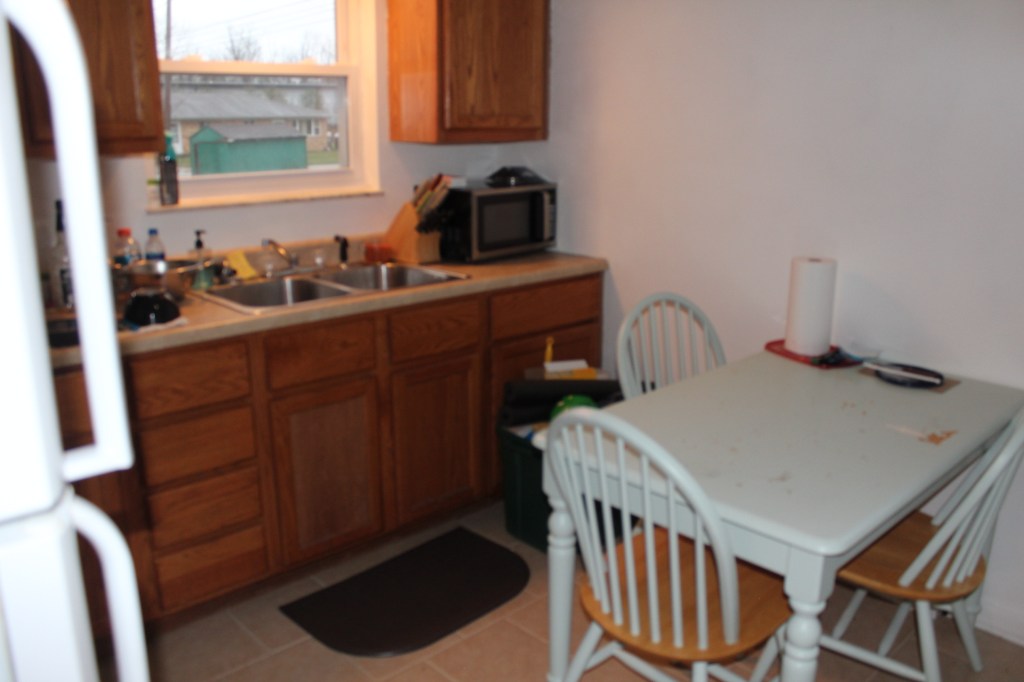
When we bought this house we had a list of issues that needed fixed in order to make this place a “quality property“. There was wallpaper hanging from the walls that needed to be removed. One bedroom had a wall with paneling hiding bad drywall. An old kitchen screaming for renovation. A bathroom begging for new life. Tired and worn carpet that needed replaced along with many other issues that needed correction!

We will run down an overview of how we went from a tired, old, neglected property; to a renewed, vibrant, clean and refreshed home!
The first thing we tackled was the walls. The wallpaper came down pretty easily by using water and fabric softener mixed in a pump sprayer. We soaked the walls and scraped the wall paper off. There was a wood panel in a bedroom hiding cracked and disintegrating drywall. Once the paneling came down, we skim coated over the existing drywall to bring this wall back to its former glory.


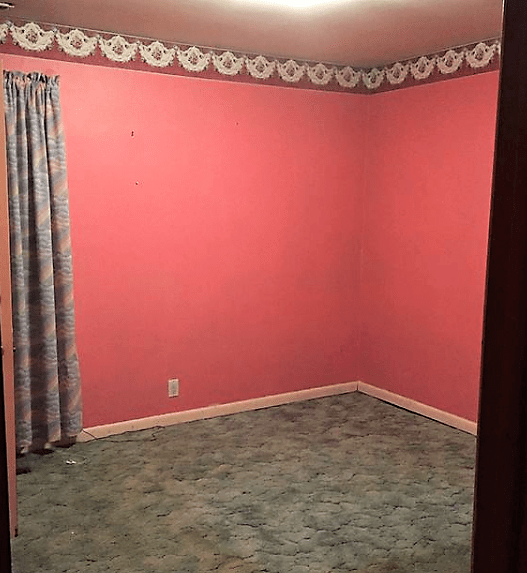
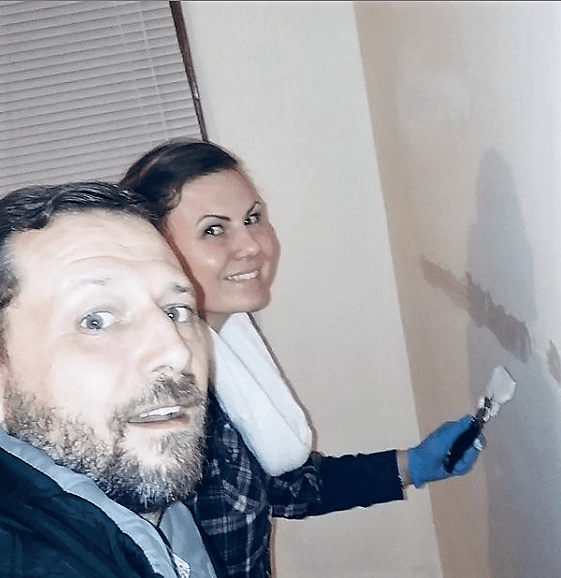
We removed a shelf on the living room wall that was attached to the studs using half inch metal rebar. Once the shelf was removed and the holes were patched, we moved on to paint. All of the walls in the house needed to be freshly painted. The cream walls in the living room, the tan walls in the kitchen, the “Pepto Bismal” pink walls in the master bedroom and the bright blue walls in the second bedroom all had to go!


During this process we decided to paint all of the trim work as well. We changed from stained and finished wood to bright white trim which included all of the window frames. This was quite timely and labor intensive, but if something saves you money, you do it!
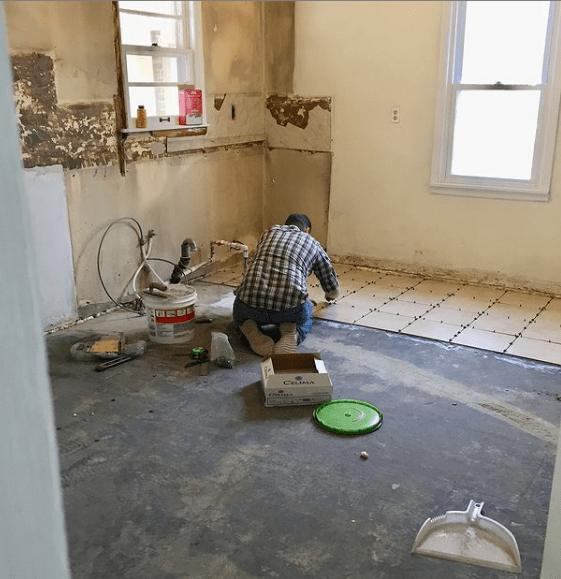
Next on the list was the floors. We had to pull all of the carpet up and remove the tile underneath. Once we were able to get the floors back to the concrete we moved on to other projects.
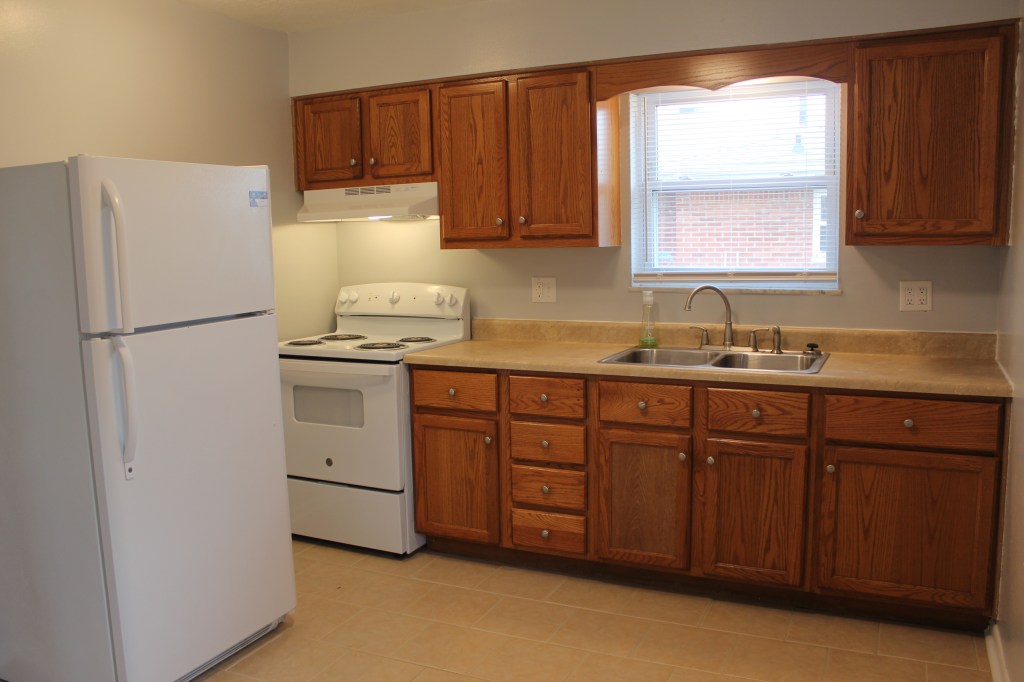
The kitchen was completely gutted and replaced. See our blog post “5 Things We Do When Renovating Then Kitchen For Under $5000” from April 12th 2021.
The bathroom was completely renovated. See our blog post “Remodeling a Bathroom For Under $2500” from April 4th 2021.

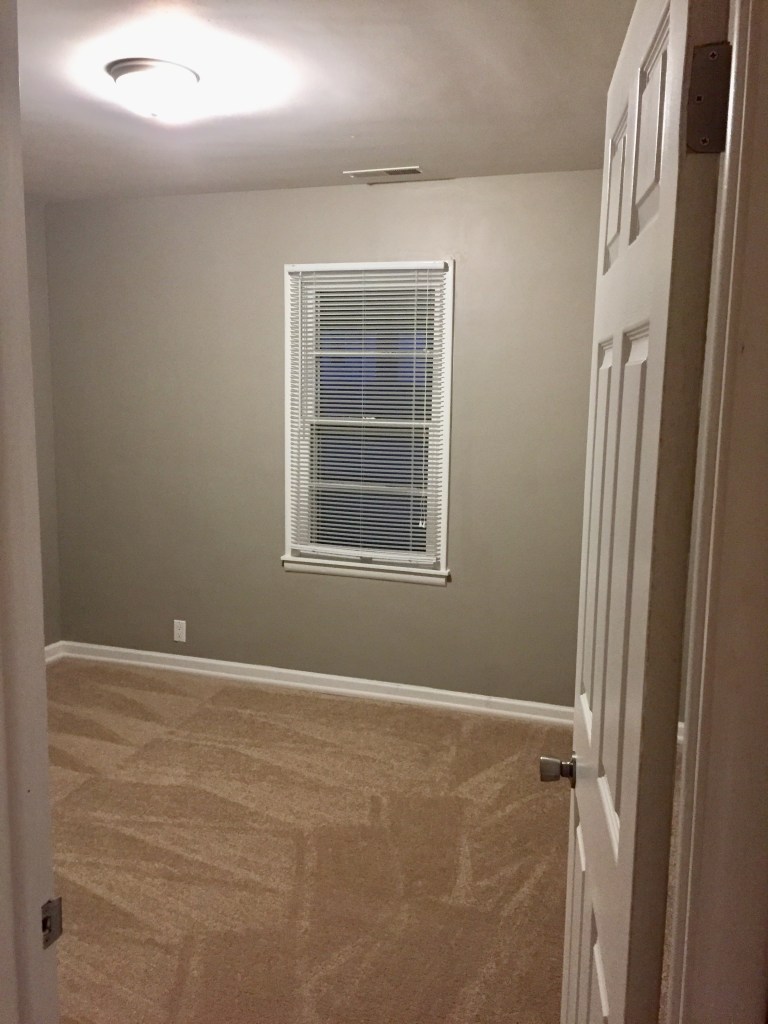
We installed new interior doors to replace all of the old beat up doors in the house and finished them all out with stainless steel hardware and door stops. We also installed all new lighting throughout the inside and outside of the house, including a nice ceiling fan in the living room.
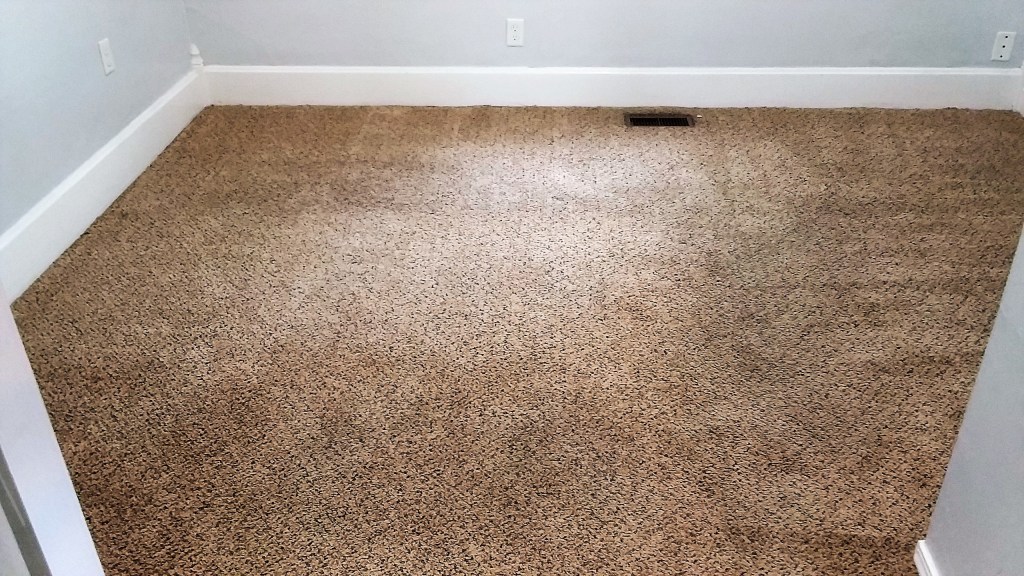
Once the bulk of the projects were completed, we had one of our contractors install a new pad and carpet. The only thing left was to clean the interior up and paint the ceiling boards in the car port and the front and side entry doors.
Be sure to follow us by subscribing to our blog! Thank you to everyone who already is. We appreciate your support!
REMODELING A BATHROOM FOR UNDER $2,500!

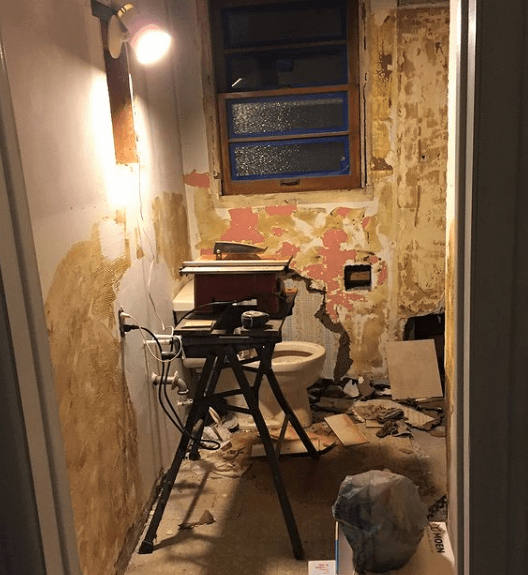
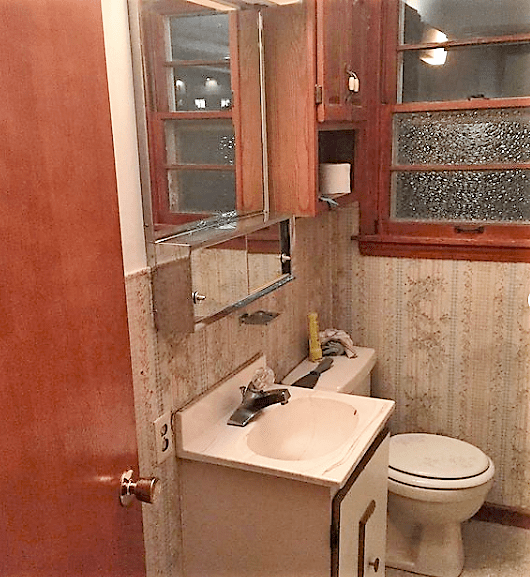
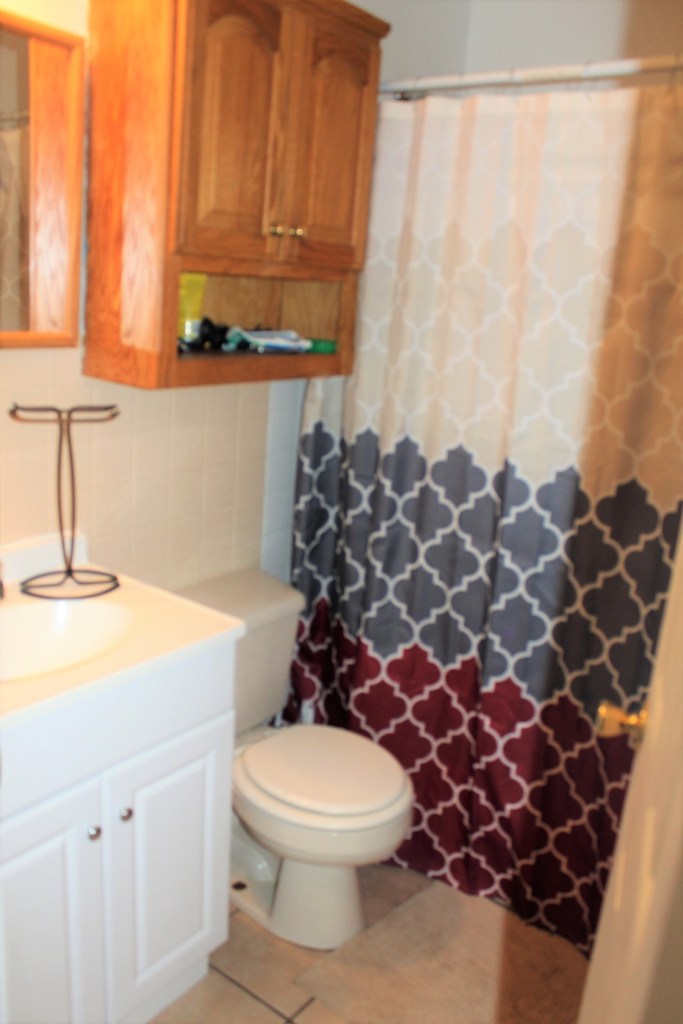
When we bought this house we knew that the bathroom had to go! This was one of those bathrooms that had no redeeming qualities to it. The dated built in cabinets had to come down. The old tub had to be torn out. We needed a new vanity, mirror and new fixtures. The big question was, “how to do all of this on a tight budget??”
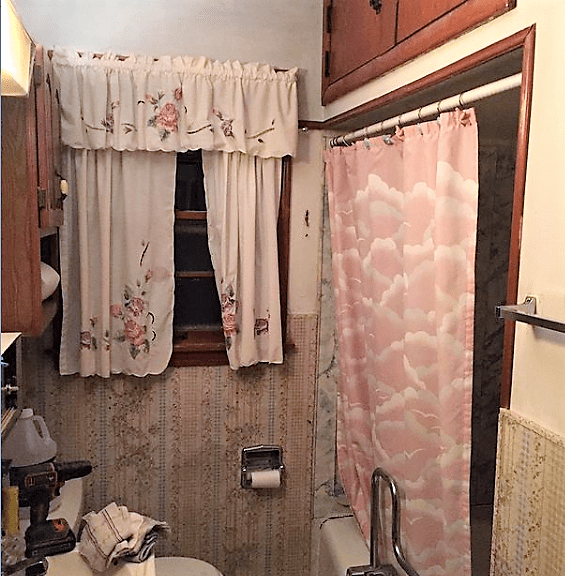
BEFORE
The first step was demolition. We gutted everything back to the drywall. Danny needed to build in a platform for the shower base to sit on, move the water line for the shower head up to the ceiling and replace the old plumbing and faucet mixer valve. After we had the base built and the plumbing replaced, we installed the shower pan and hooked up the plumbing for the drain.

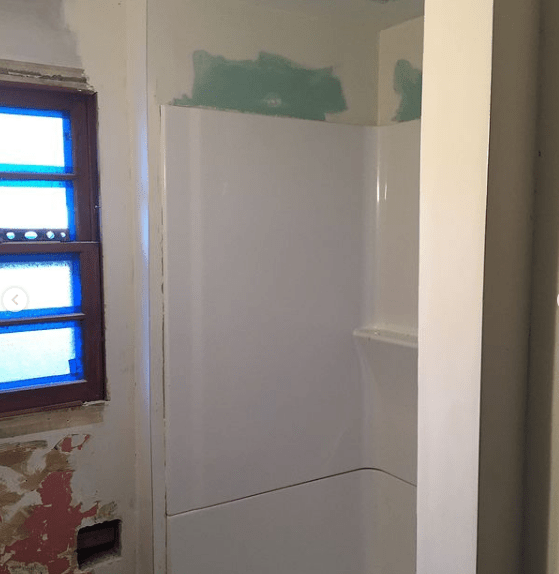
AFTER- Shower Installed!
Next on the list was the surround. We picked up a shower surround at Menards and installed it over the shower pan. Because of the odd size of the original bathtub, we decided to install a stand-in shower with a bench instead. The most difficult part of this process is measuring where the holes for the shower faucet will go. Because the shower was so spacious we wanted to put in a rain fall shower head coming from the ceiling. Once the surround was in, we needed to hang new mold resistant drywall and finish it with tape and mud.
After the drywall was finished, sanded and primed, Danny laid new tile on the floors. When the grout lines were dry, he moved on to the white bead-board. This project went pretty quickly and he was able to finish putting the beadboard and chair rail up in an afternoon.
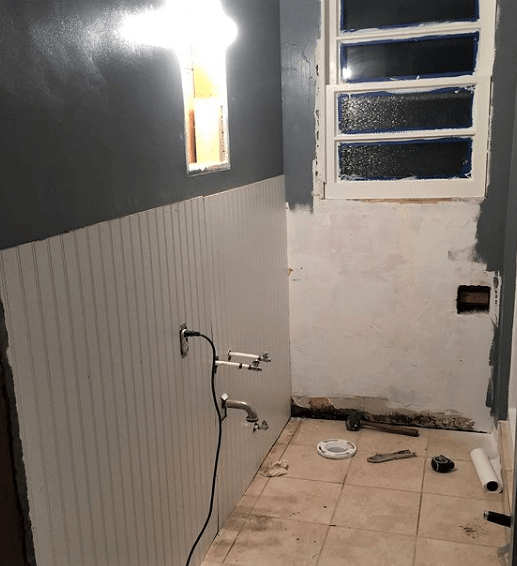
Adding Bead-board
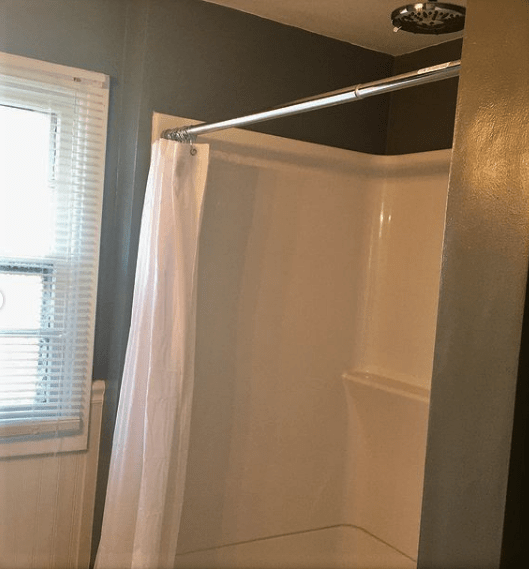
At this point we were starting to see the finish line and knew we were getting close to the end. The new toilet went back in with no problems and we installed a new medicine cabinet. The lighting over the mirror was installed, followed by the new vanity, sink, and faucet. Danny quickly installed the fixtures and it was time for me to caulk and paint. We really like the way this tiny little bathroom turned out and we are always amazed when we look back at the before and after pictures!!! We hope you will be too!
BEFORE 
AFTER
Be sure to subscribe and follow along with us on our journey! Thank you to all have already. We appreciate your support!
HOW WE MADE $4,000 IN 1 DAY!

We’ve listened to a lot of podcasts and books over the years such as Tim Ferriss’ The 4-Hour Workweek and BiggerPockets podcasts. So many investors will say, “spend your time on what makes you the most return.” There are several ways we bring in revenue and save THOUSANDS, outside of our regular 9-5 workdays.
1. We own rental properties. 2. Danny is a licensed realtor through F.C. Tucker. 3. We do 95% of the renovations and repairs ourselves!
To find the perfect tenant for us, we screen thoroughly!! We have them complete an application, run background and credit checks, look at employment history, rental history, and look to see if there have been any evictions or convictions. If they have pets, they also complete an application for that. They also pay extra fees and deposits for having pets. Tenants really appreciate the fact that we allow pets, regardless of the hoops they need to jump through to make it happen. As an animal lover, I want to be considerate of others wanting to be able to bring their pets with them when they move!
Another “hack” we do is allow our tenants to break their lease if they purchase a home using Danny as their agent!
Selling a house isn’t a one day process. There are showings to do, offers to write, communications to send, paperwork to complete, and forms to submit. It’s a long and detailed process, but he finds it fun to walk through this process with clients. In this case this was a first time home buyer looking for a house in a very hot market!
This particular house listed at 4 in the afternoon and he was able to schedule a showing for 8 in the evening. Danny had to drop everything he was doing to make this happen. It was well worth the effort! Our tenants found their first home and he made the sale happen for them.
On this particular day, after we had tenants in line to move into their new unit and Danny had all of his closing papers in order with our other tenants, we were able to divide and conquer! I was in one town going over leasing documents while Danny was in another closing a sale! We make a great team!
We always try to stay busy and work on things that will either save us a good deal of money or work on something that will make us money. We try not to spend too much idle time, but try to use our time as wisely as we can. Life is short.
I once had a teacher say to use your mind and not your body, but we do both! In this case, I left with rent and deposit and he left with a check for commission. It was a good day!
Be sure to subscribe and follow along with us on our journey! Thanks to all who already are! We appreciate your support.
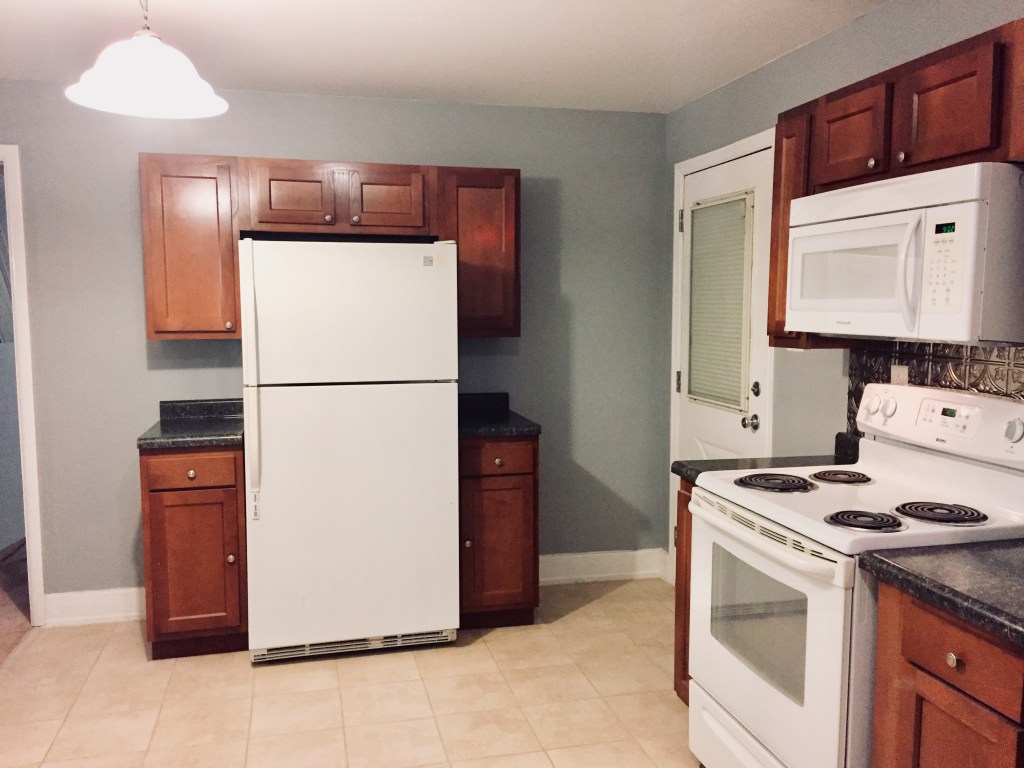
5 THINGS WE DO WHEN RENOVATING THE KITCHEN FOR UNDER $5,000!
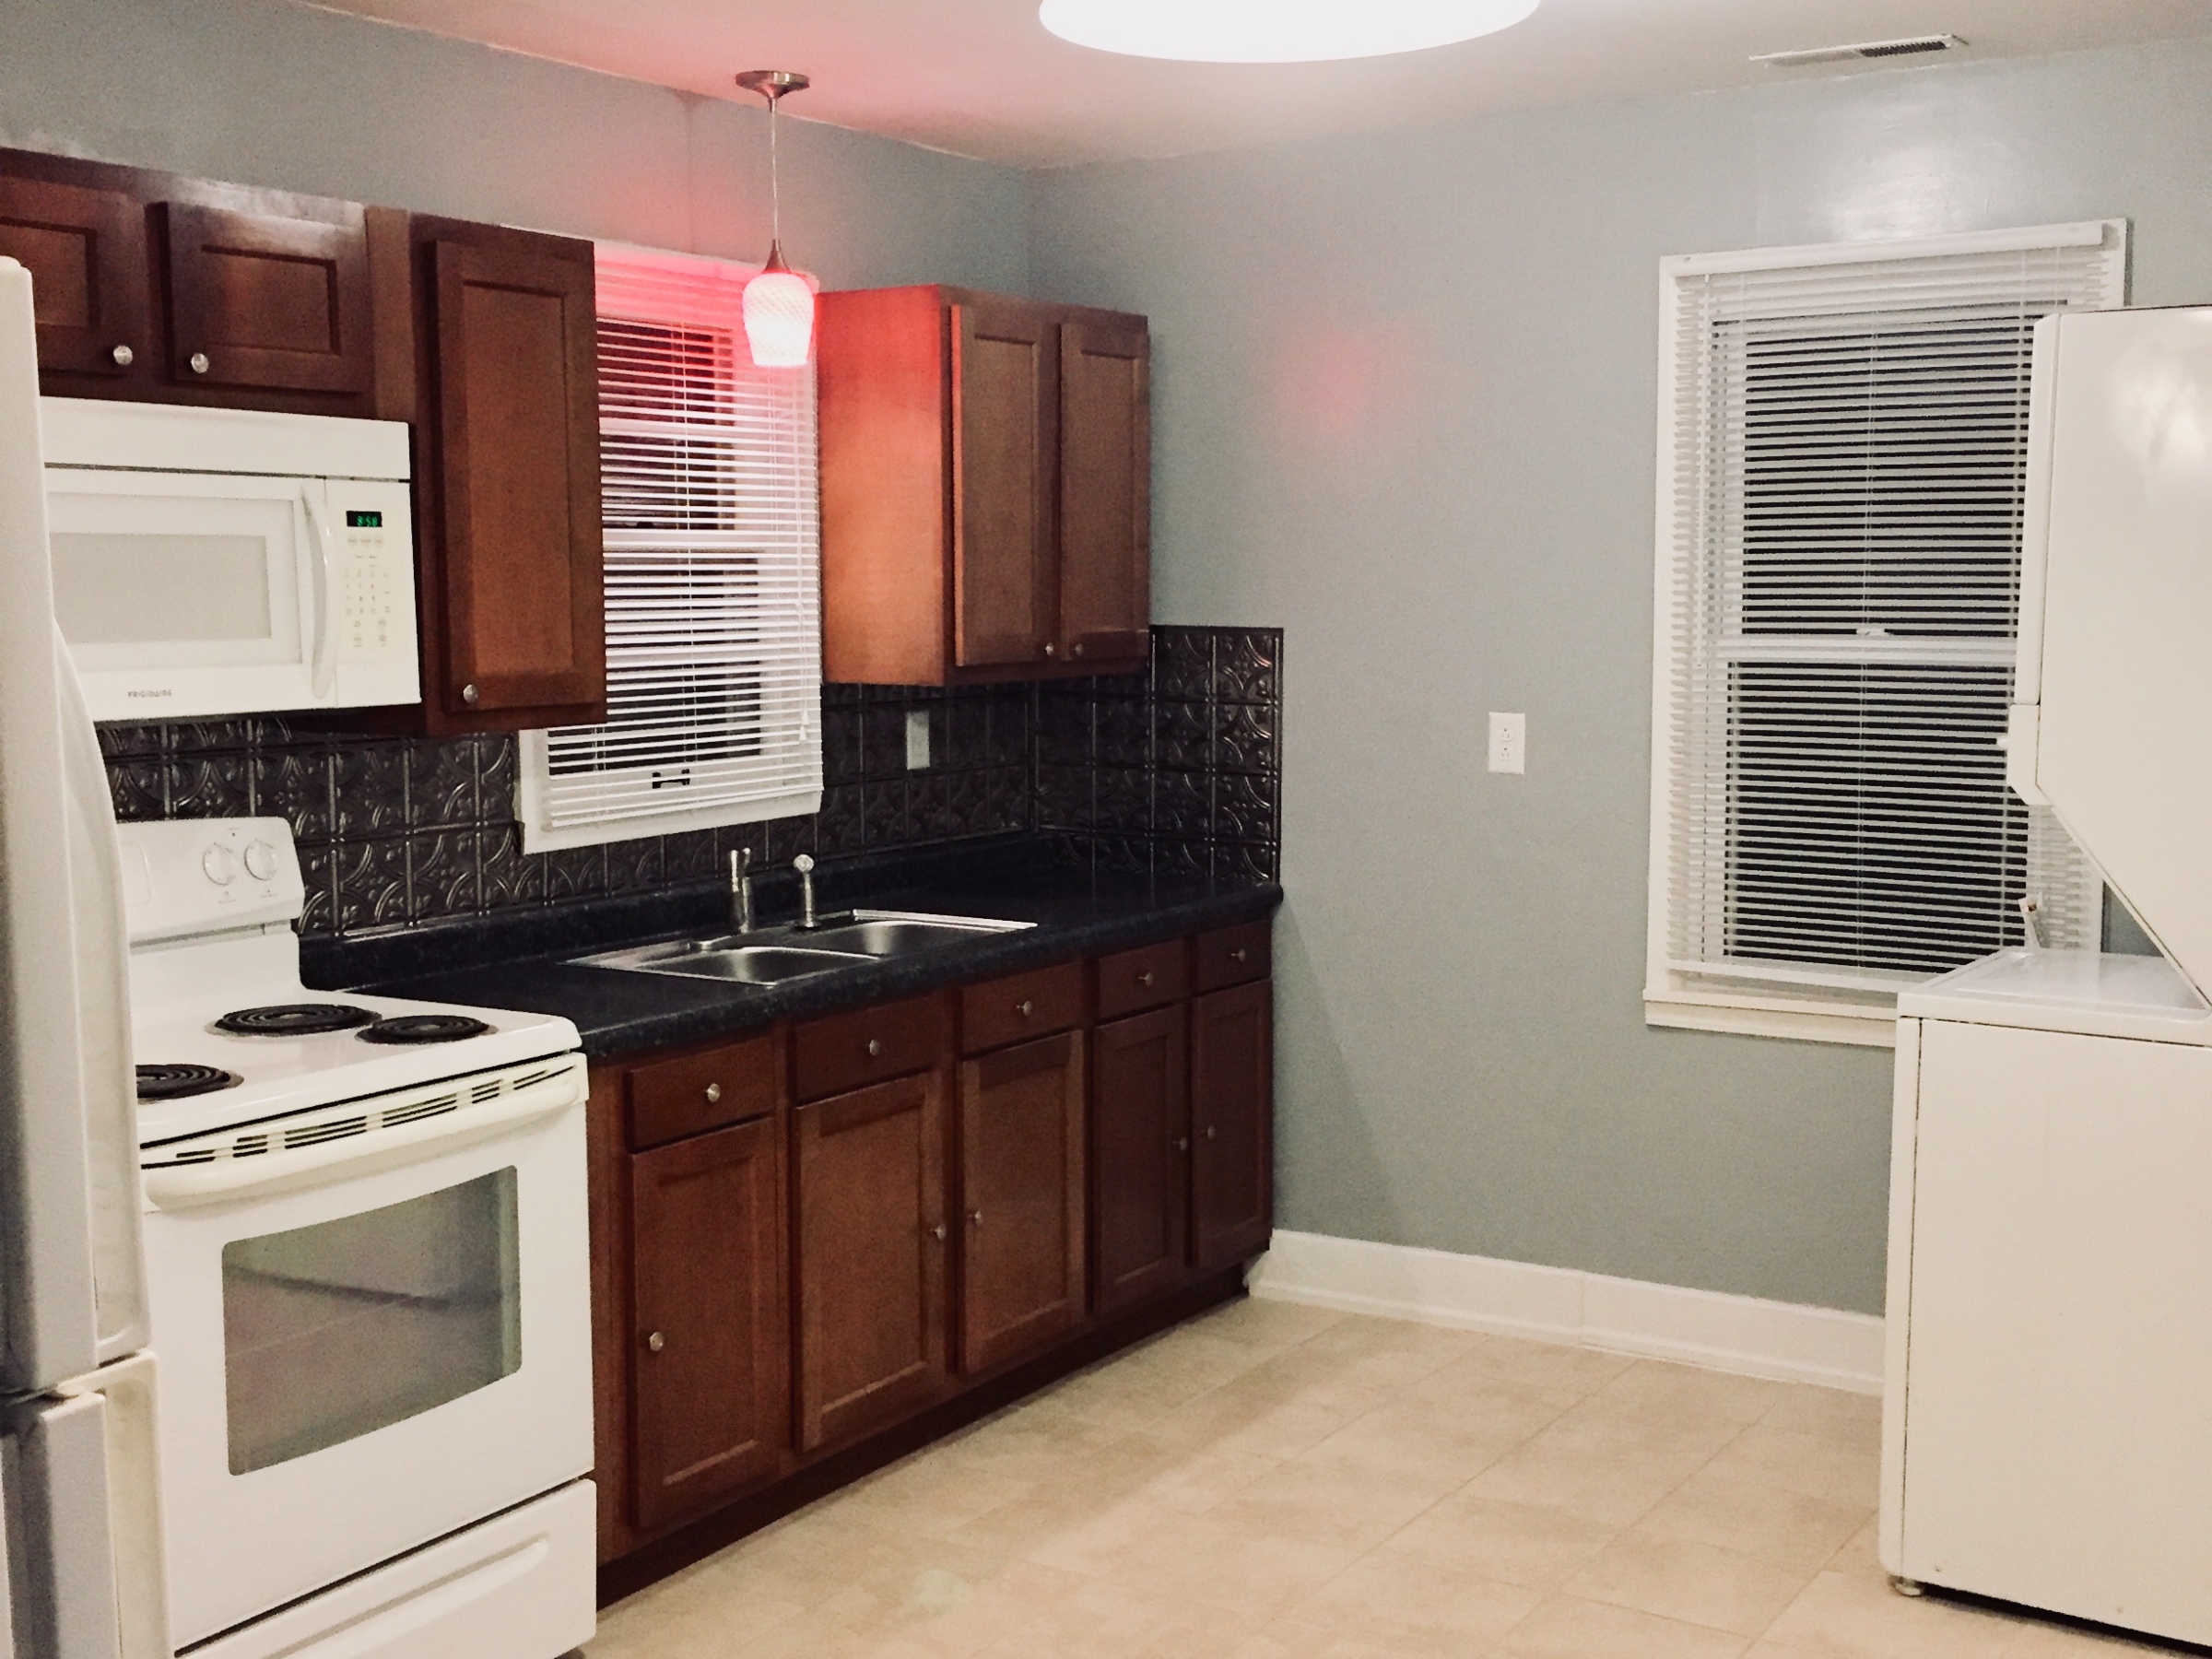
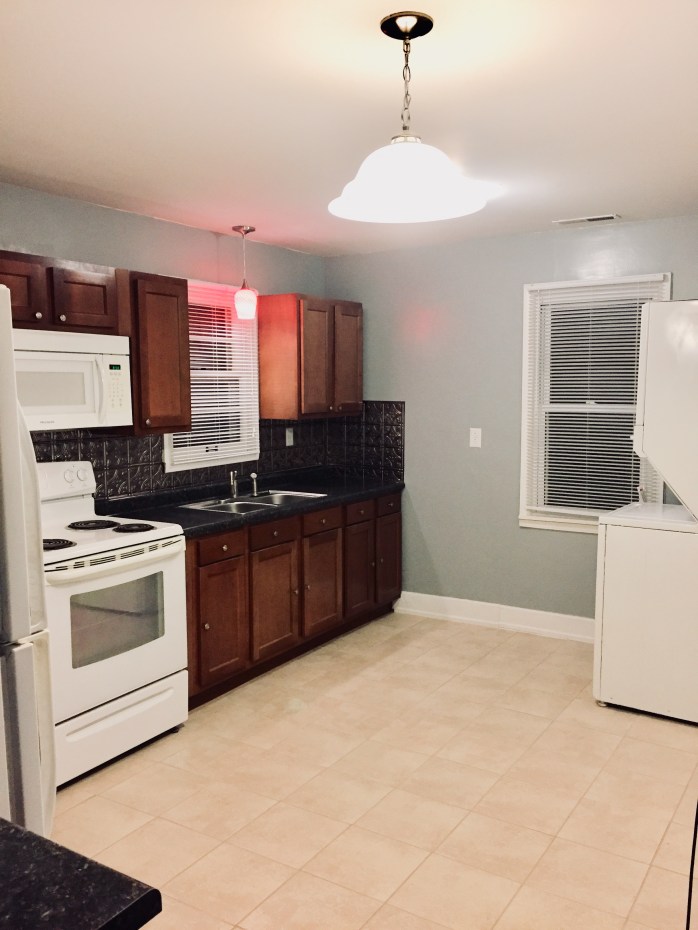
Danny and I will share the 5 top items we focus on when renovating the kitchen. You should be able to renovate a kitchen with $3,000-$5,000, including new appliances! For more kitchen posts, please see “Time for the Kitchen part I and II” from July 1st and 5th!
- Cabinets – We’re not talking top of the line, luxury cabinets. Just new, simple, cabinets that look good and function well. The cabinets that we generally use just come from Menards and are usually in stock (do not get the kind you have to assemble!). Most of the time we just replace the old cabinets with new ones that are the same size and layout. Sometimes we change the layout slightly and add a few extra cabinets if the space allows. That’s what we did in this case!
- Counters – The same rule applies here. We aren’t putting top of the line marble or granite countertops in. These are rental properties. We are looking for something inexpensive, durable, and appealing! We try to keep it simple on counters and use something that Lowe’s or Menards has in stock. One extra tip is to look for countertop with a backsplash. This will be less tile work to add later!
- Flooring – Whether we are using tile or vinyl wood plank floors we look for items that are durable, easy to install, waterproof and timeless. Tile is a good waterproof flooring that can take some abuse, but is susceptible to cracking or braking. That’s one of the reasons we have recently been opting for the vinyl wood plank floors. Keep in mind, we were working on National several years ago when we installed tile! Danny also thinks that the vinyl flooring is easier to install and won’t break if someone drops a plate on the floor. Once these three stages are completed we really start seeing progress and have a good idea how this project is going to turn out.

- Backsplash – When picking out backsplash we are always forcing ourselves to hold back and think with a level head. It is very easy to get over-excited and pick out a tile that you like or is very trendy (and more expensive!). We always try to pick out backsplash tile that will still look as good in ten years as it does the day it’s installed. This can range from white subway tile to simple solid color mosaic tiles. We have experimented with a few tiles that leaned on the trendy side, but we’ll see how time treats them in a few years. In the case of National, we decided to use the tin metal sheets as backsplash. It’s easy to install and saves time, but a bit pricey.
- Appliances – Most of the time, when we buy a new rental property, we HAVE to change out the appliances. Old stoves that don’t work correctly, mismatched refrigerators, or outdated appliances have to go! We replace them with a “new set”, which could sometimes include scratch and dent items! You can find some great deals there! One other “amenity” we try to always add in is an over the range microwave. It makes the kitchen look nice and it’s quite convenient to have a large microwave above the stove!
Be sure to subscribe to our blog to receive the latest posts! We appreciate your support in following along!
BACK TO NATIONAL! 5 ITEMS WE CONSIDER WHEN RENOVATING

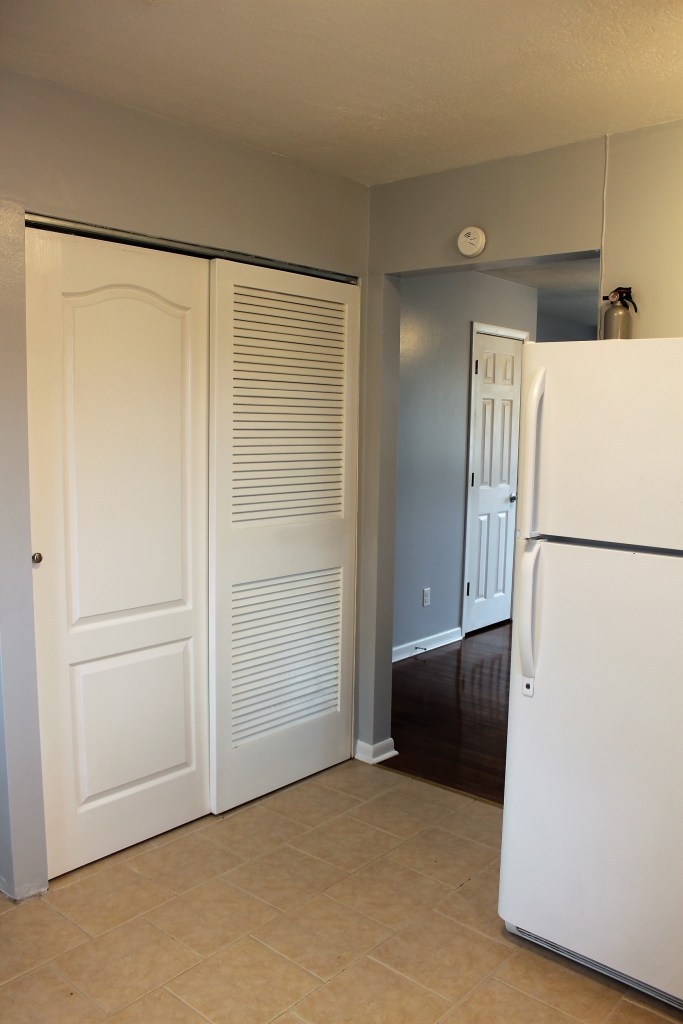
Just as a reminder, National was our 2nd rental purchased and this home needed a complete transformation! Here we start with the living room and bedrooms! In addition, we’ll give some pointers of what we look for in a rental and our “go-tos” when renovating! You’ll notice greys & whites in almost all of our rentals. The contrast always gives a nice clean and crisp look.
When searching for rentals, we prefer smaller, 2 bedroom, 1 bath homes on concrete slabs!
- Paint every surface! Ceilings, baseboards, walls, window frames. EVERYTHING!
- It is well worth the time and effort to fill any holes or cracks in the walls. You want to make the space as clean and “new” as possible. If you are also planning on painting over old wood paneling, just don’t. Oh and one other sin we never do is to paint over wallpaper. Just take the time to strip it off and do what needs to be done to make it look nice and new.

2. Change the outlets & switches to WHITE!
- Does anyone like the almond colored outlets and switches? We think not! It may be a tedious task to change everything over to white, but the result is well worth the effort! Those tan outlets just look like they are dingy and dirty.
3. Replace the lighting.
- Lighting is a big one. First off, no one gets excited to see a room that was recently painted but still has an 1985, brass chandelier hanging from the ceiling. A new fixture just makes the renovation look complete and shows that we didn’t miss any details. Secondly, we like to set our rentals up with LED lights in order to save our tenants money on their power bill, help do our part to lessen the impact on the environment, and lower maintenance responsibilities for us.
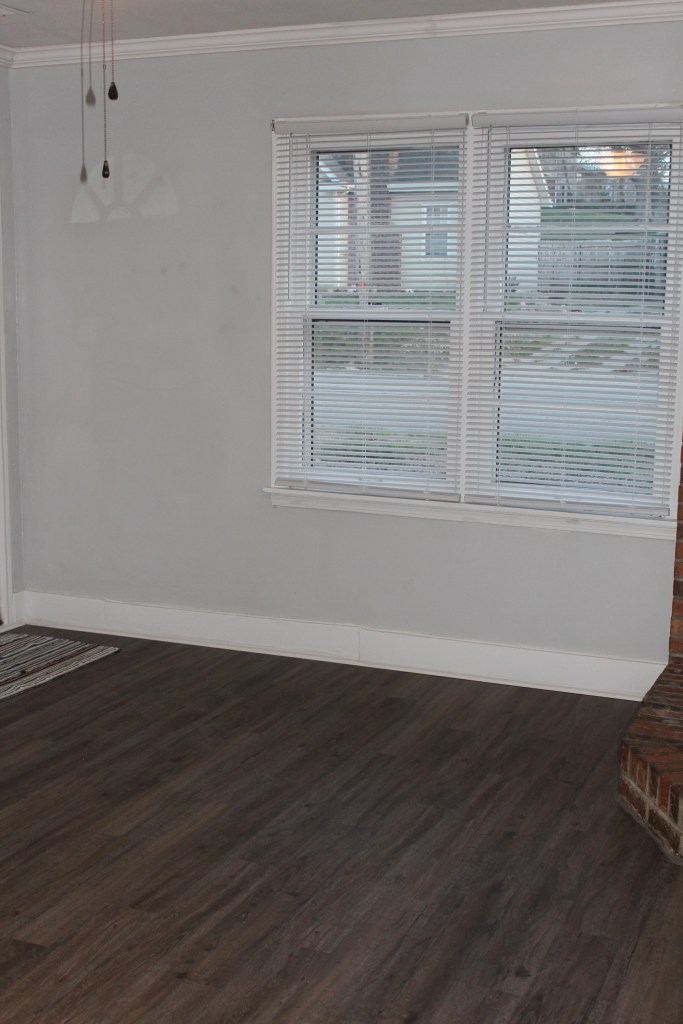
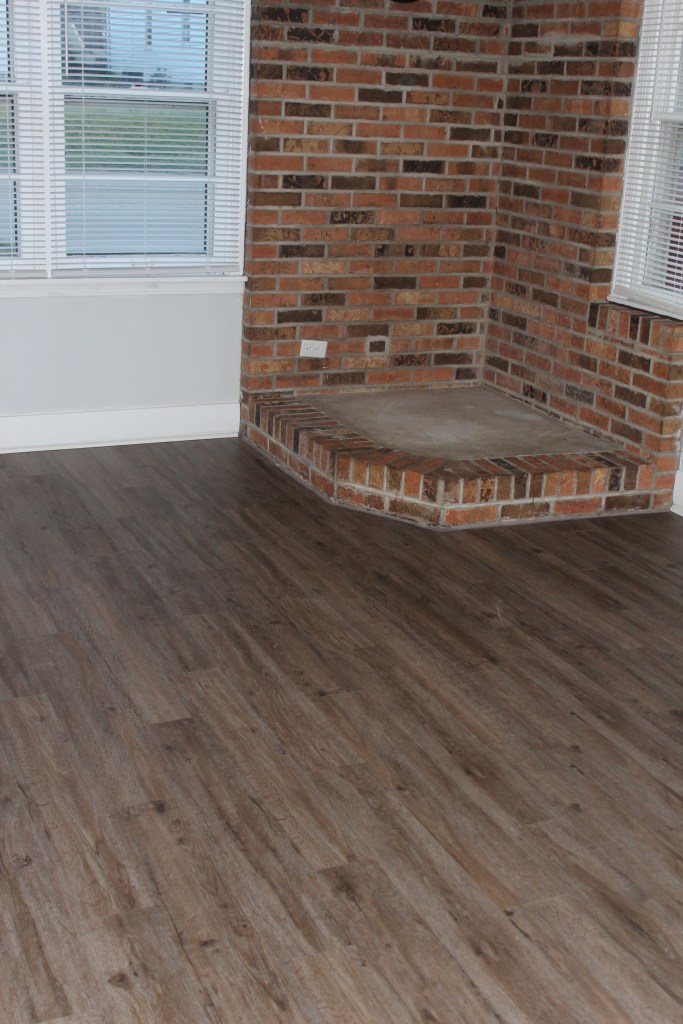
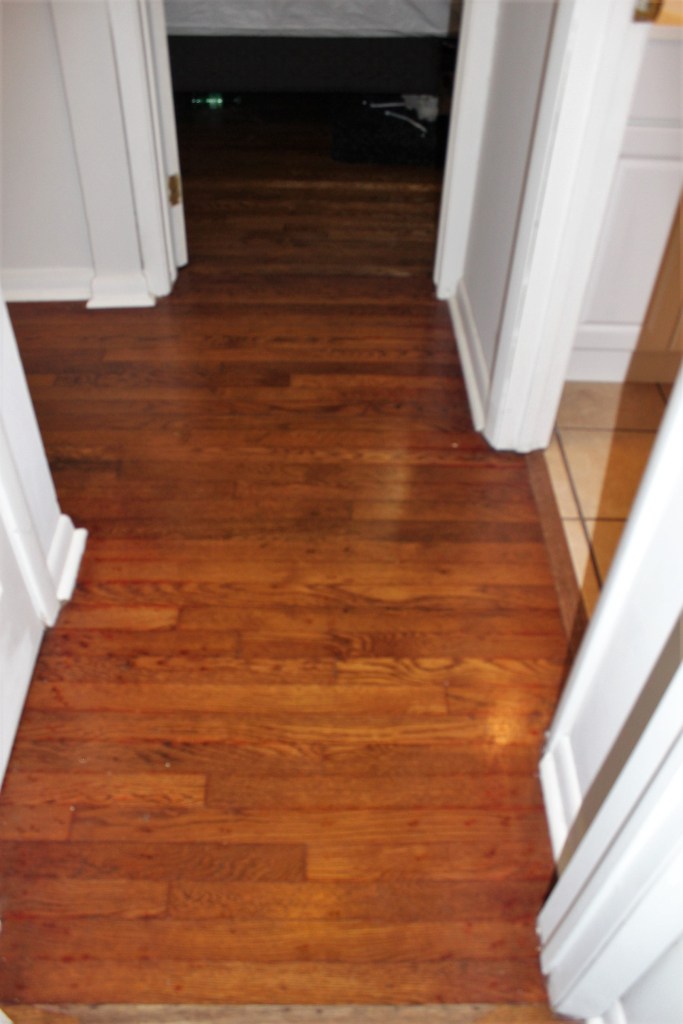
4. Replace carpet with vinyl flooring!
- We like to pull the carpets out and install vinyl flooring because they look good, they’re durable, and they’re waterproof! The wood plank vinyl floors we install make the house look sleek, clean and en vogue.
5. Finish by caulking, putting new window fixtures up and cleaning.
- Running new caulk lines on the trim work, around the window frames and door frames help to finish out the painting projects and make those lines look crisp and clean. We install nice, clean mini blinds on all of the windows for our tenants. Once the project list is done we give the place one last good clean, making sure to wipe all of the surfaces, clean the floors and completely tidy up!


Be sure to subscribe to our blog to receive the latest posts! Thank you to all who are already doing so! We truly appreciate your support.
5 TIPS AND TRICKS ON SAVING MONEY WHEN TRAVELING

Because our blog focuses on financial freedom through investing in real estate, we want to share some saving tips that we do when planning trips.
Every now and then, we need to escape the “hustle and bustle” of our everyday work lives, BUT we don’t want to spend a lot by doing so! If things are tight in your budget and you’d like to improvise to get some time away, you may appreciate our suggestions!
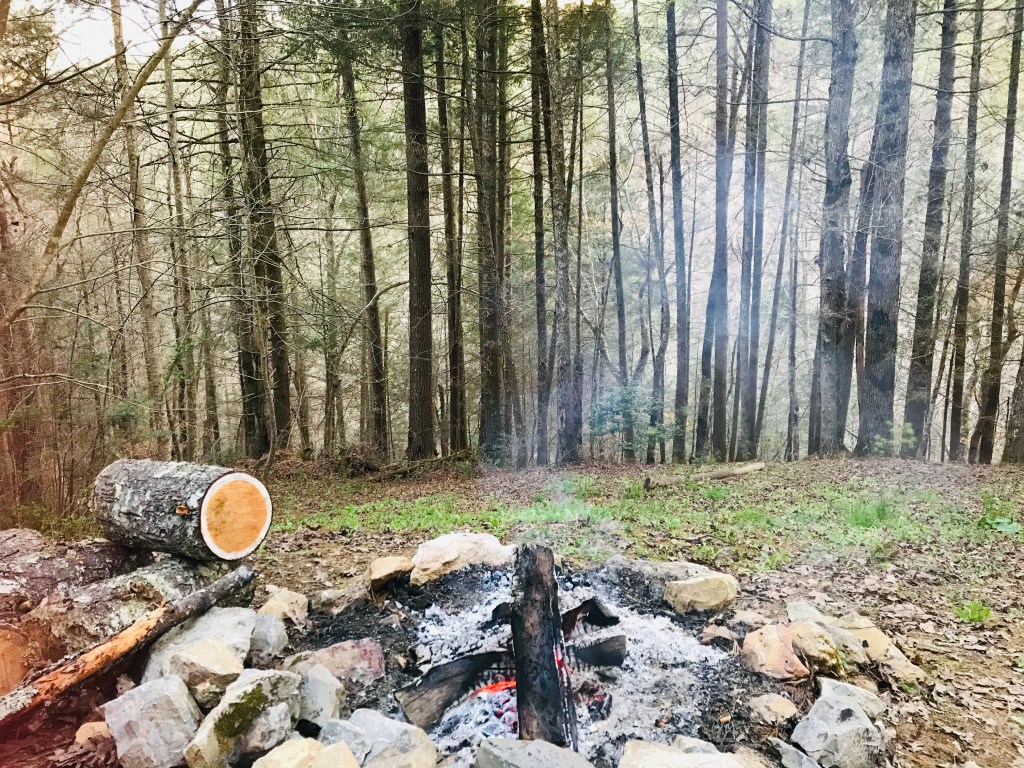

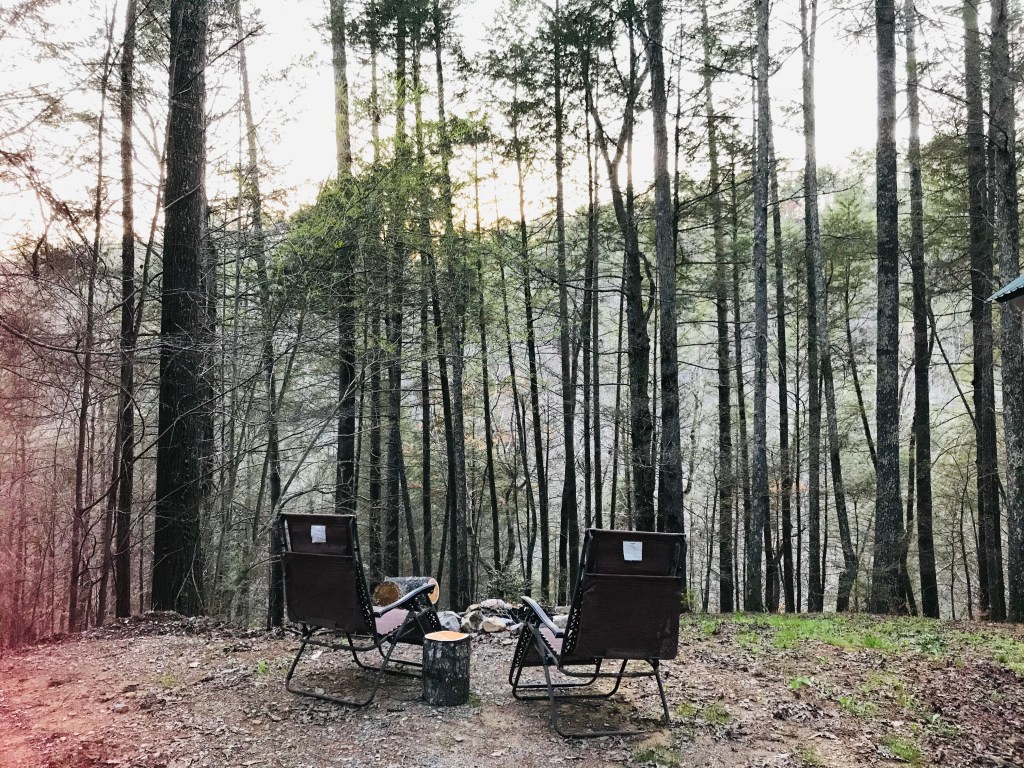
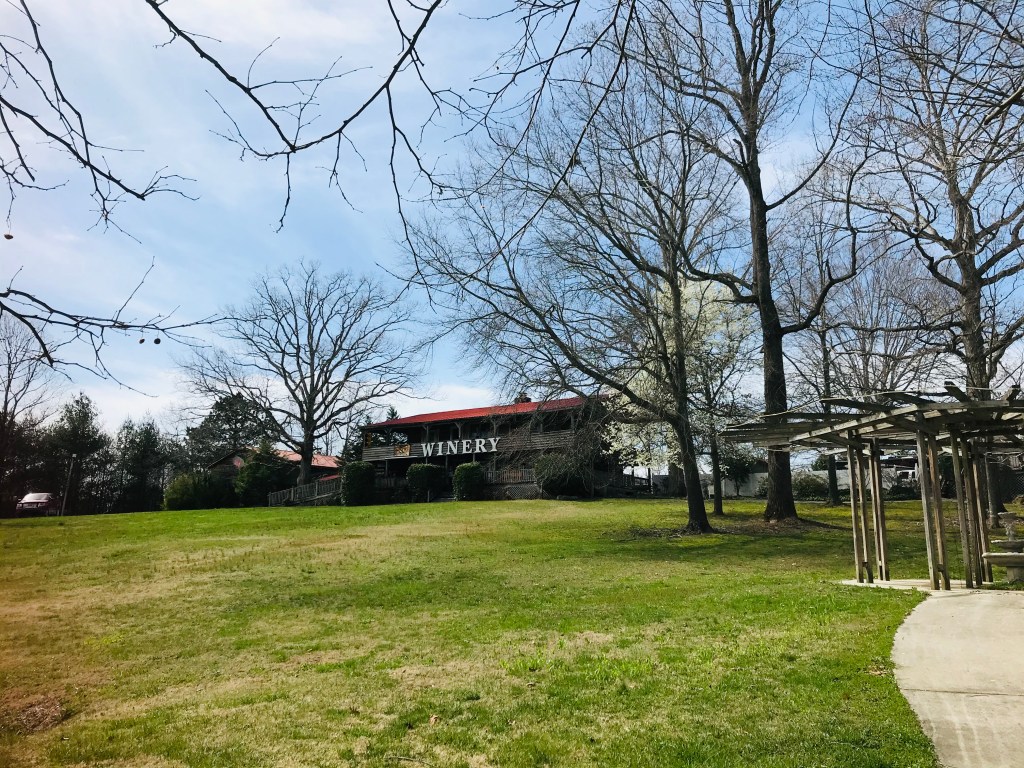
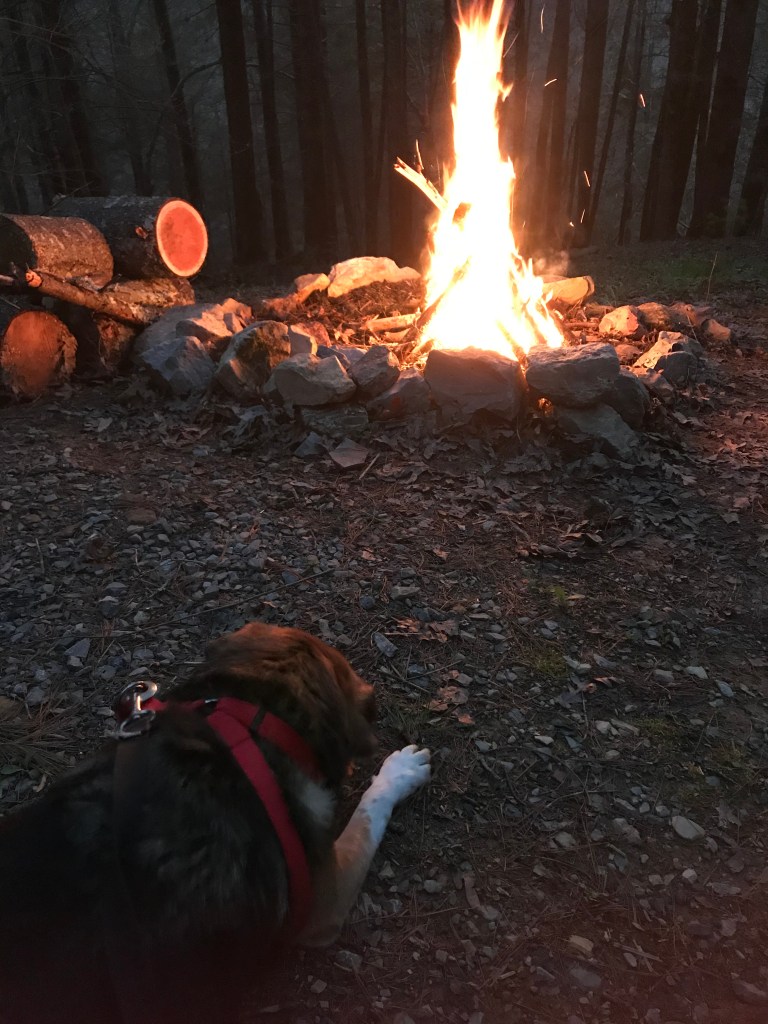
We decided on a 4 day trip to Tennessee (as we typically do!). We stayed busy by hiking at the nearby parks, having bonfires, soaking in the hot tub, watching movies, and stopping in at the local Winery.
When planning to travel on a tight budget consider these 5 things:
- Travel somewhere within a 6-7 hour radius so that you can drive and pack all the items needed.
- Bring your dogs with you to save money in boarding costs or paying pet sitters who stay in your home. For our beloved cats, our family is able to come in to care for them while we were away.
- Find a place outside of main attractions and tourist hot spots. This will provide a secluded, peaceful setting and force you to enjoy the outdoors! Nature is free. No shopping available, so no money being spent going from shop to shop!
- Pre-plan all of your meals and bring everything with you to cook! Be sure to bring other necessity items such as aluminum foil, seasonings, and oils. We even brought our rice cooker, which was an awesome accessory to have!
- Find a cheap airbnb for $100 or less a night and stay for a long weekend (3-4 days). You’ll want a place equipped with a kitchen and all the items needed to cook meals there! The more secluded, the less it will likely cost per night. Find a location near state and national parks to keep you occupied!
Planning a short trip like this allows you to decompress without breaking the bank. Our budget breakdown: Lodging stay less than $500. Shopping and attractions $35. Gas & Miscellaneous Items less than $200. In total, less than $800 was spent. Being frugal doesn’t mean you have to sacrifice, it just means you have to improvise and maximize your experience! At a time where we are all constantly plugged in and always on the run, time away from all of that can really reset your buttons and prove to you that you can live without always being connected to your phone.
Although for us financial freedom will come through passive income and appreciation in properties, financial freedom also comes through being smart with your money and having it stretch as much as possible along the journey!

Be sure to subscribe to our blog to receive the latest posts made! Thanks to all who are already following along with us on our journey!
Our Second Rental Purchase

In December of 2017 we found and purchased our second rental property. Once again we are starting a rehab in the middle of winter! Great timing, I know. We learned a lot of lessons with this property because it was much more of an extensive rehab than our first from Emison (refer back to post from August 6th, 2020).
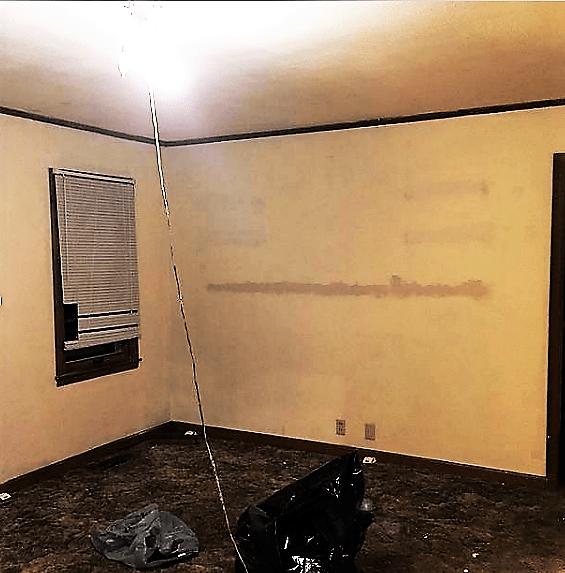
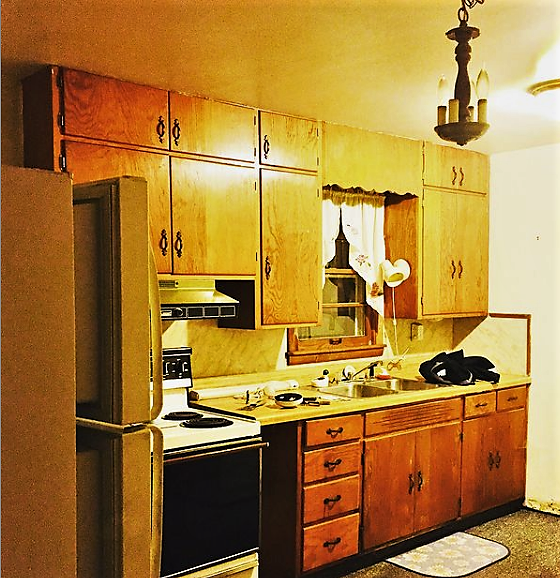
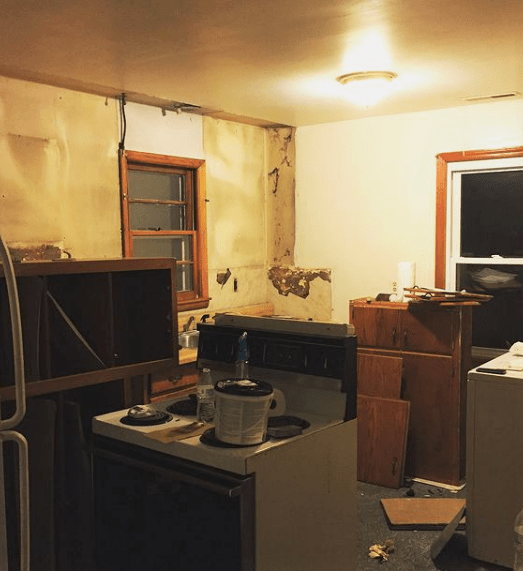
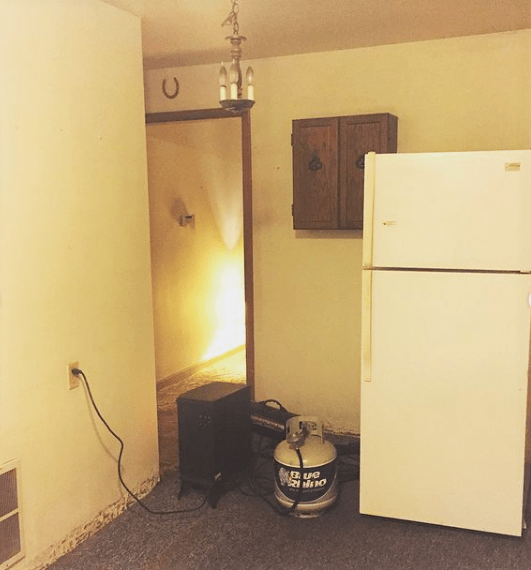
We knew we were going to have to replace the flooring. There was wall paper hanging off of the walls. We had one wall that needed a new skim coat applied that had a piece of plastic paneling over the crumbling plaster. This was the first property that needed a complete kitchen and bathroom remodel! We had plumbing issues that needed to be addressed and re-run. A bug problem that had to be taken care of by hiring an exterminator. Painting to do. Outdated lighting and electrical outlets to update.
And that’s just the tip of the iceberg.
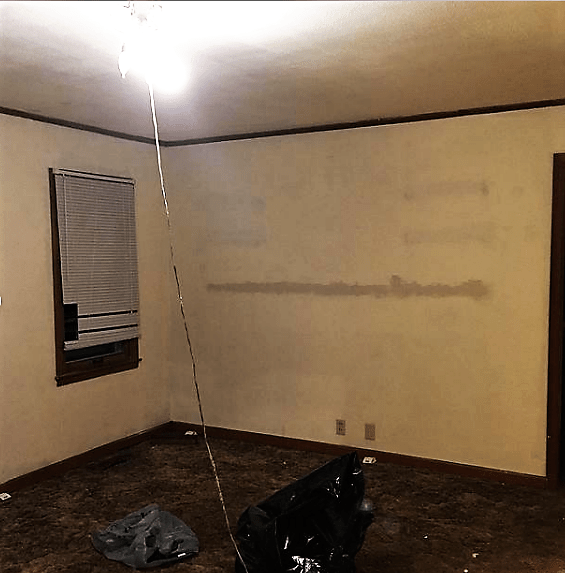
Please keep in mind that during this time we had no intentions of creating a blog to share our experiences, so the photo quality of our “befores” are poor. Try to overlook those, if you can, and enjoy the stories along the way!
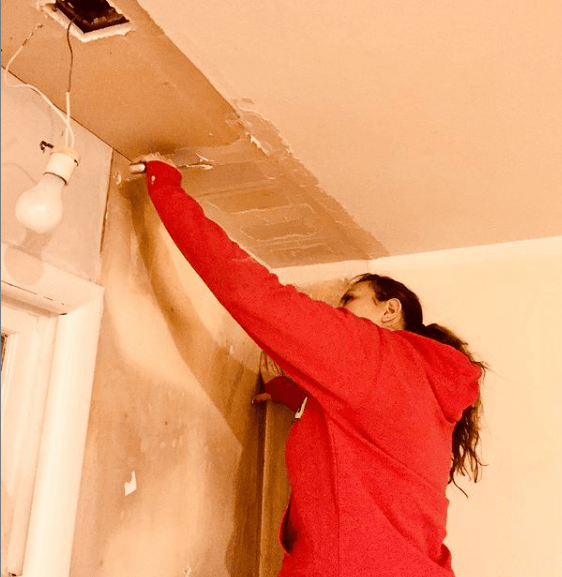
Trying to stay warm while filling in massive holes!
And of course, we failed to get the heat turned on before closing, so Danny and I were bundled up to work over there!
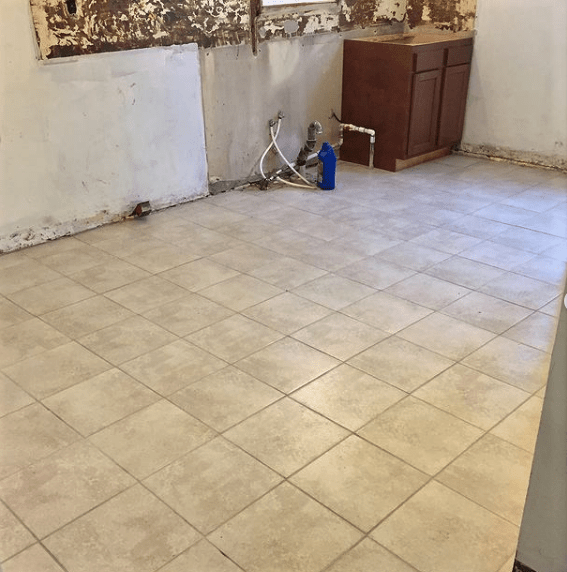
The first thing we had to tackle was to tear out the flooring. The stains were gross and the smell of urine (and other things) was overwhelming. Once we pulled the old carpet up we realized that the entire house had been tiled at one point. Danny took the time to pop all of the tiles up and get the concrete floor ready for carpet.
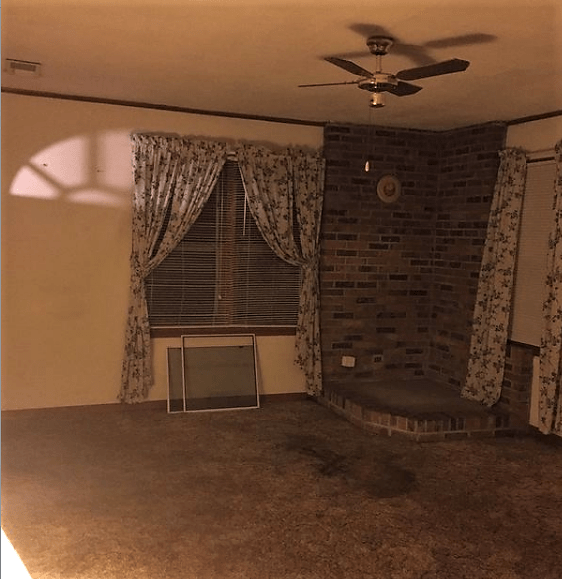

Here you can see, we have some huge patch work since there were these very long wooden shelves that were installed with large metal dowels. The curtains were one of the first things to get rid of and we began to pull up the stained 1970’s carpet.
Stay tuned to see the progress as it unfolds! It’s a big transformation.
Thanks so much for following along and be sure to subscribe to our blog for the newest posts released!
5 WEEK TURNAROUND TO FRESHEN UP A TIRED AND WORN OUT PROPERTY!!

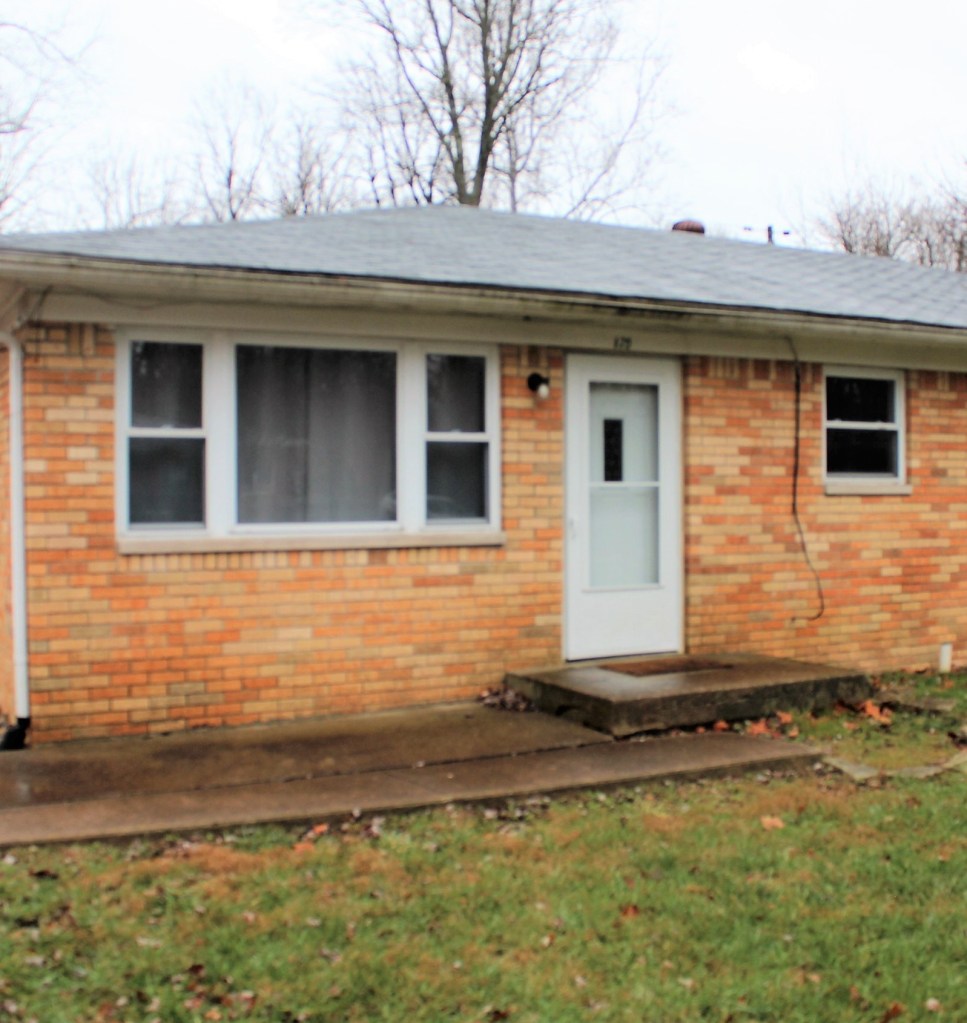
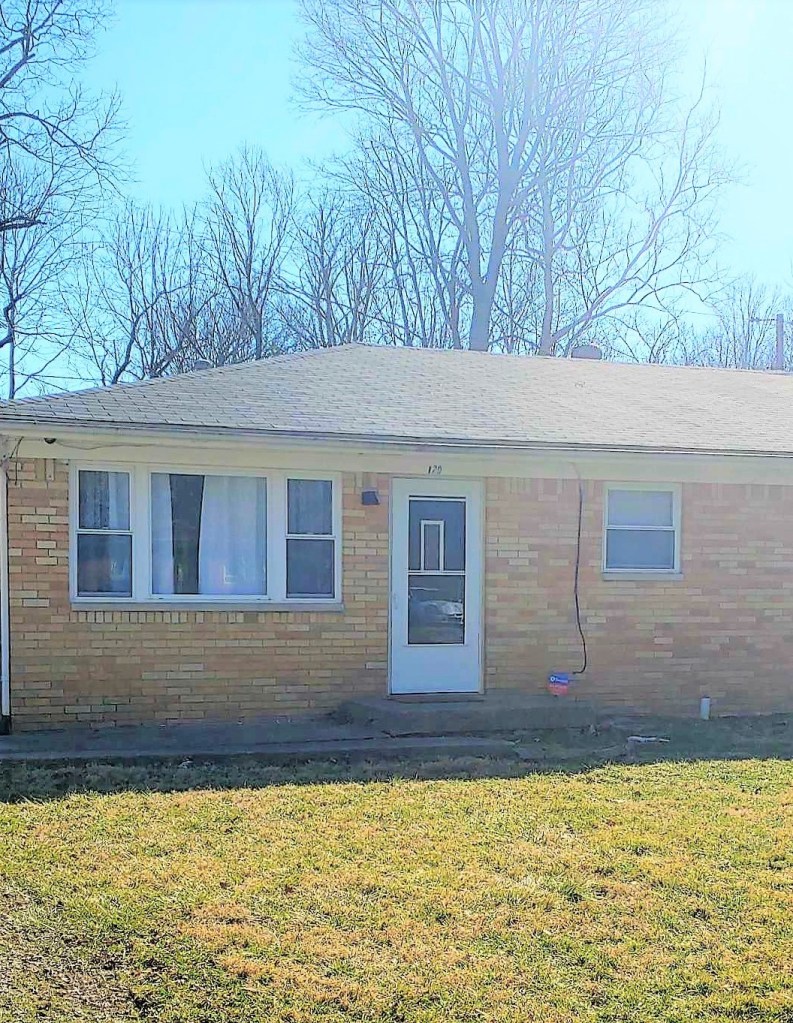
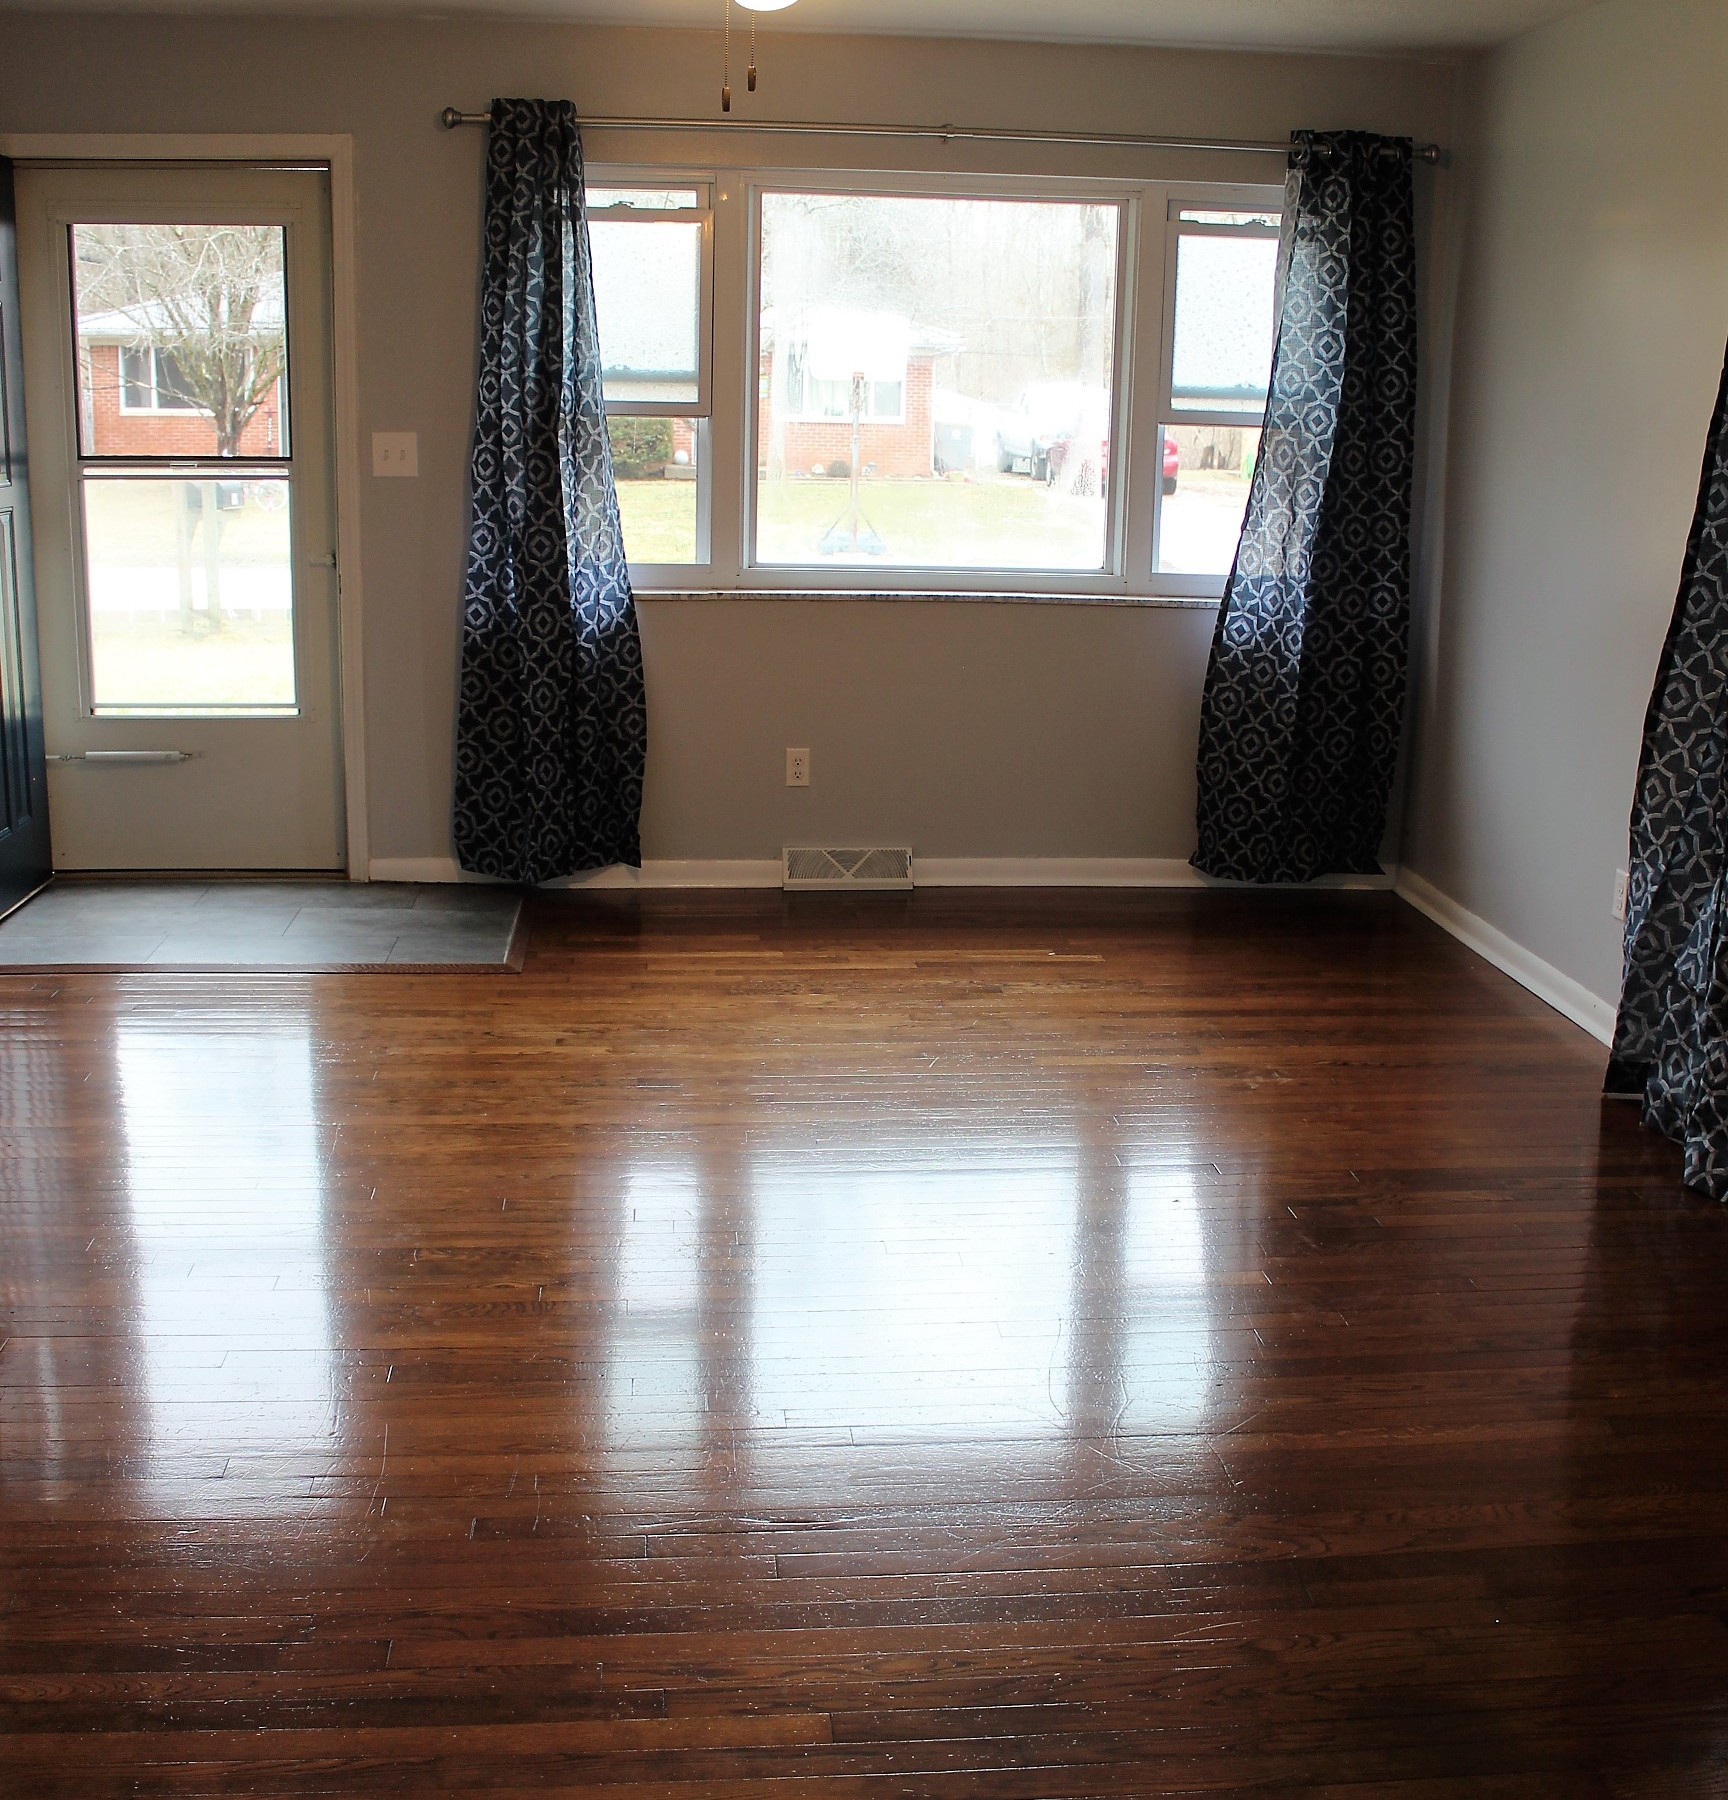
Sometimes a house just looks very old and tired. The paint on the walls looked dingy and the almond color outlets were old, filthy and well, almond. We are not fans of off-white or almond colors in our rentals. We prefer bright white to give it a clean appearance and contrast with grey paint. The wood floors were also dated and worn out. In all of the properties we work on, we know there comes a time when an interior is begging to be made new again, which is exactly what we offer with all of our properties!
With the exterior we spruced it up by painting the entry door a dark blue called Mid-night hour, and replaced the porch light with a simple, modern, style. Also, the new interior curtains helped to clean up the appearance from the outside!
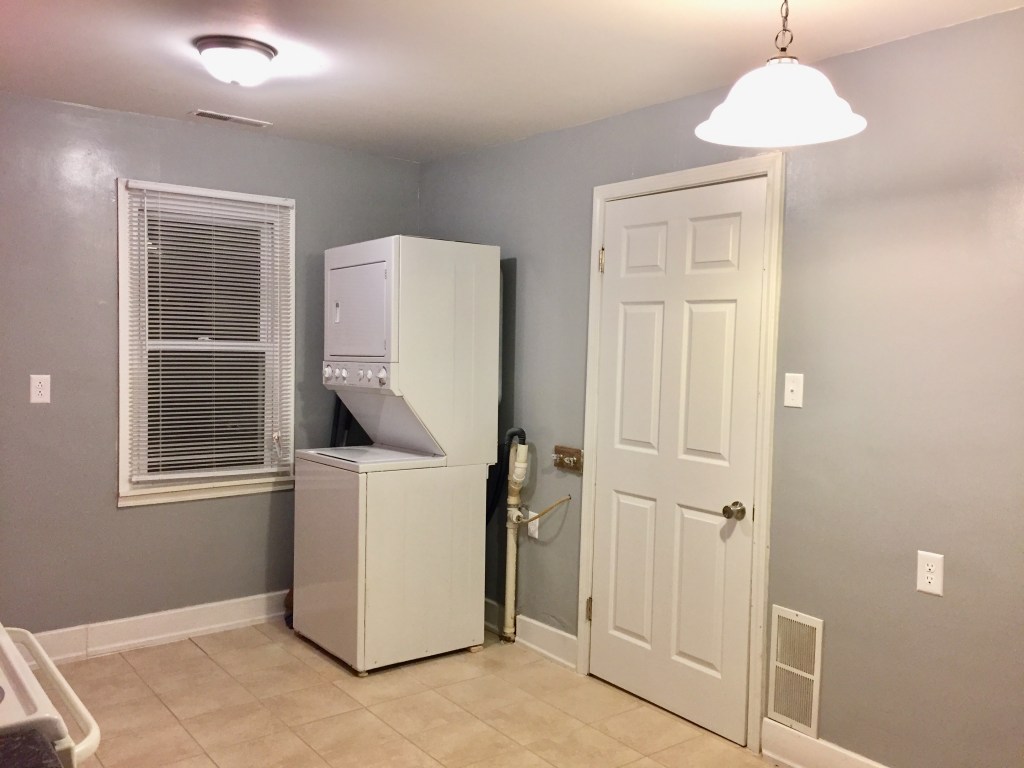
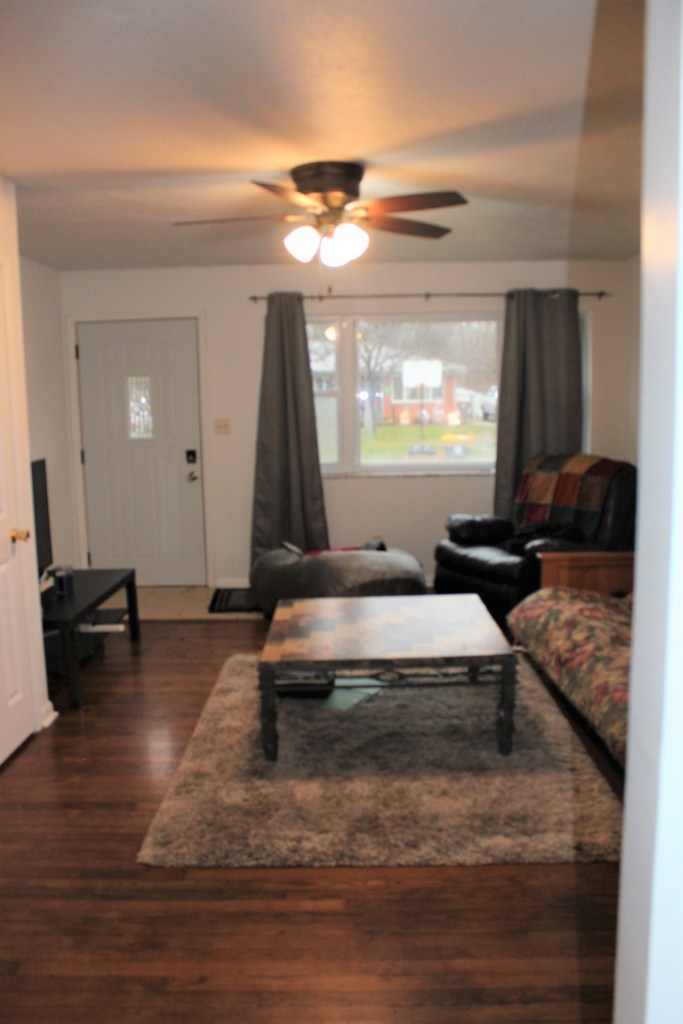
Throughout the entire house, we painted the off-white walls to a fresh grey (our go to color!), and we gave the baseboards a fresh coat of bright white! We replaced the old tile at the entryway with a dark vinyl durable tile. When the tenant moved out, he took his curtains and curtain rod with him. We needed to add those back in to give the room a complete look. The curtains also match the new front exterior door color! We also took this opportunity to change out all of the old lighting fixtures and replaced them with LED lights. If we decided to keep the existing fixtures, we replaced the bulbs and installed LED bulbs. The flooring was also cleaned and layers of poly was put on to give the wood floors their shine back!
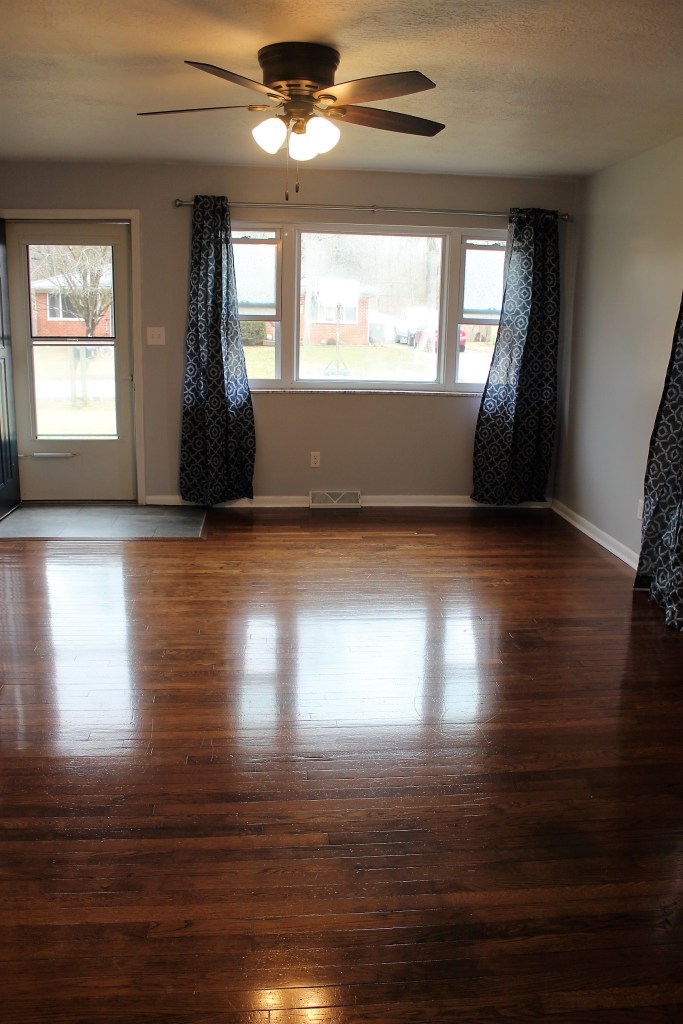
One thing that we focus on is flooring. If the floors can be refinished or given a couple coats of polyurethane to revitalize the look of the floors we want to take advantage of that opportunity! If we’re looking at either replacing carpet or laying new floors, most of the time we’ll opt to install new vinyl floors. Usually these projects can be completed on a weekend. In this case, we were lucky enough to already have hardwood floors!
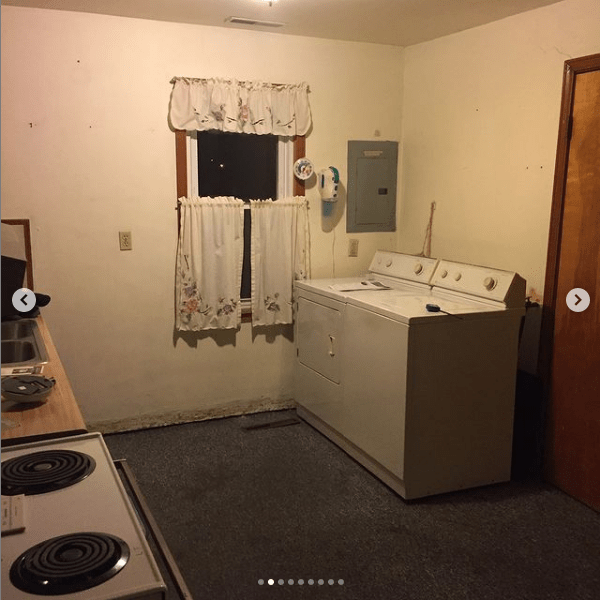
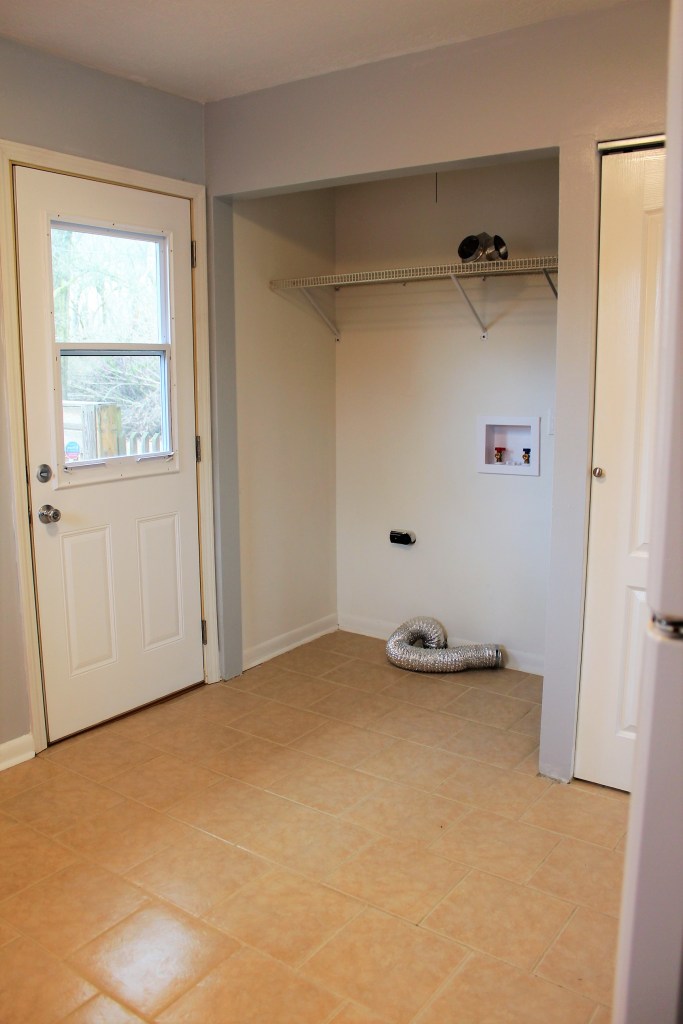
In the kitchen we replaced the old faucet with a new stainless steel faucet. A small 30 minute project that gave us great results. The oven was very dated and needed to be replaced. We put in a new one with a white oven hood. Keeping the black one wouldn’t have matched well with the other white appliances. We freshened up the old cabinets by giving them a new coat of polyurethane and new hardware. The poly brings back the sheen on the cabinets and makes them look a lot better! One other item on our list was to replace the old, rusty, leaking washer hookups. We had a plumber come in to install a new hookup box on the same service call he rebuilt the toilet. Both are things that we could have accomplished on our own, but having these done while we were both at work was one less thing we had to tackle!

One other project that has HUGE impact is the walls! If there are holes in the walls or old patches that weren’t done correctly, we’ll take the time to fix them. Once we have the walls in good order we take on the task of painting them. We use a standard color, Elemental by Pittsburgh Paints that we get at Menards. We also pay attention to the door and window frames and the baseboards, giving them a fresh coat of bright white paint! In the master bedroom, we also had to take the time out to flake off ceiling paint, re-texture, and paint the ceilings. Everything in a house needs painted!!! Once we had the walls painted we installed new blinds, doorstops, switch covers and outlet covers.
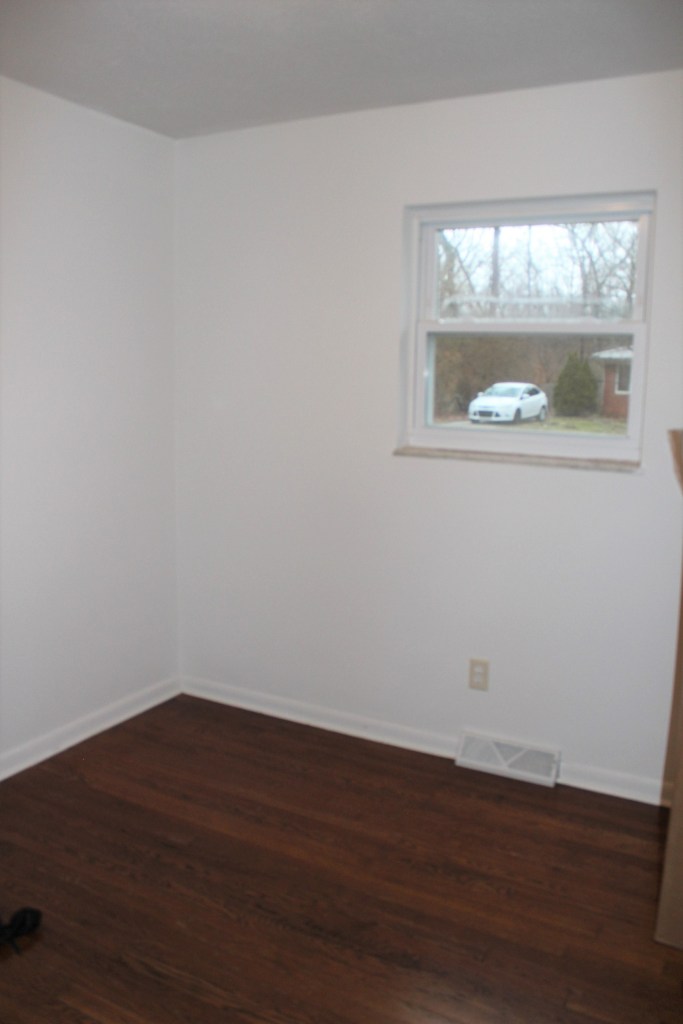
Before 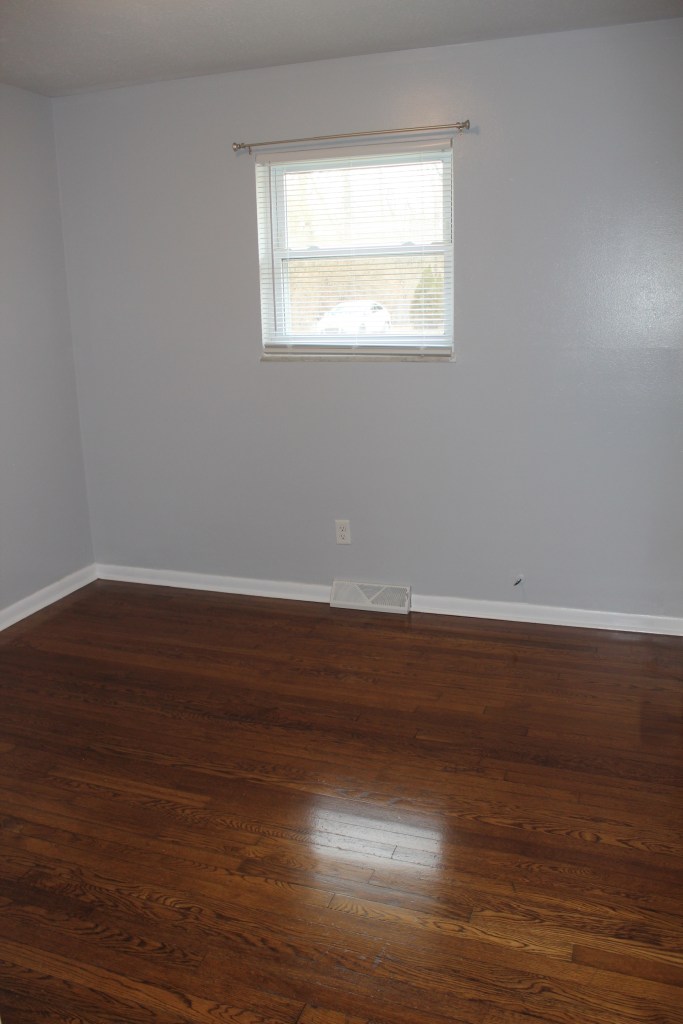
After

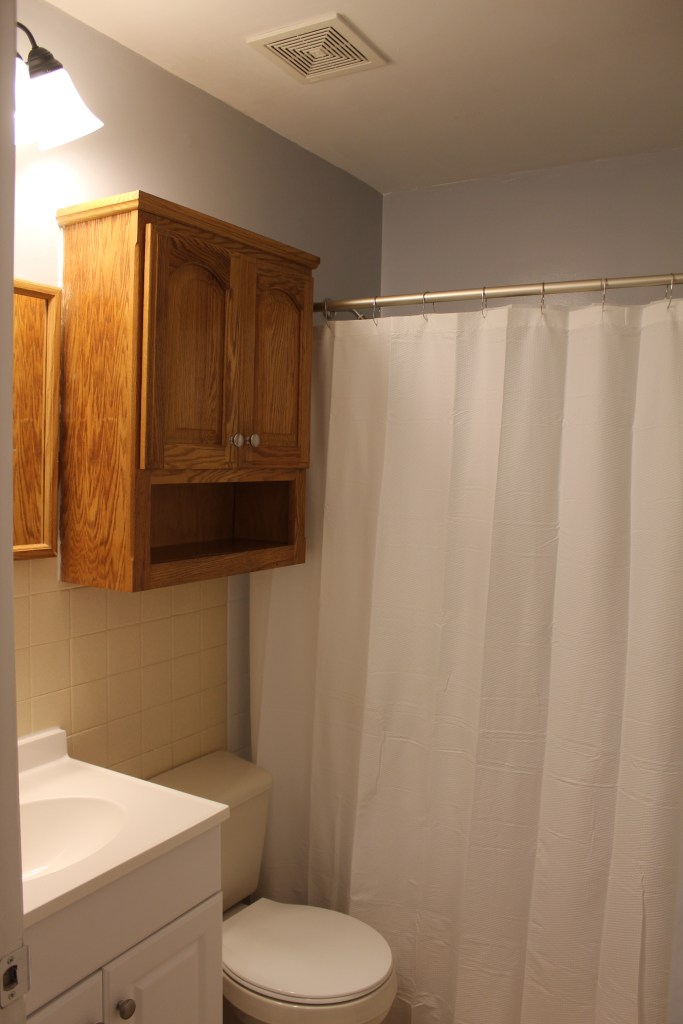
The bathroom needed a little attention as well. We cut out all of the old caulk around the tub and shower and add new. We painted the walls, baseboards and door-frame. The fan cover was hanging, so Danny fixed the wire that holds it in place and reinstalled it. The medicine cabinet also needed a fresh coat of poly and we added new hardware to the cabinets. We replaced the old bulbs in the lighting fixture with new LED bulbs. A nice clean white shower curtain and new bathroom fixtures finished out this bathroom reset.
All in we spent almost every night and weekend doing this project and completed it in about 5 weeks!
Be sure to follow along by subscribing to our blog! Thanks to all who are following along. We appreciate your support!
5 EASY STEPS TO RENEW YOUR WORN OUT HARDWOOD FLOORS IN LESS THAN 2 DAYS!
The floors in this unit were looking a little tired and worn, so we decided to give them a quick refurbish! The polyurethane was starting to flake and peel. The luster had long worn off. Here, we’ll give you 5 simple steps to do a quick, low-cost turnaround without having to sand everything back to bare wood, stain, and put several coats of polyurethane on!! This project took us a couple of days. We started on a Friday evening and finished around noon on Saturday.
- Flake off any loose material, and lightly sand these areas using a fine grit sandpaper to smooth out the rough edges.
- Clean the floors. I don’t mean sweep and mop. You need to get them as clean as possible. Remove any wax or oil that may be on the floors. If there is wax or oil on the floor the new coat of poly will not adhere to the existing flooring. You need to get any and all debris up and off of the floor. We first swept the floors to get the loose stuff and then scrubbed any of the stubborn spots clean. Then we used a Swiffer wet pad mop. This is also your last chance to double check and make sure that you were able to remove any of the stubborn dirt and buildup.
- If you have areas that the color has faded, I would suggest using a small amount of water based stain to revitalize the color in the wood. If you are going to use a stain that is oil based refer back to step number 2. For this project we used Old English polish (which is oil based). This brought the color back, but we then had to wipe up the oil residue that was left behind. It is EXTREMELY important that you do NOT leave any oil (Old English in our case) on the floors when moving onto polyurethane! It will not adhere!
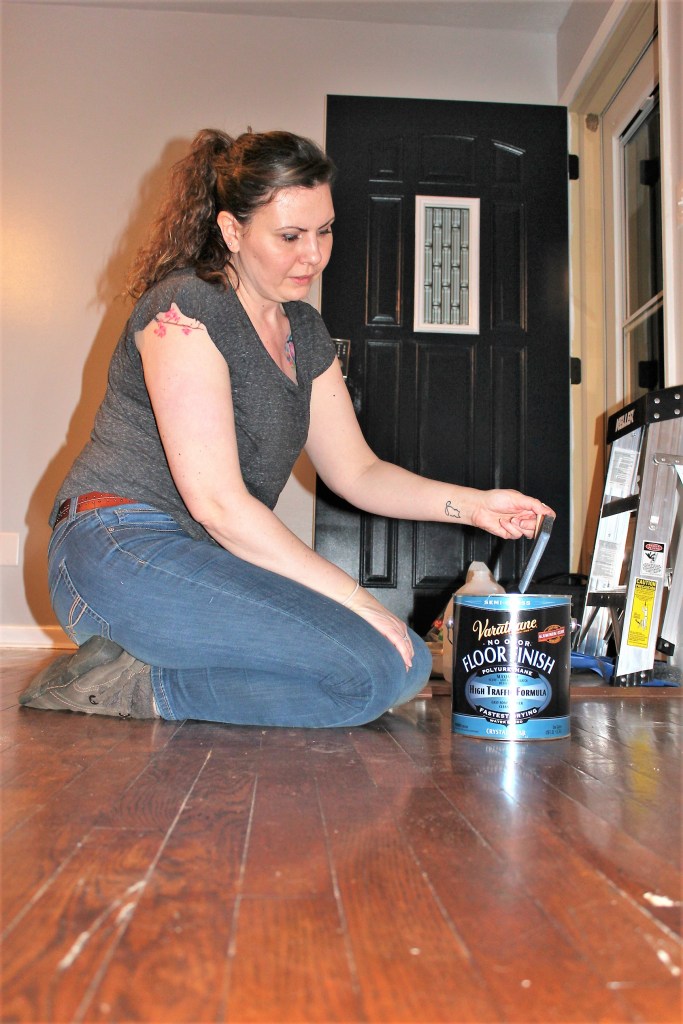
- It’s time for Poly!! Zella and I work in teams when we are coating the floors. She coats the outside edges with a 3-4 inch foam brush, while I do the application with a lambskin applicator on the rest of the floors. We used Varathane Water Based Floor Finish for this project. Never shake your poly in order to mix it! Slowly stir it using a stir stick!! You do not want to create a can of poly that is filled with air bubbles!!! Also, when applying with the foam brush, apply slowly so that you do not create air bubbles. Another tip when applying, Zella kept a paper towel with her in case there were any loose hairs that were stuck to the foam brush and when they got “too hairy” replaced them with a new one.
- Once the initial coat is dry and ready for the next coat repeat step 4. We just went with 2 coats for this project as we were just wanting to extend the life of the floors until we are ready to sand them back and refinish them completely. Bare floors usually call for at least 4 coats and some professionals suggest up to 7 coats. We think 2 quick coats of poly on this floor really made a huge difference. Tell us what you think!!!!
For a more in depth explanation of refinishing hardwood floors take a look at our “Refinishing the Hardwood Floors” post from July 9th 2020, when we worked on our first live-in flip!
Be sure to subscribe to our blog to receive the latest posts when they go live! You won’t want to miss next week, where we share before & afters!! Thanks so much to everyone who is supporting us on our journey!
