Our Unbelievable Journey
A couple getting out of the rat race through flipping homes and investing in real estate.
ONE STEP CLOSER TO COMPLETION

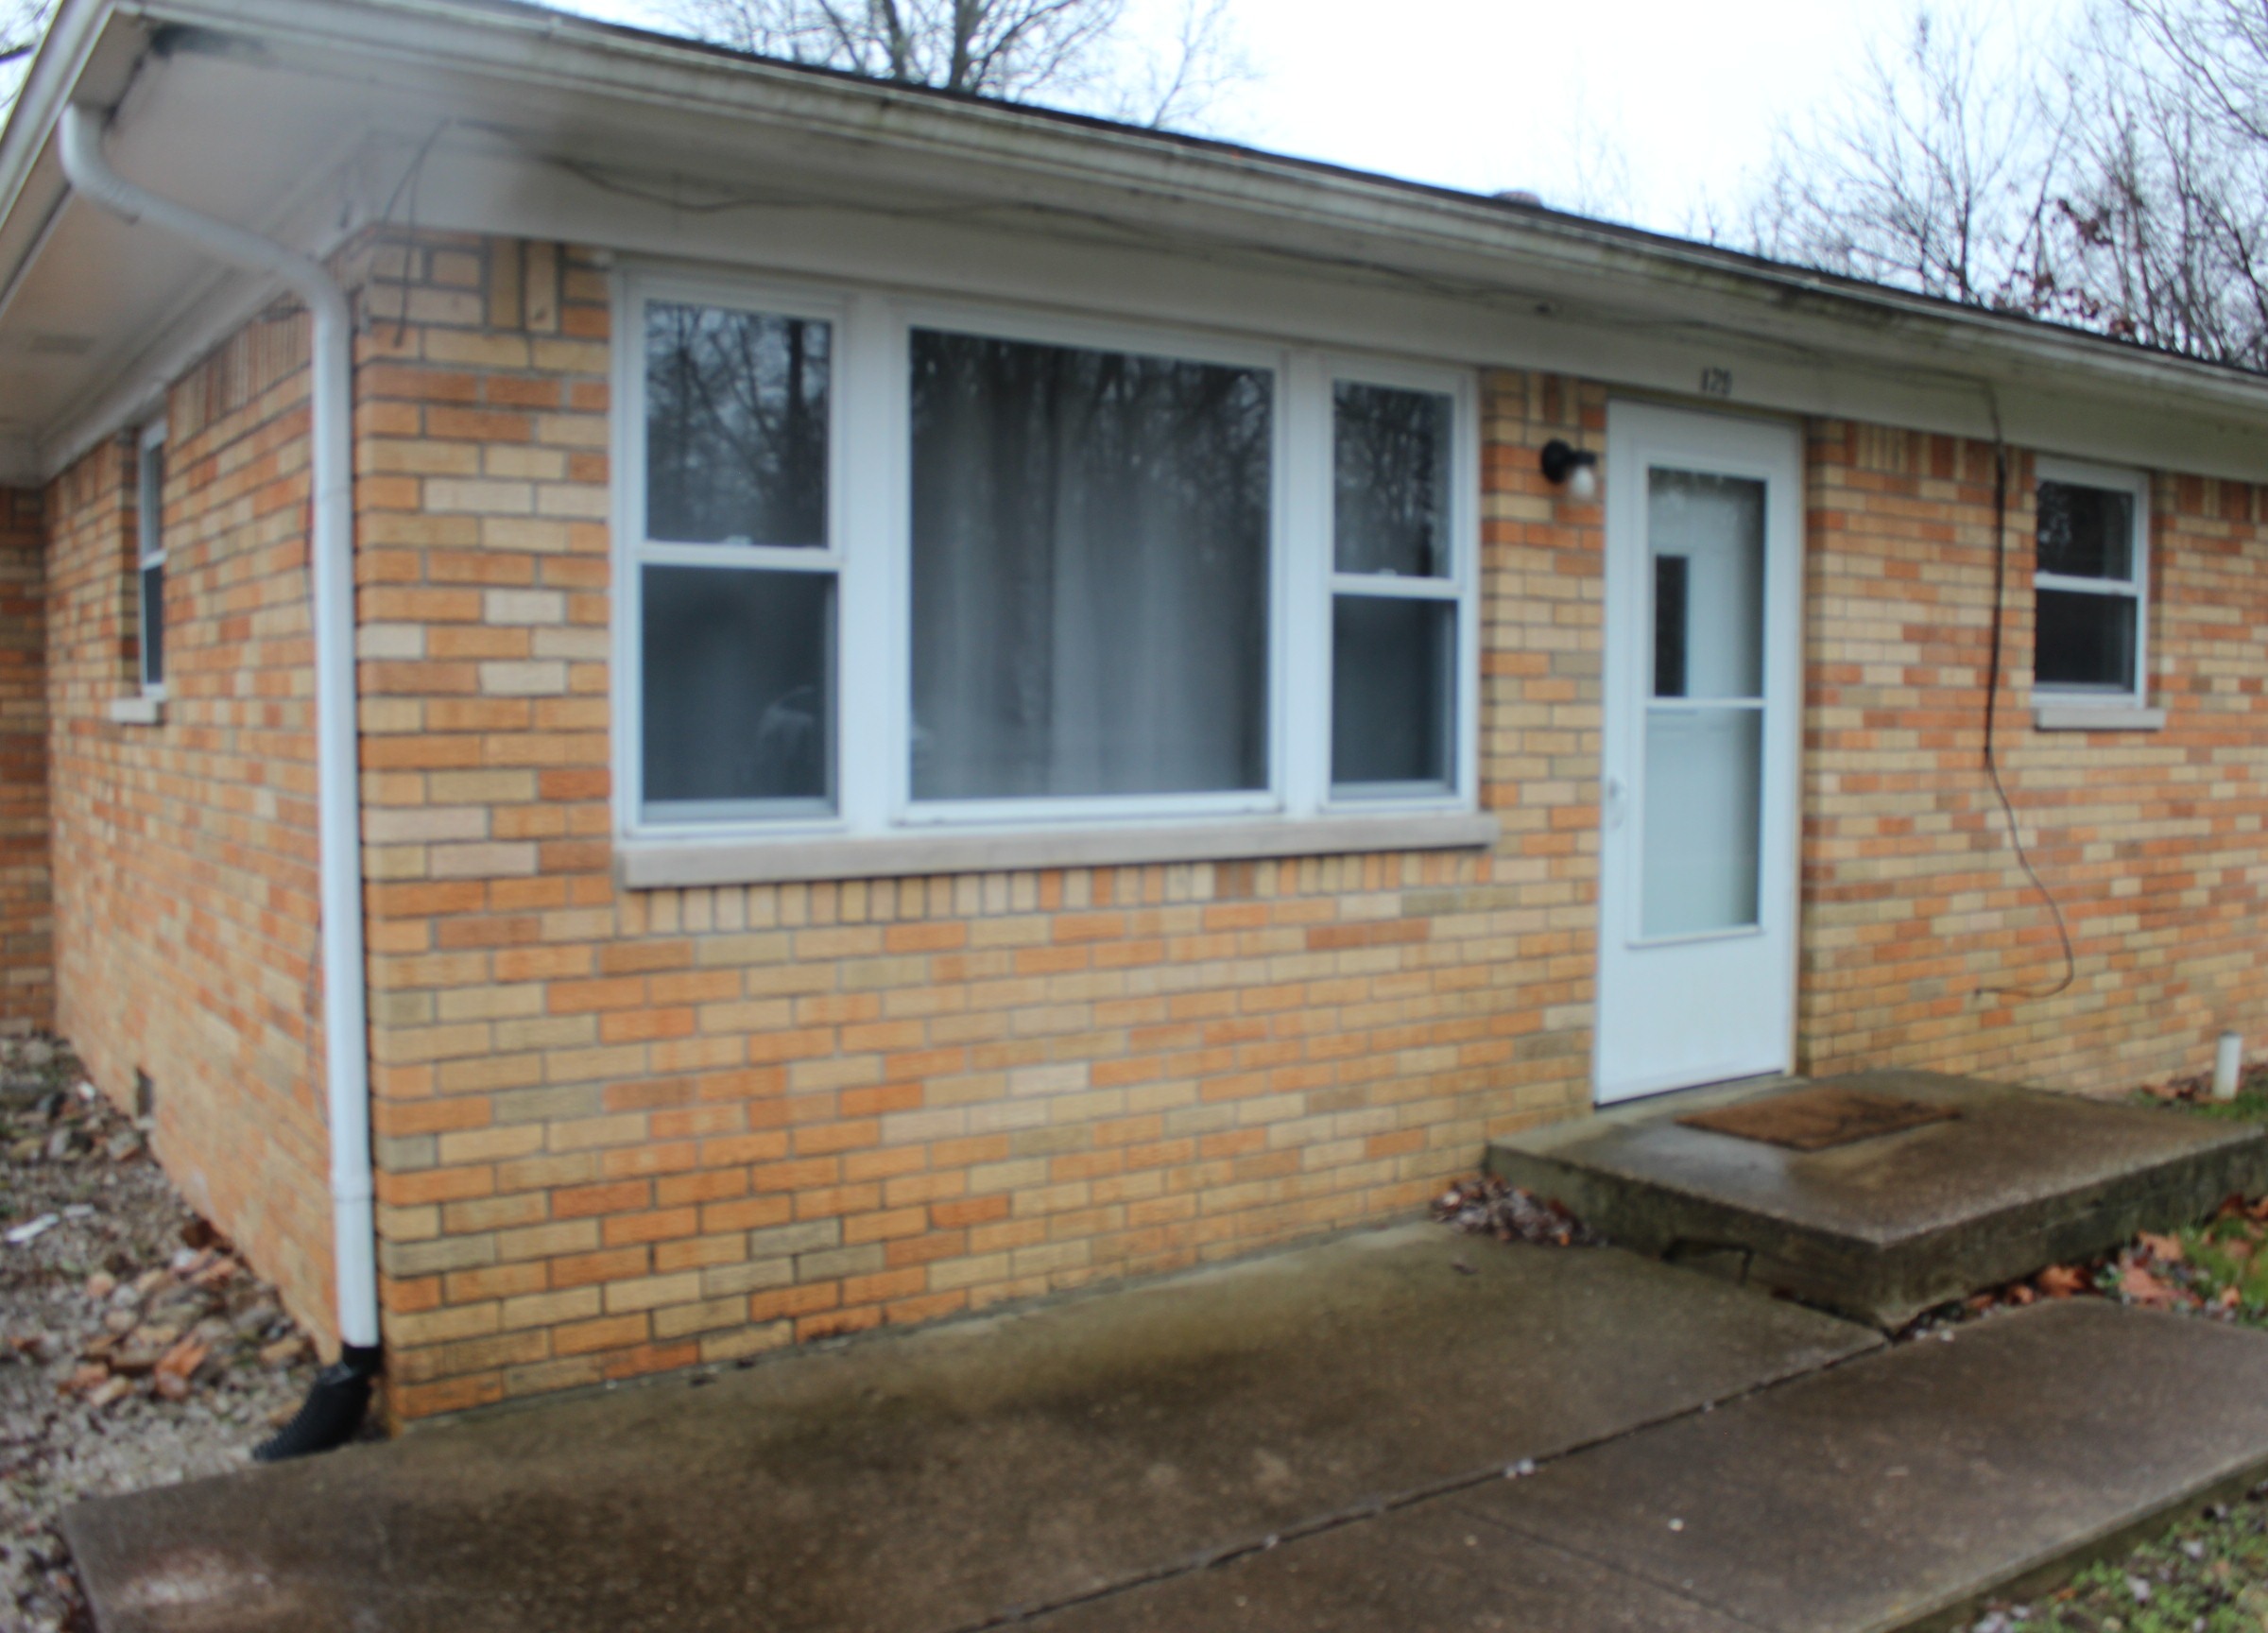
The front and back door were replaced last summer so we decided to take the opportunity, while we had the time, to go ahead and paint the front door to make it pop with color! Of course, I am the “professional painter” out of the two of us! We love this color because it’s dark, but its eye-catching! We picked up this Pittsburgh paint from Menards – the color is Midnight Hour. Consider having a nicer door with a window for natural light and paint it an appealing color since it’s the first thing your tenants will see when arriving to see the property! They say that the eyes are the windows to the soul, but the windows to the soul of a house is the front door.
We noticed that the washer/dryer hookup was old, rusted, and leaking. On top of that, the toilet was running for an extended period of time after flushing. In this case, it was best to just use a plumbing service to come and take care of these two items in one day (while we were both at work). If you do go this route, be sure you’re familiar with your service provider! We’ve learned this the hard way!


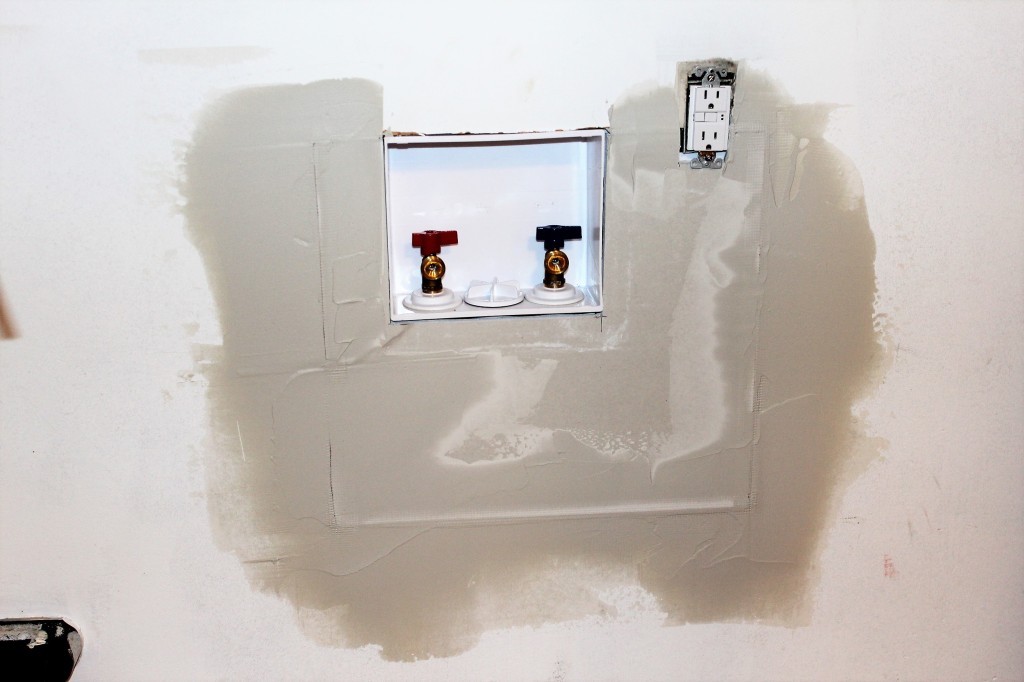
So, in order to fix the section of the wall that was cut away to fit in the new washer hookups, we needed to get a piece of drywall. We picked up a small 24″ x 24″ repair piece from Lowes. Danny measured and cut the piece to fit, taped the seams with drywall tape, and finished the seams out with several layers of mud. For a more detailed look at finishing drywall see our prior post, “Maximizing Space in a Small House” from December 20, 2020!

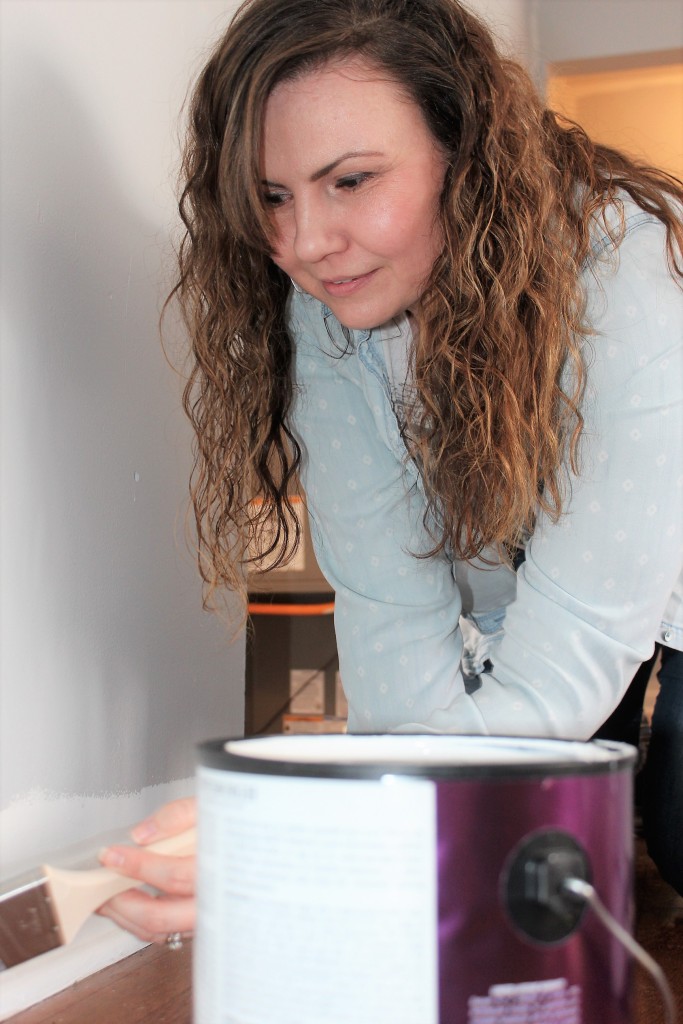
The painting never seems to end. Usually Danny is working on some project which leaves the “chore” of painting to me. I like to make sure our properties look fresh and clean! One of the most important aspects is to have nice clean walls and baseboards. I usually start with cutting in the top of the wall and then cut in around the baseboards, door frames and window frames. If Danny has time between projects sometimes he’ll help me by rolling the walls.
I make sure Danny does NOT cut in or paint tight spaces, especially since I do not tape off anything prior to painting!


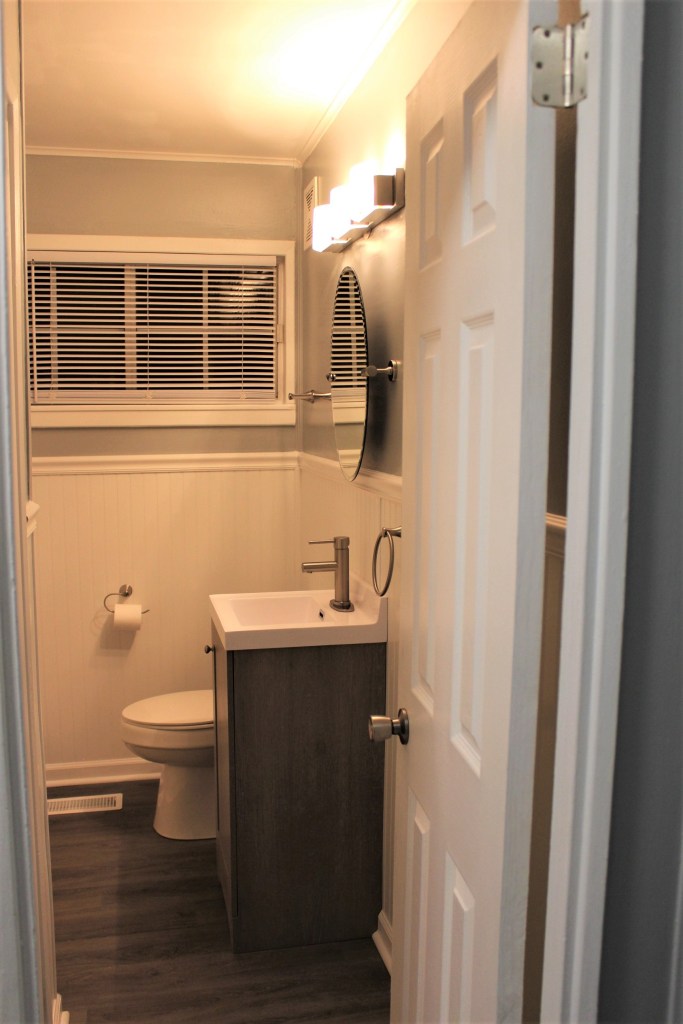
It’s always exciting to get to the point where we are adding in the finishing touches. Small things can make such a huge impact. NOBODY wants to step into a shower that has old ugly caulk that has mold or mildew stains on it. The best thing to do us cut the old caulk out and get the area as clean as possible. Once the area is clean and ready, using a tub and bathroom caulk, you’ll run a line of caulk around the tub and shower surround to make sure no water can get in behind the walls. Make sure to use an even pressure on the trigger of the caulk gun and run that bead at an even pace to get a good seam. Once you have the bead in place run you finger over the bead to smooth it out and push the caulk into the line. You want to make sure that you are sealing the gap up so water does not have a chance to get in. Typically Zella would do this job too, but with so much painting, she delegated this job to me:)
We always install a shower rod, liner and a nice white shower curtain in the bathroom. This helps make the bathroom appear nice, clean and crisp. Not only does this help to make the bathroom look refreshing, it also makes sure that tenants have what they need to minimize damage being caused by water getting everywhere!
Be sure to stay tuned for next week’s post, where we cover “how to” spruce up worn out hardwood floors with a few easy steps! Thanks so much for your support and to all of those who are following along! Subscribe to receive the latest updates of when a new post comes out!
SO MANY PROJECTS, SO LITTLE TIME!
Renovations can be actually, very monotonous. It’s the same processes over and over again, especially when you do most of the work yourself!
Danny worked on laying down new vinyl flooring at the entry way. The tile that was previously installed was too thick and was obstructing the door from opening correctly. He pulled up the old tile, and the plan WAS to put some new tile down (that we already had laying around!) BUT it wouldn’t work. Laying tile by the front door wouldn’t work because it would have sat too high and block the door from opening like it should. We needed an option that is thinner. We decided to lay a floating vinyl floor so we chose a tile that was easy to install and waterproof.


We’re still very much working on PAINTING, caulking, changing outlets/switches/plate covers! Trying to turn a unit in a short amount of time while we are still working 40 hour day jobs can be a daunting task (and an hour drive each way!), but we always work together to get things done. These small tasks I usually handle so Danny can handle the larger jobs!

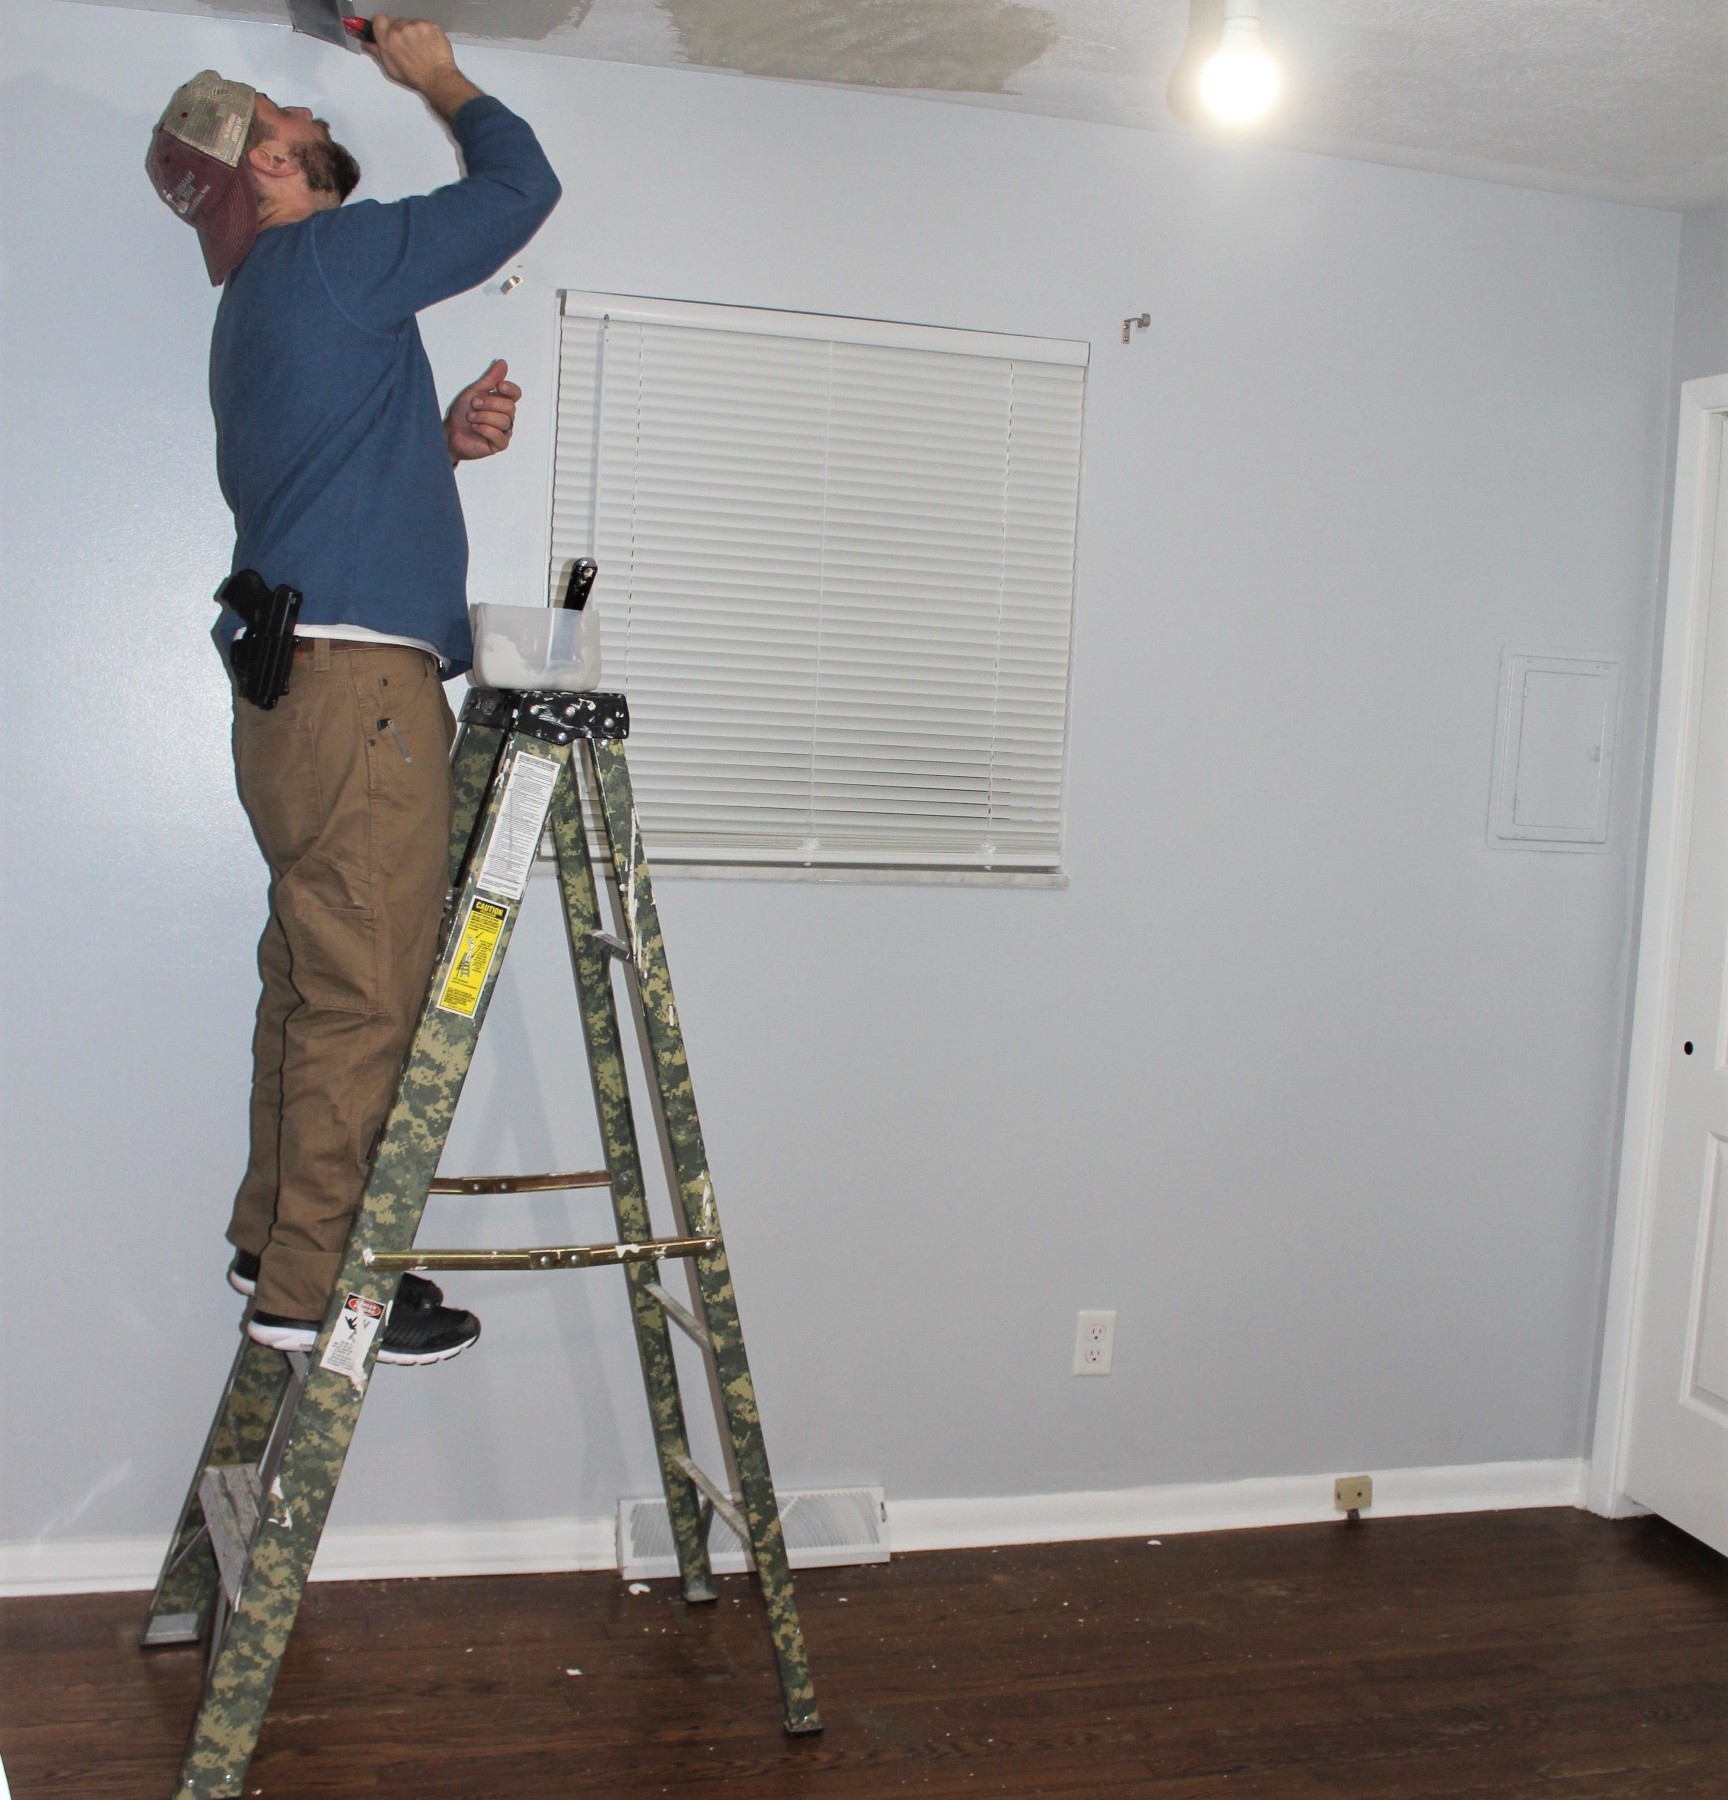
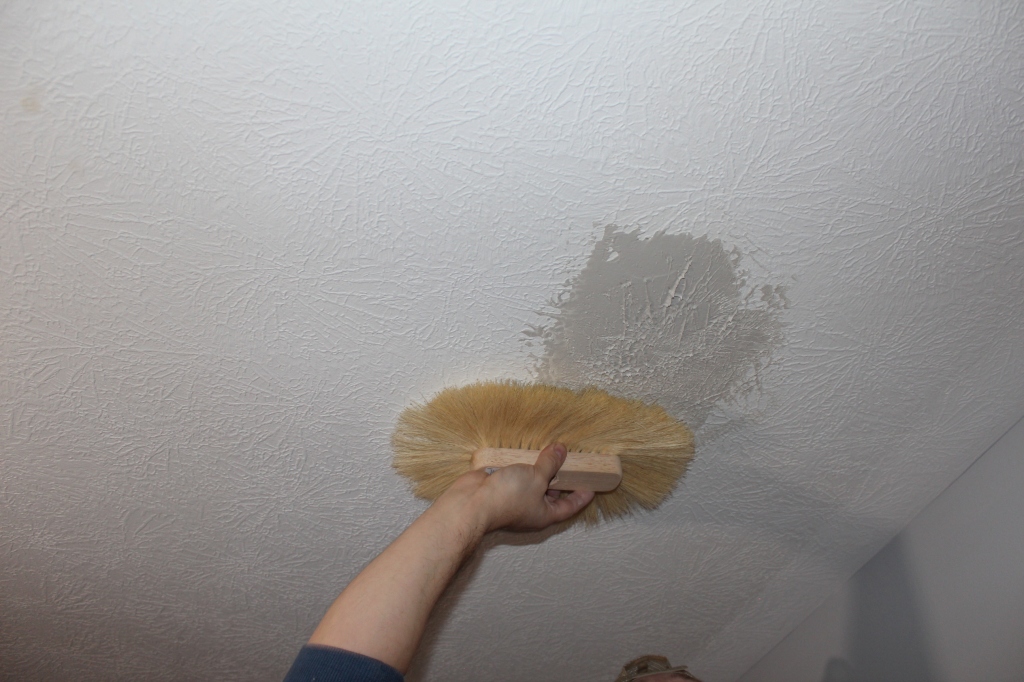
One of the bedrooms had some bad spots on the ceiling where the textured layer was cracking and flaking. Danny chipped the lose stuff off and put a skim coat of mud over the spots that needed patching. He had never had to try to match existing texture on a ceiling before so it was necessary to try to learn how to do this quickly. YouTube always comes in handy in these situations. He watched this video which really helped understand the process. https://www.youtube.com/watch?v=9l02eMhsRpQ


Replacing just a fixture can make a world of difference! We would typically replace the counters and sink as well, but in this case, we’ve decided to leave them (for the sake of time and money). You have to be careful to not dump too much into a property. Know it’s value and know when to stop. If you can’t make it back in your return, leave it.


Be sure to subscribe and follow us on our blog! You’ll receive the first notifications when we publish! Thanks to all of those who are already doing so! We appreciate your support!
GETTING STARTED ON OUR RENTAL REFRESH!

As mentioned last week, we plan (and are doing) a quick, low cost “renovation” to spruce up a vacant rental!
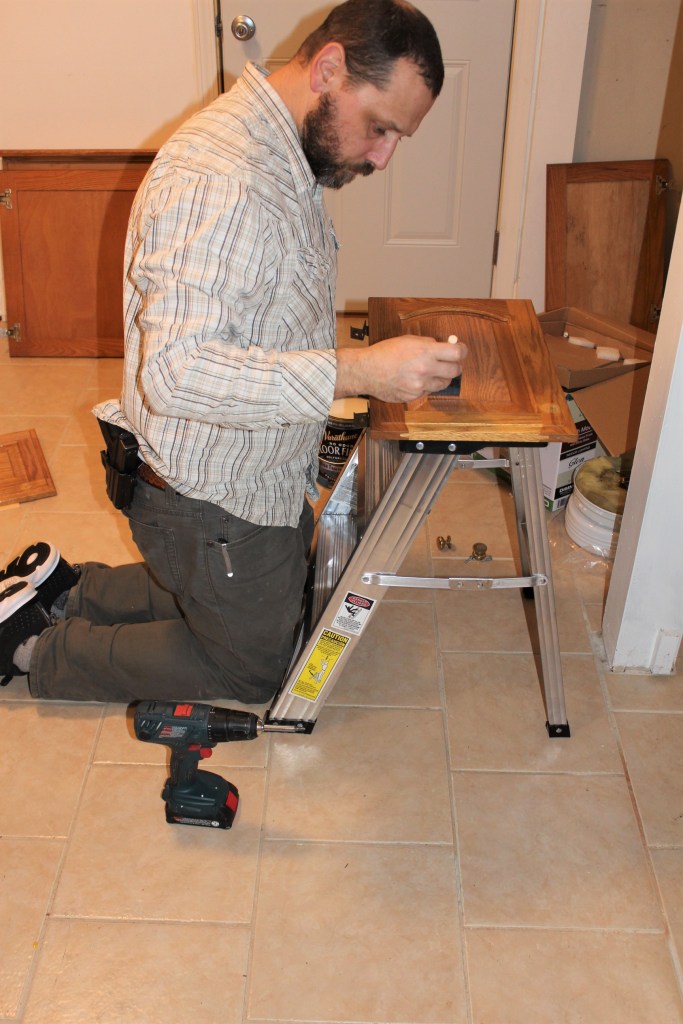
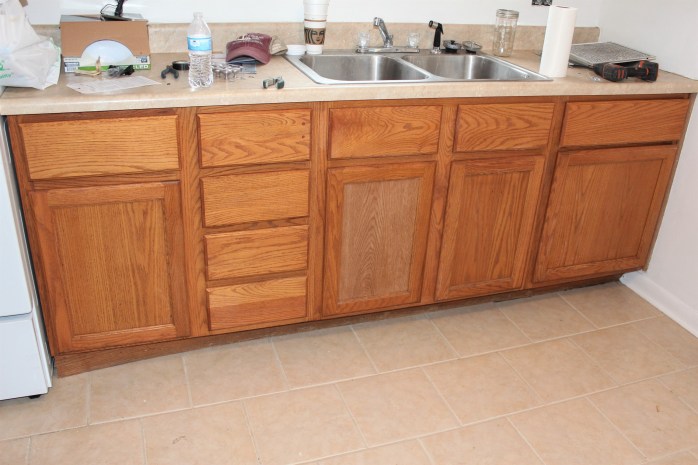
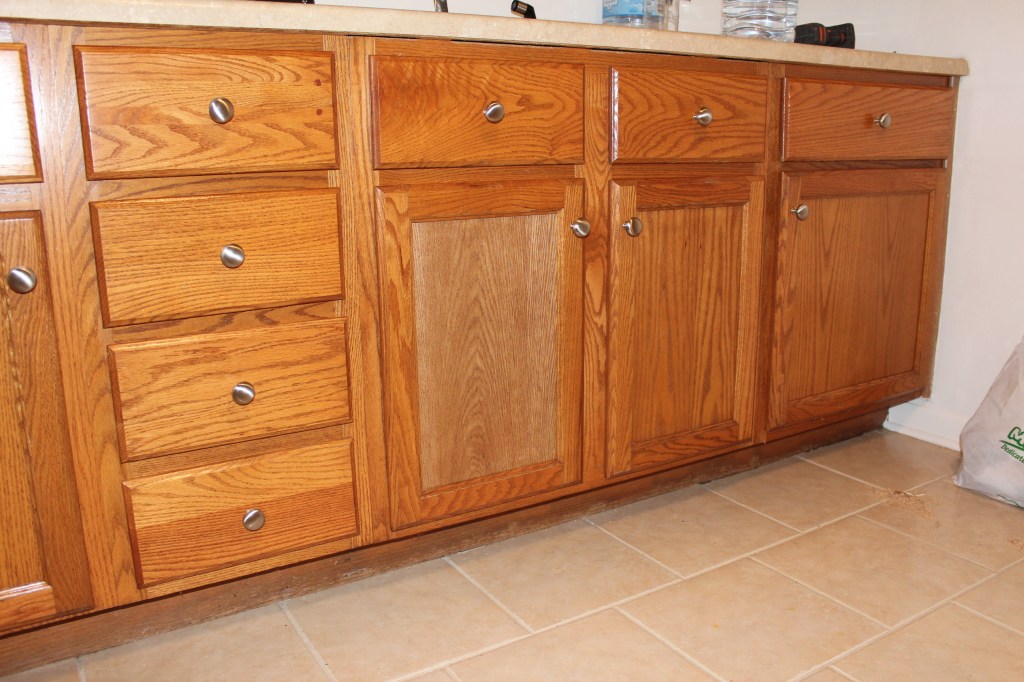
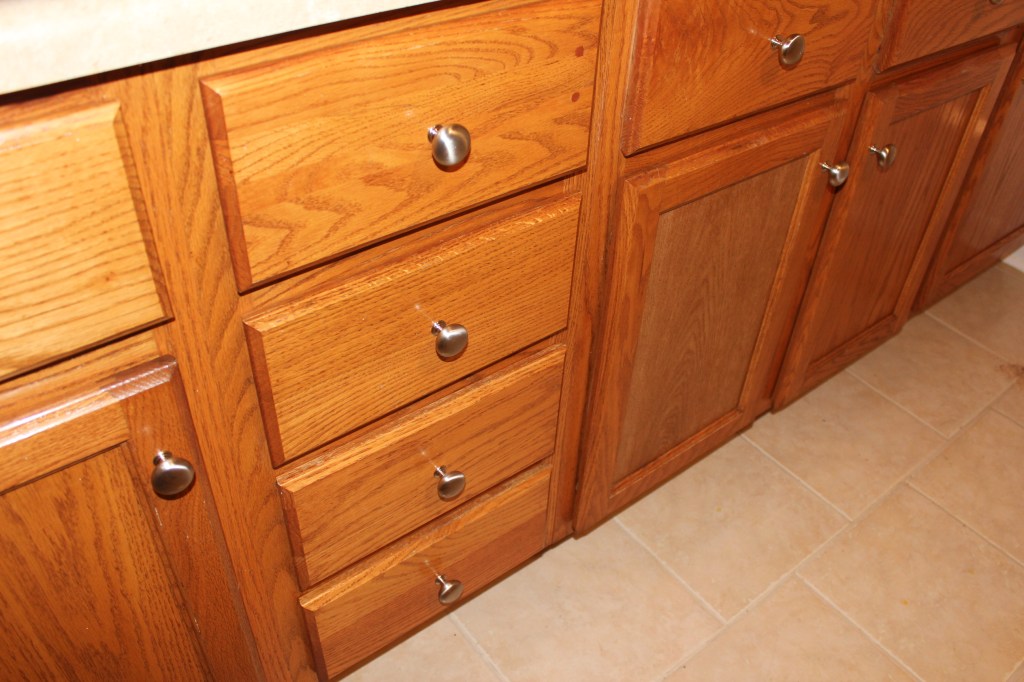
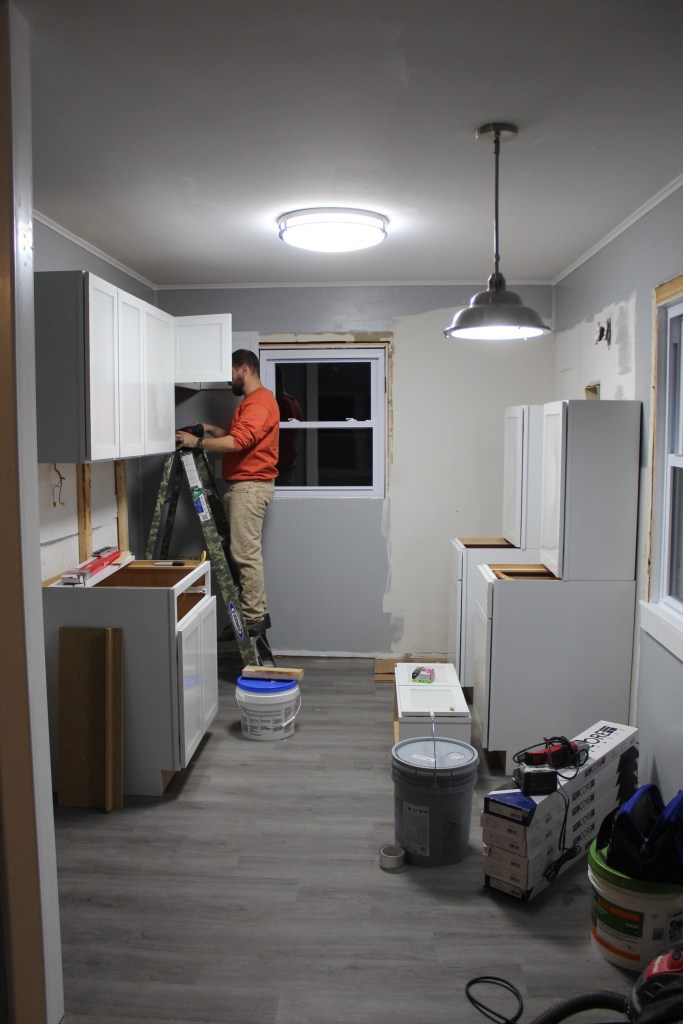
Danny started the kitchen refresh by cleaning the cabinets thoroughly before applying Varathane polyurethane from Menards. Adding a coat of polyurethane gives the cabinets a nice shine when you want to salvage what you already have. He had to take off the hinges so he could get a coat of poly on the doors as well. To finish out this project he installed brushed nickel knobs to give it a final touch!
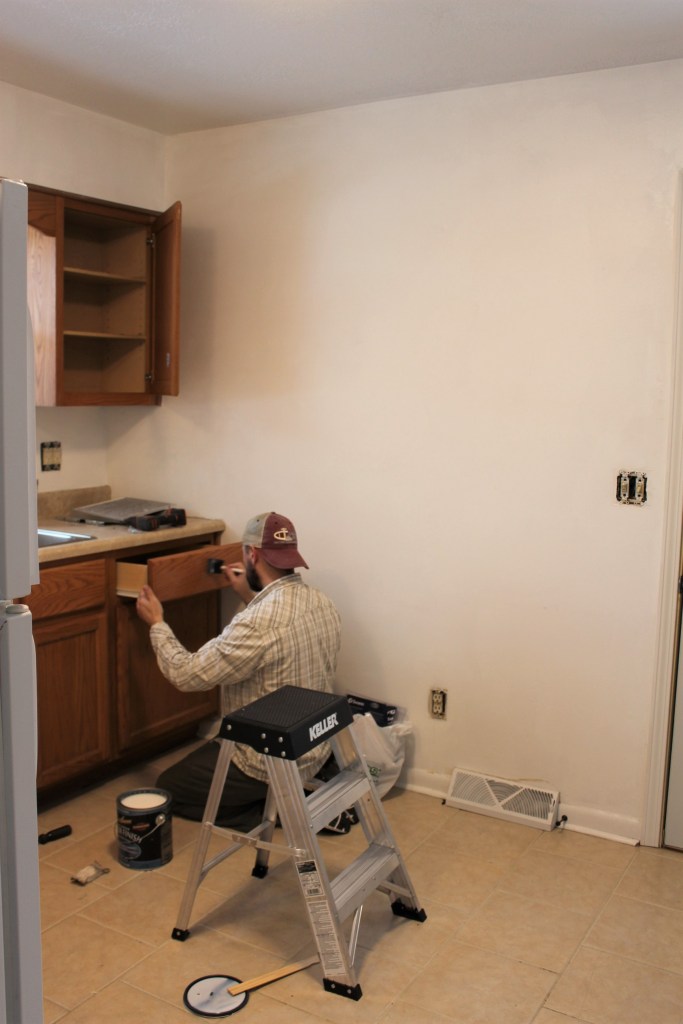
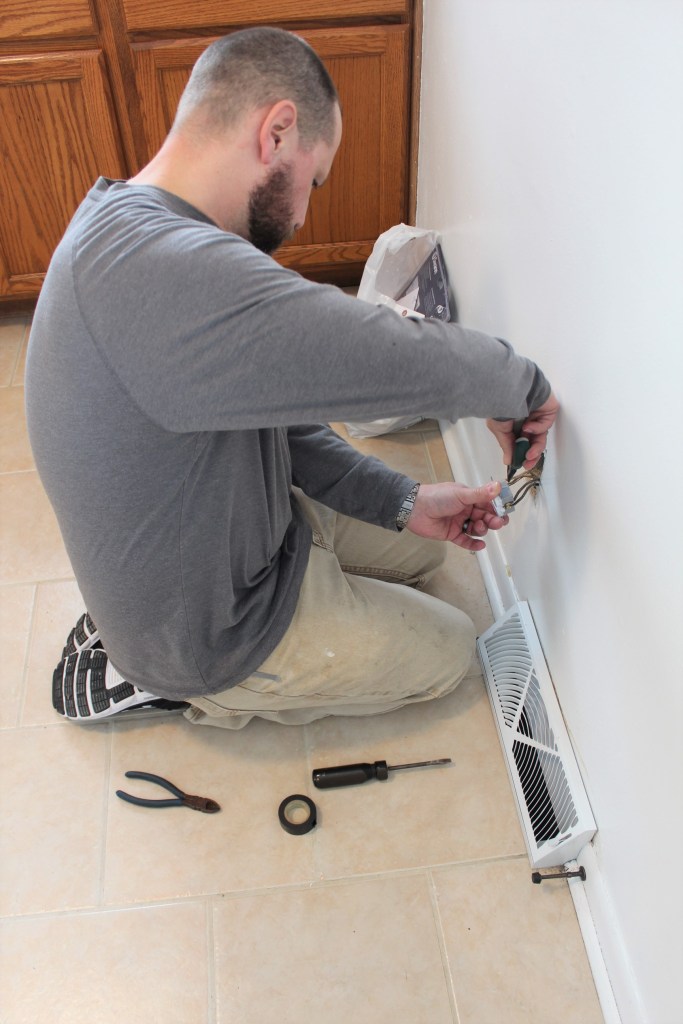
Next, he wanted to change out all of the switches, outlets, and face plates. Not sure if we mentioned this last week, BUT something that will help your place look freshened up is changing these out! He also wanted to change the old off white outlets and switches because they didn’t match the gray walls and white trim. We already had most of the outlets and switches we would need in our supply from previous renovations, so there wasn’t much expense added, making it worth making the change!
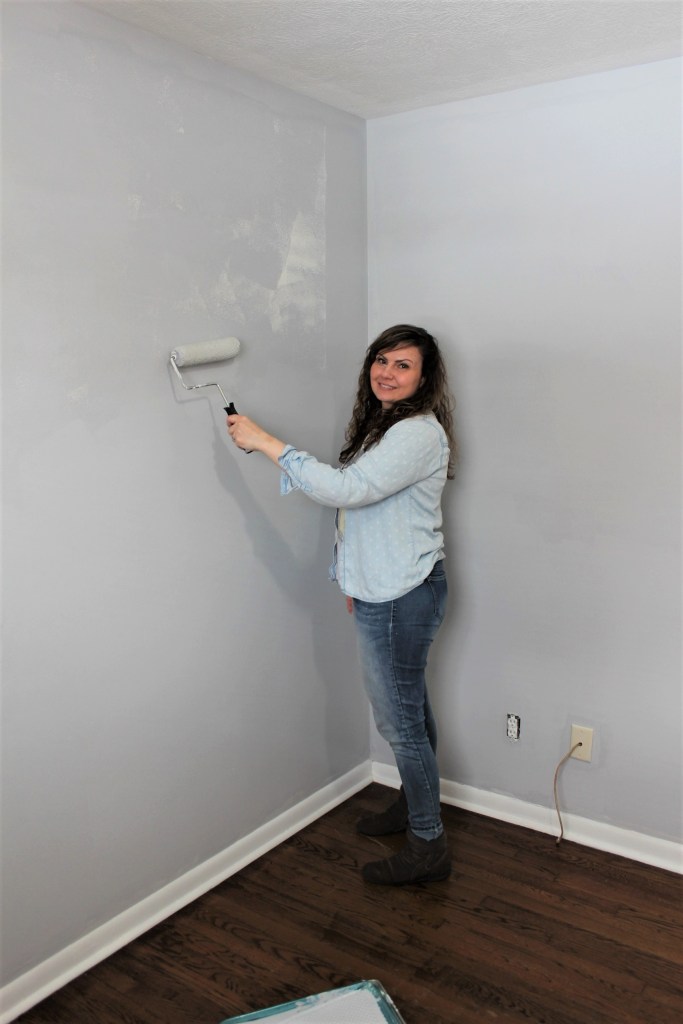
My job is ALWAYS the painter! No, I do not enjoy it and don’t find it to be a super fun activity! However; hiring professional painters is not in our budget and can cost $1,000’s! We’ve saved so much money by painting and doing the majority of work ourselves. So…I will do the majority of all of the painting for this rental just like I always do! I do not use painters tape, plastic, or any drop cloth. I do all of my cut-in free hand and if I drip, I just wipe it up quickly! The paint we are using is Pittsburgh Ultra. The color we generally use from Menards is Elemental. I managed to finished both bedrooms over the weekend!
Stay tuned for the finished product!

Be sure to subscribe and follow along to our blog to receive the latest notifications! Thanks to all who are supporting us!
5 EASY WAYS TO RENOVATE WHEN YOU’RE ON A TIGHT BUDGET AND UP AGAINST TIME!
Below is a list of some items to consider when working on a tight budget and needing to turn a property around quickly! Here are some steps we typically take:
Tip #1 – LIGHTING!!
Updating the lighting fixtures one of the best updates you can do. It’s quick, fairly inexpensive, and it helps make a property look so much better. Also, another tip is to use daylight bulbs! They really help brighten up the rooms and make them feel more open!

Tip #2 – Quick Restorations
If time and money weren’t of concern, we would prefer to strip floors back by sanding, then applying a stain, followed by layers of poly. In this case, we are going to only clean the floors and apply several layers of poly to provide extra protection and shine to the wood floors.
When cabinets are in fairly in good shape and they’re solid wood, we KEEP them! Again, we are going to apply layers of poly. The same thing will be done with the wood bathroom cabinet.
Tip #3 – Updating Appliances
In all of our renovations we have replaced the appliances. In this case, we’re going to replace the stove and range hood but we’ll keep the refrigerator. The freezer shelving is a bit rusty so we plan to spray paint it white again (spray paint is another great hack!)
Tip #4 – Grab those inexpensive and easy updates!
Changing out the faucet, sink, and countertop is another inexpensive way to make a property nicer without spending a lot of money. We think in the case of this rental, we can get by with just replacing the faucet.
Hardware and door knobs are another update that can be done quickly and inexpensively! We are putting new hardware on all kitchen cabinets, in the bathroom, and installing new door knobs for all of the rooms and closets! It’s a quick and easy way to update the old brass door knobs and handles by installing a simple brushed stainless replacement.

Tip # 5 – PAINT, CAULK & CLEAN!
This cannot be overlooked or minimized. These are the finishing touches that make a huge impact to your rental. People look for clean, fresh places to call home. We will paint the walls and touch up the baseboards and door frames. We also take the opportunity to freshen up the cold air return vent and some of the register covers by giving them a quick coat of white spray paint! Focusing on the lights, walls, and floor will add value to your property without breaking the bank when applying these techniques!
Stay tuned to see the “before and afters” of this mini renovation!
Be sure to subscribe to receive the latest posts! Thanks so much for all who are following us on our journey!
TOP 5 BENEFITS TO BEING YOUR OWN REAL ESTATE AGENT

As a real estate investor, one of the important pieces of the puzzle is purchasing or selling real estate. Some investors find real estate agents that are “investor friendly” who understand the needs of the investor. While other investors simply use the listing agent (the agent that listed the property for sale).

In this post I want to list the top 5 benefits of being my own real estate agent and explain a little about those as benefits.
#1 Looking for a property
As a real estate agent I have access to the MLS which gives me the ability to look at properties for sale as soon as they hit the market. This is helpful because I can set up automatic searches that show me properties that fit our general criteria. Online search platforms are great, but can have a lag when a property goes on the market. Meaning that the property still shows as available on the website but it has recently gone on contract and is no longer available at the current time.
#2 Showings
When people are looking for a house they have one small hurdle that will always exist. Schedules. Most listing agents ask for a 24 hour notice before showings. One other schedule issue is between the agent and the client. Clients usually work and agents have other clients that they are working with (not to mention that both parties have personal lives like school events for children, dentist appointments, planned events with friends, etc…) Getting the client/agent schedules to mesh can sometimes be tricky. As an agent and an investor that is one hurdle I don’t have to overcome. There have been times we have been out, saw a property that piqued our interest and we were able get right in to see the property. I just call the listing agent, receive a code, and enter the property. It’s that simple.
#3 Offers
Once we find a property that we want to purchase, I can submit an offer right away. It’s a matter of having a conversation with my partner (my gorgeous wife) to nail down how much we want to offer on a property and then submit the necessary paperwork. The time between when we view a property and when we submit an offer can be as quick as an hour or so.
#4 Oversight and Assistance
I am licensed in Indiana and work through the FC Tucker Emge Realtors office. This means that there is a team of people that assist with everything. I have groups of professionals that I tap in to automatically that spans from IT to Marketing to Legal. They have people working to make sure that paperwork is filled out right and on time. They also make sure that everything in the entire process is done correctly and ensure that the closing process goes as smoothly as possible. It’s also a safeguard from doing anything that may fall into a gray area.
#5 Commission
One last benefit is the commission from a sale. If someone is going to get a commission on a sale, it makes sense to get in on that action too. Just as a generic example if we buy a house that sells for $100,000 and both the selling agent and the buyers agent receive a 3% commission I will grab a $3000 commission. Once the brokerage fees are paid I could walk away with an extra $1500 on the deal. One sale isn’t going to make or break the bank, but it just makes the process that much sweeter! Another great aspect to renovating your own properties, is potentially being the agent for both buyer and seller, providing double commission. Just make sure that you disclose that you are the owner and seller of the property listed.
Hope this brings some knowledge and thought when you are considering becoming your own agent! If you are interested in listing or purchasing property through me, please reach out to me at dannytaylor@fcte.com!
Be sure to subscribe to our blog to receive the latest posts and thank you to all who are following us already! We appreciate your support.
OUR LAST BEFORE AND AFTER AT 13TH STREET!

Wrapping up this rental “series” by ending with the outside of the property! One of the first things we realized had to go was the old shrubs in the front. Removal was a simple as hooking up the truck with a tow strap and giving them a tug. They pulled right out!
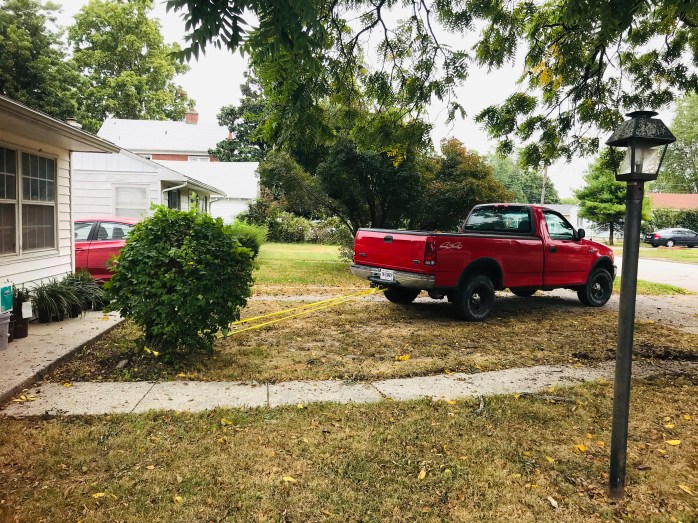
Danny pulling out the shrubs
With the shrubs out, we decided on planting some simple, low maintenance, hearty perennials like boxwoods, liriope (ornamental grass), and small juniper berry shrubs along the front walk to welcome you home each day. These choices are pretty low maintenance and are green year round, giving the front of the house a little bit of color.

Some simple landscape put in
We are also investigating the cost of removing the walnut tree in the front as well. It’s a nice tree, but not a tree you want hanging over your driveway with tenants!! When walnuts fall from 30 feet in the air they can really play havoc on a car’s windshield!! (Danny would like to get a couple of 13 foot slabs cut from the trunk for a project too!)
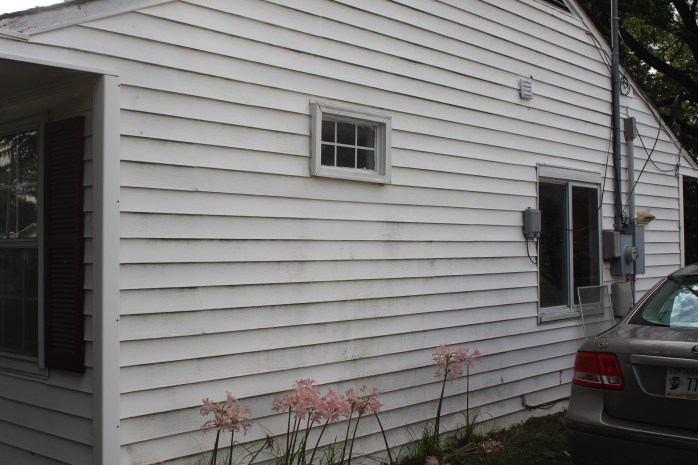
I spent a half day power washing the vinyl siding, which really helped clean it up and freshen the exterior! It went from an off white to a bright white!
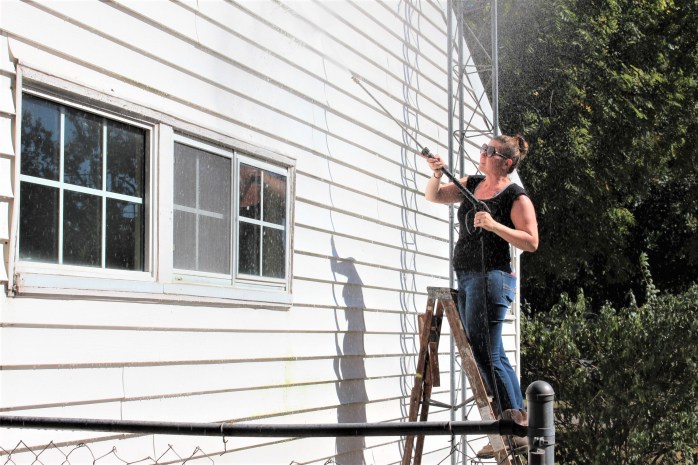
Zella power-washing
The roof had to have been over 30 years old, so a new roof and soffit was a necessary expense and we had to paint the soffit white to match the house! We cleaned all of the walnut debris off of the sidewalk. It looked like the sidewalk stopped in the middle of the yard! The trees growing in the fence line had to be cut back and hauled off to clean up that side of the house. (The neighbors noticed an immediate difference!!) We’d like to take the 4000 foot antenna down but that will have to come later!
We replaced the living and kitchen windows, giving the outside of the house a nice, fresh look to go along with the clean vinyl siding and new roof! New windows help to make the front of the house look nice and more updated.
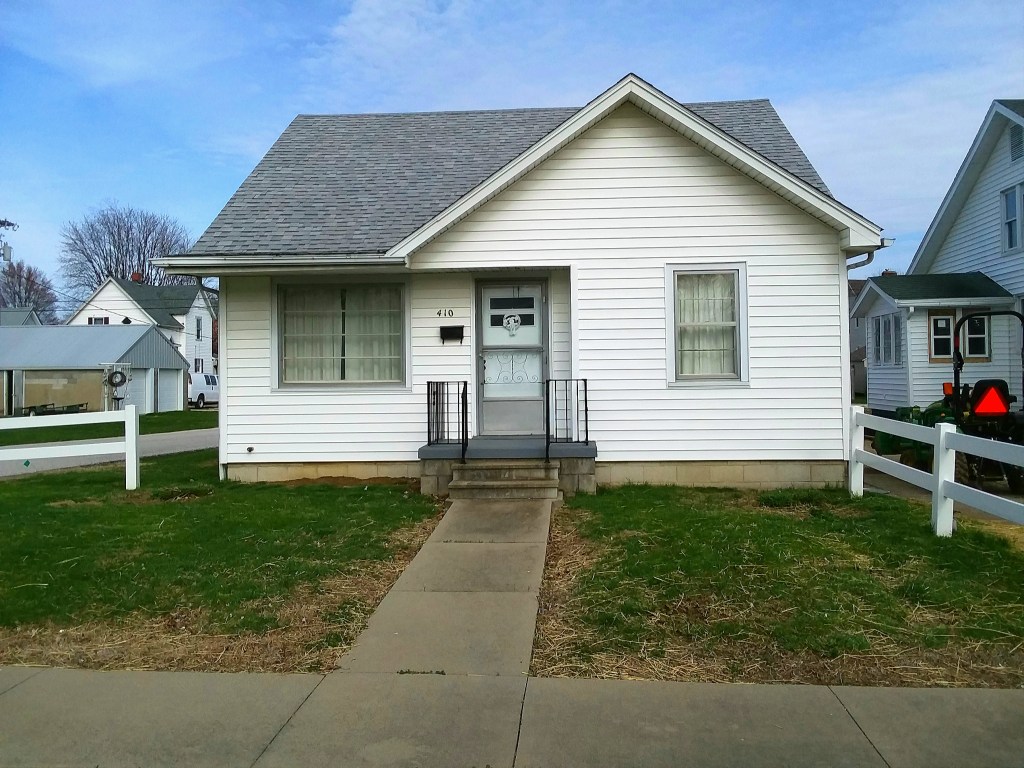
BEFORE 
AFTER- New windows & power-washing

NEW PICTURE WINDOW
We also changed the color of the shutters from burgundy to slate gray. We picked these shutters up at Lowes, but they were special order and took about two weeks to come in. We installed a new door and added a screen door as well. Finally we added some small details like a new mail box, a new porch light and a new address numbers to finish everything out.
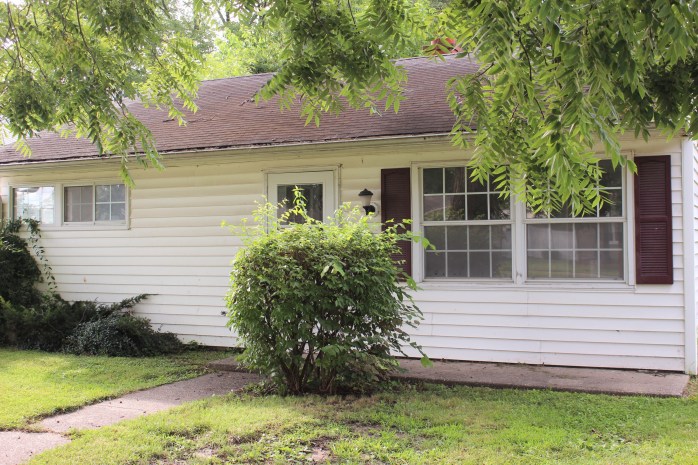
BEFORE-When we purchased

AFTER
You won’t want to miss the next post! Danny will be sharing 5 pros of being his own realtor!
Be sure to sign up and subscribe to our blog! Thanks to all who are following along with us. We appreciate your support!!
BEFORE AND AFTER: LIVING ROOM

When we bought this property we knew that EVERYTHING was going to need to either be replaced or fixed. The smell of dogs welcomed us with a smack to the face every time we opened the door! The drywall was never finished properly, the front door was worn and ragged looking, and the windows were completely worn out.

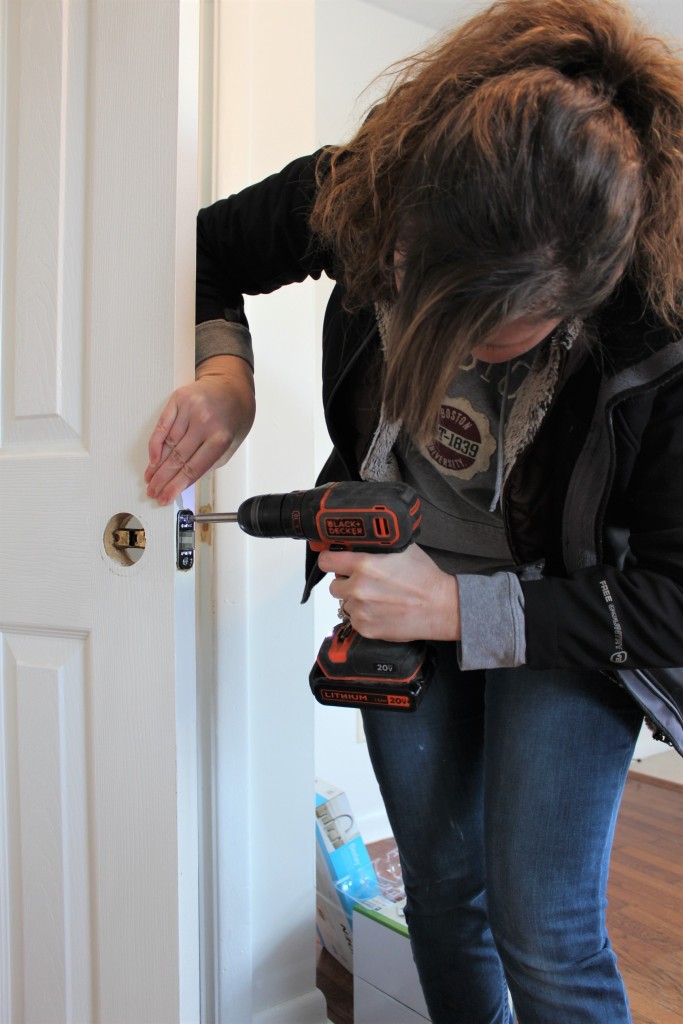
The picture windows had been installed incorrectly and the smaller window was cracked. We decided to have new windows installed in the living room and dining room, which gave the house a fresh, new look. The interior and exterior doors also were old and dated. No door hardware was ever installed and the previous owners had only mounted a cabinet handle and “latched” the door closed by using a magnet. The outlets, switches, and ceiling fan were also pretty gross and dated too. The carpet had stains all over it and needed to be pulled up.
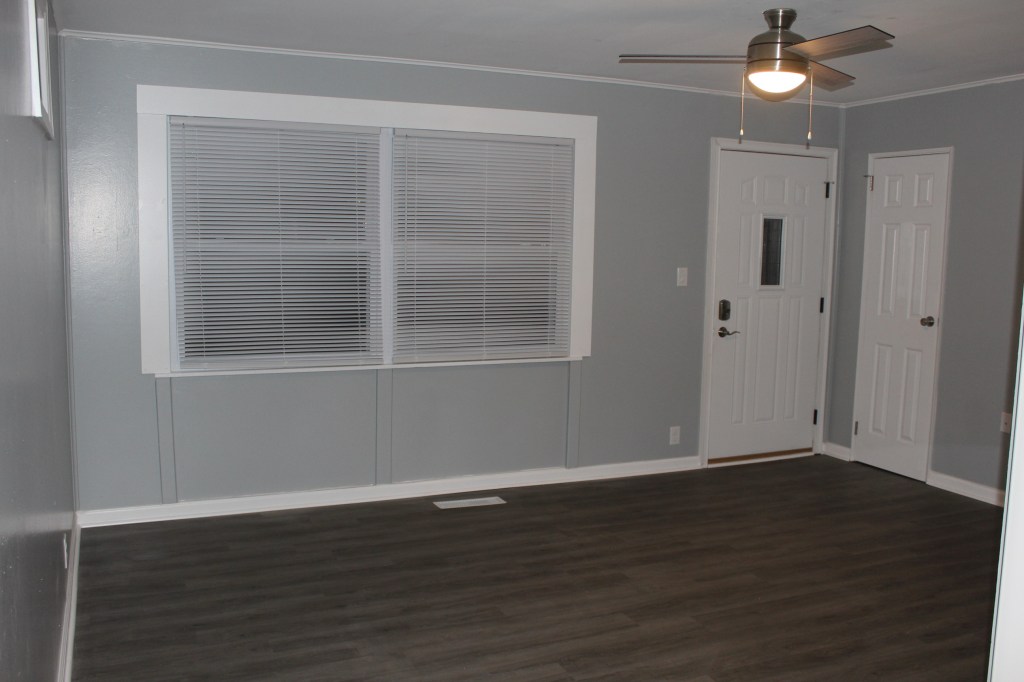
You can see in the after, the new steel exterior door and Schlage Camelot keyless entry lock on it. We use these locksets at all of our properties. We get them from Menards for around $125 and well worth it! It’s great for when we need to gain access quickly or have a contractor needing to come in to do work. No need for the tenant to be home or trying to find a key to the right property! When putting in new flooring, we’ve gone with Procore vinyl flooring from Lowes. It’s durable, affordable, easy to install, and waterproof!
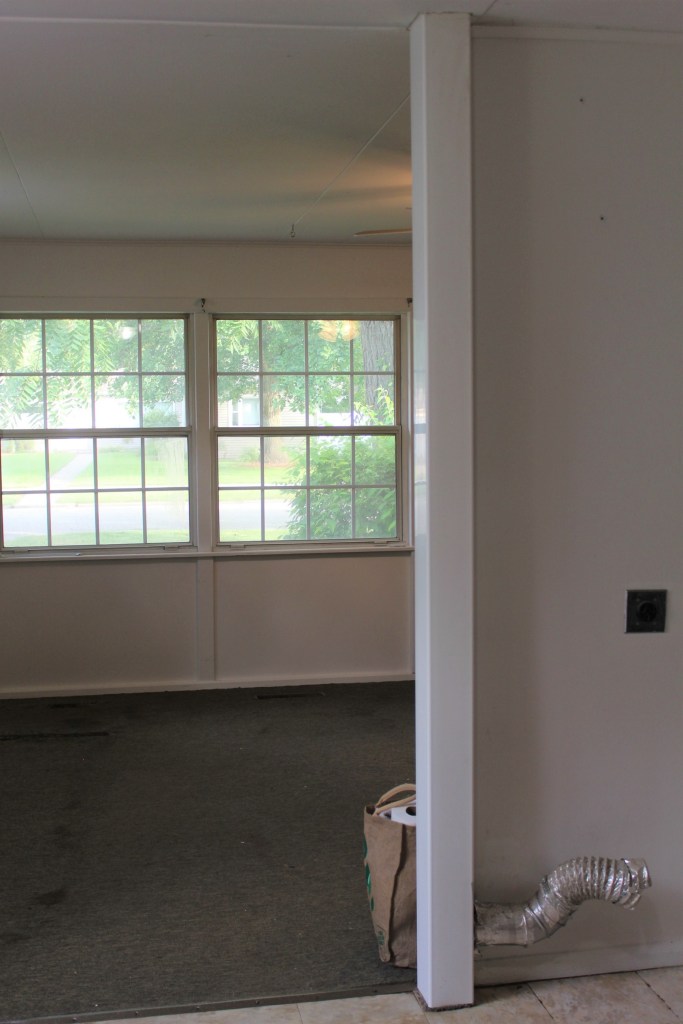
There was a vinyl column for a dryer vent that sits between the living and dining room. We initially thought about removing or moving this because it’s a bit of an eye sore. Ultimately, it would be a much bigger task than thought, so we did decide to leave it be. With the fresh grey and white paints, the new flooring, baseboards, and trim, the post doesn’t look quite so bad!
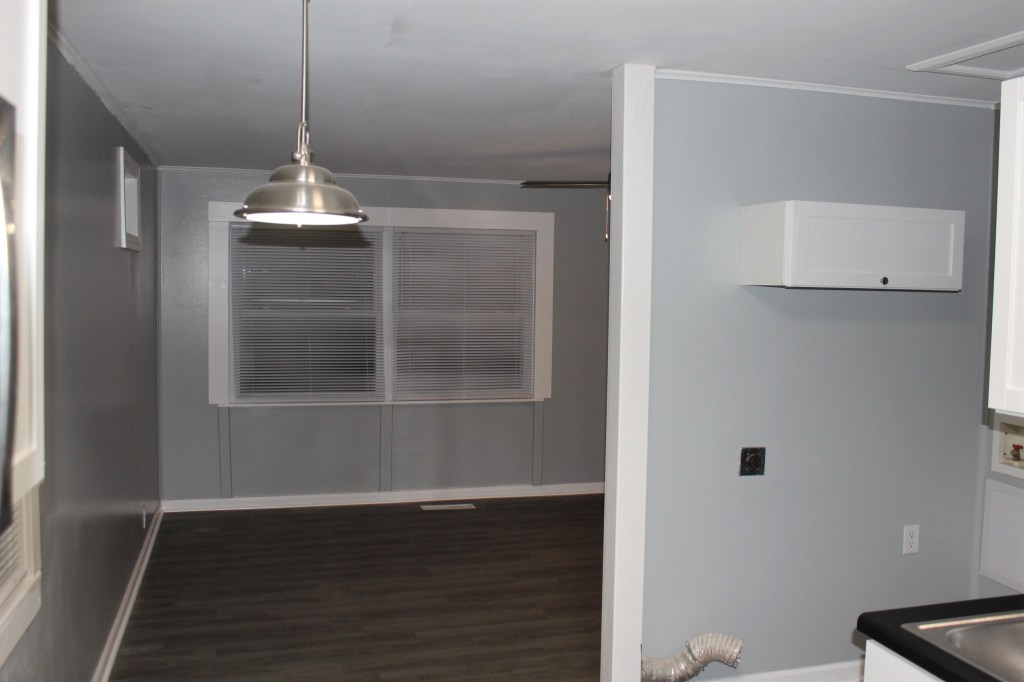
Off of the kitchen is the space for the washer and dryer, followed by the back entry hallway. We placed a small cabinet above where the units will be placed for extra laundry supplies.
Preparing the floor for vinyl ProCore flooring from Lowes. Danny had to scrape all of the glue and foam off to get a smooth surface, while I had to pop up all of the carpet strips and tacks up around the room.

AFTER- All New!
Be sure to subscribe and follow along to our blog! Thank you to all who have already! We appreciate your support!
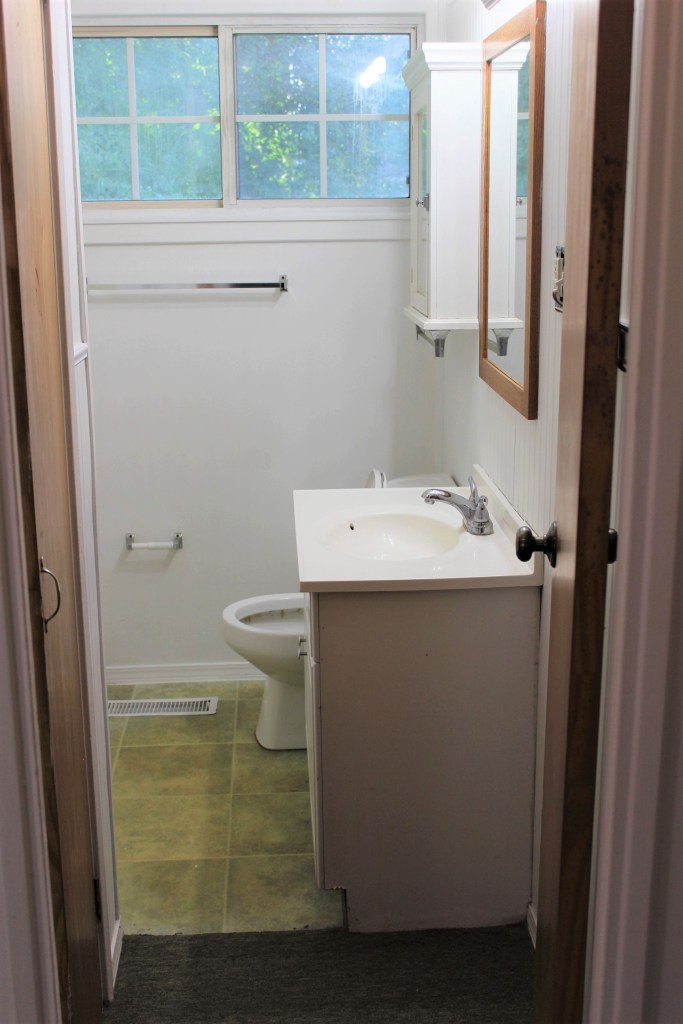
BEFORE AND AFTER: BATHROOM

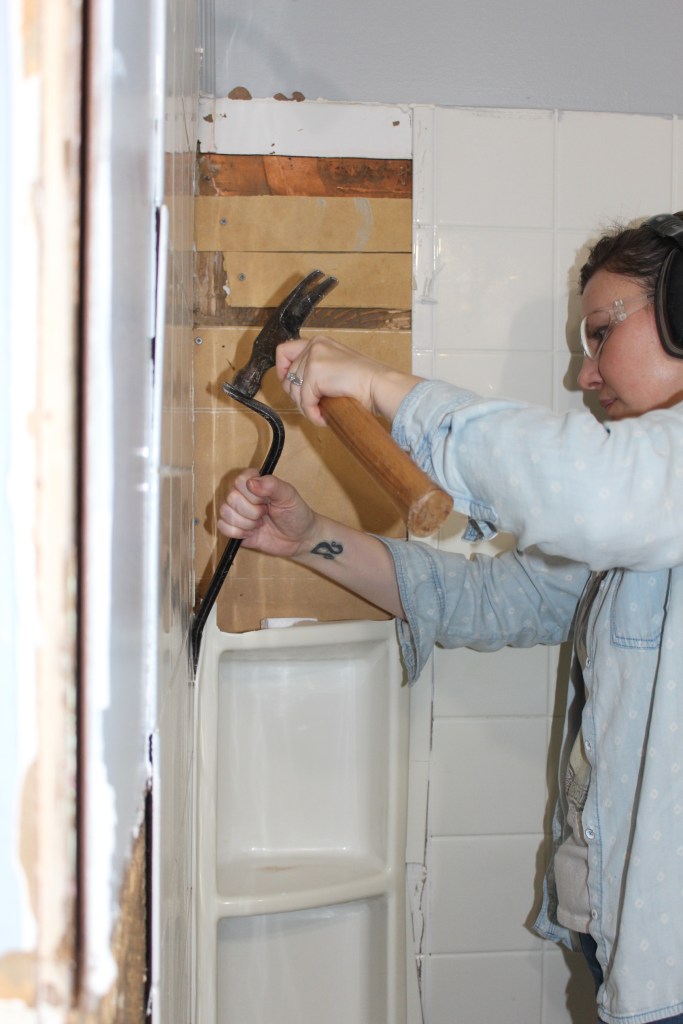
We knew the bathroom would have to be completely gutted. We started by removing the bead-board panels and tub surround. To remove the paneling around the bathroom, I used an oscillator saw to cut it out and remove as much as possible before Danny took out the sink and toilet. To take out the tub surround, I used a crowbar, a utility knife, and a hammer.
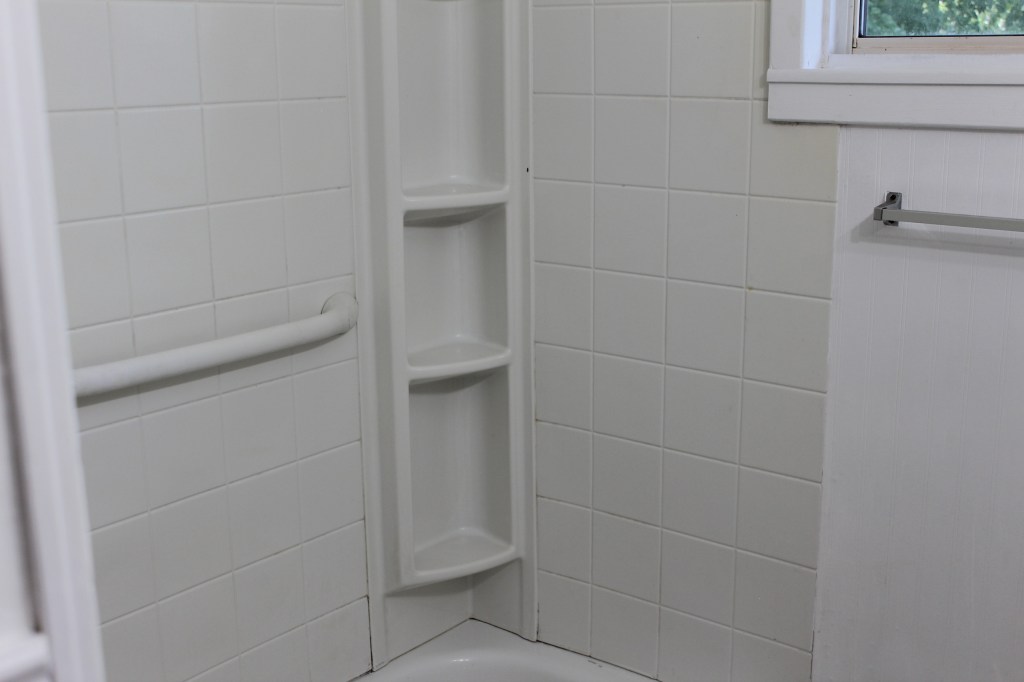
The surround was really tough to get out! There was so much glue behind it, the plastic would just break and chip while trying to get it out. Slowly but surely, I got it out, but not without a fight!
Before we started installing the new floors, the sink, baseboards, and toilet had to be taken out. The old flooring was also pulled up and the floor was swept clean. You have to make sure that all debris is cleaned up off of the floor. Anything left on the floor could create a hard spot underneath that will create wear on the new floors.

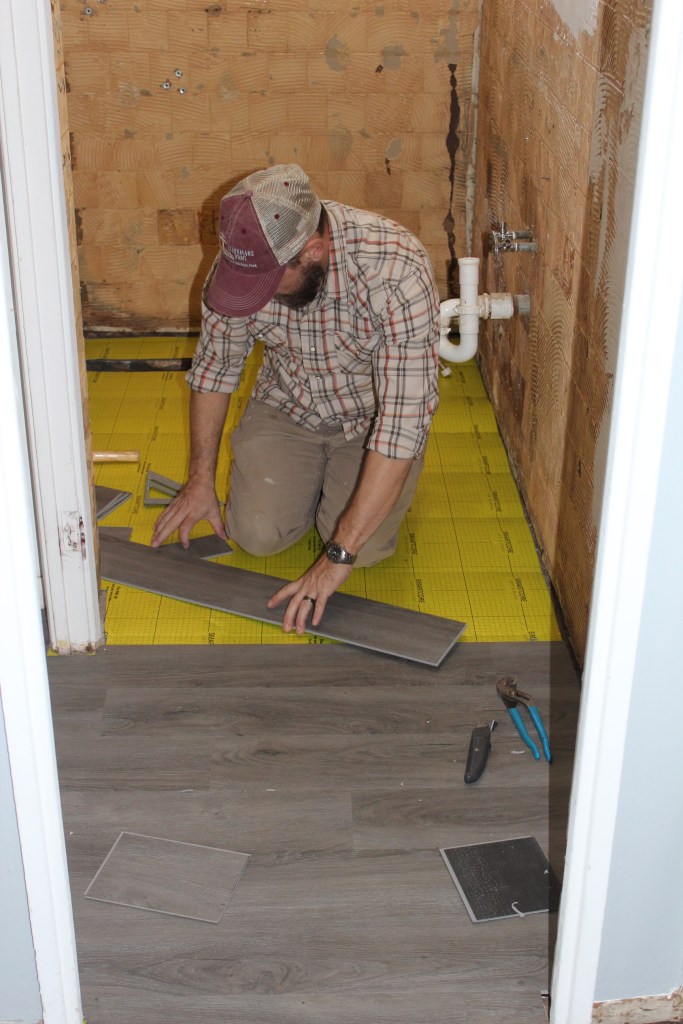
Danny starts the floor installation by cutting and placing an underlay, using Smartcore from Lowes. He likes using Procore vinyl flooring, as you can cut it with a utility knife and install fairly quickly. Once the underlay is in, Danny measures and cuts the flooring.

He is always careful to make sure that each piece is fully seated both at the front seam and the seam on the sides. You don’t want to leave a gap, as this is what locks the floors together and keeps everything looking like it was professionally installed. You will also need to leave a gap on the outside edges to allow for movement between hot and cold temperatures.
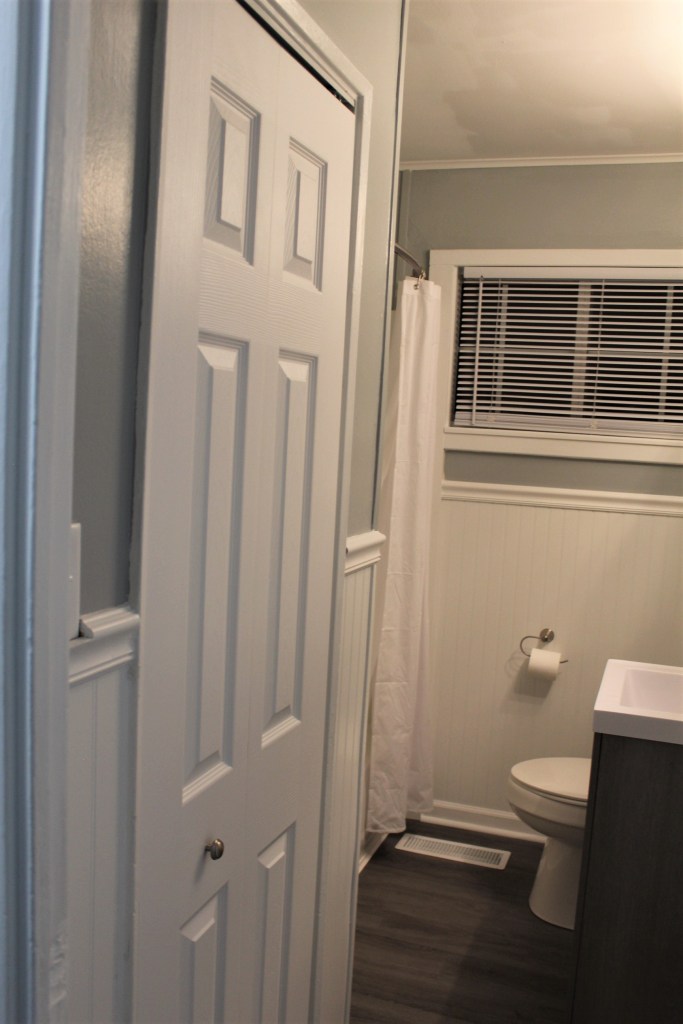
We installed a new bi-fold closet door, bathroom door, sink and vanity cabinet, faucet, new tub, surround, blinds, register, curtain rod, curtain, mirror, lighting, fresh paint, and anything else that needed replaced! Details are important to pay attention to when renovating! We also like everything to be CLEAN and WHITE! Contrasting of dark colors up against white makes things pop!
For a more in depth look at flooring installation revisit our “Next Up…Flooring” post and for a look at some of the obstacles we had to overcome in our bathroom remodel, you can revisit our “Facing Obstacles” post!!
Be sure to subscribe to our blog to receive the latest posts! Thanks to all who are following along with us. We appreciate your support!
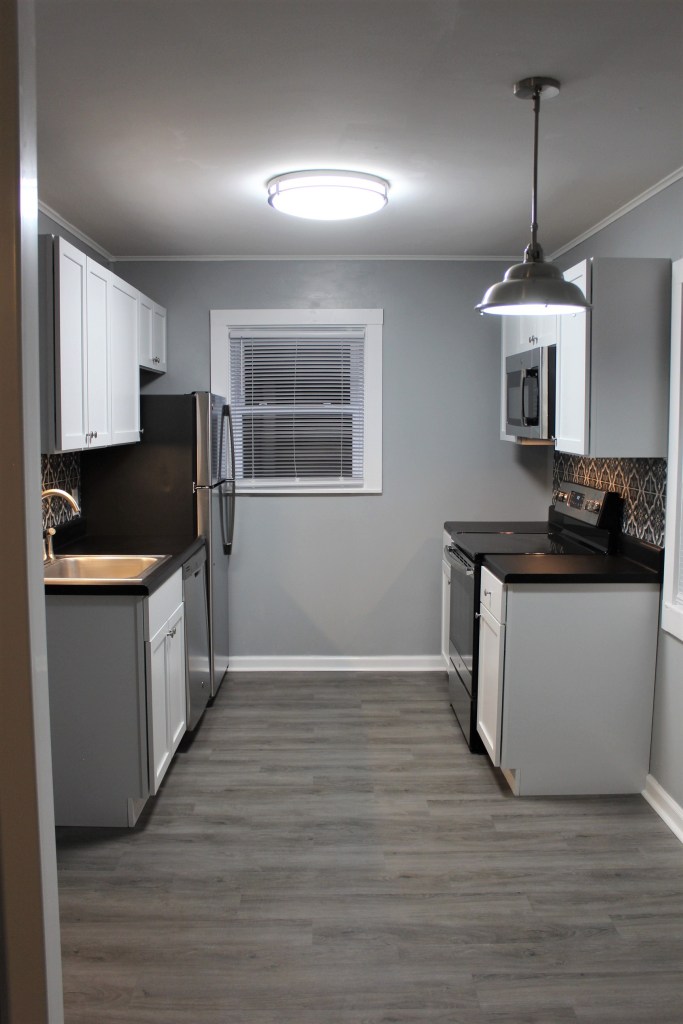
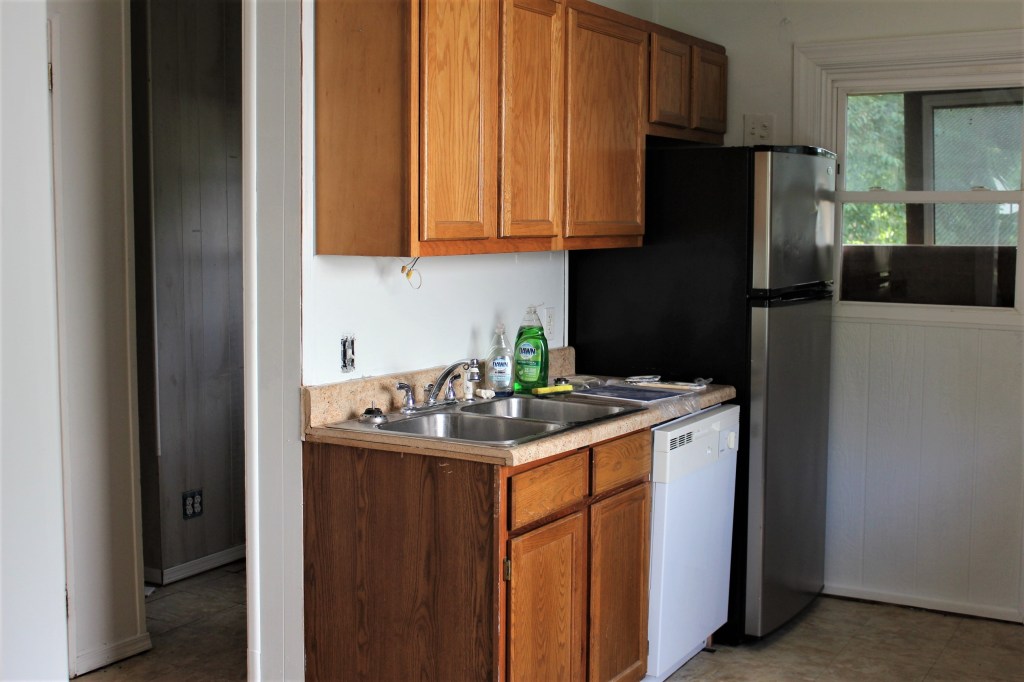
BEFORE AND AFTER: KITCHEN

The kitchen, like everything else in the house needed a complete overhaul! We had to first gut everything and start from scratch.
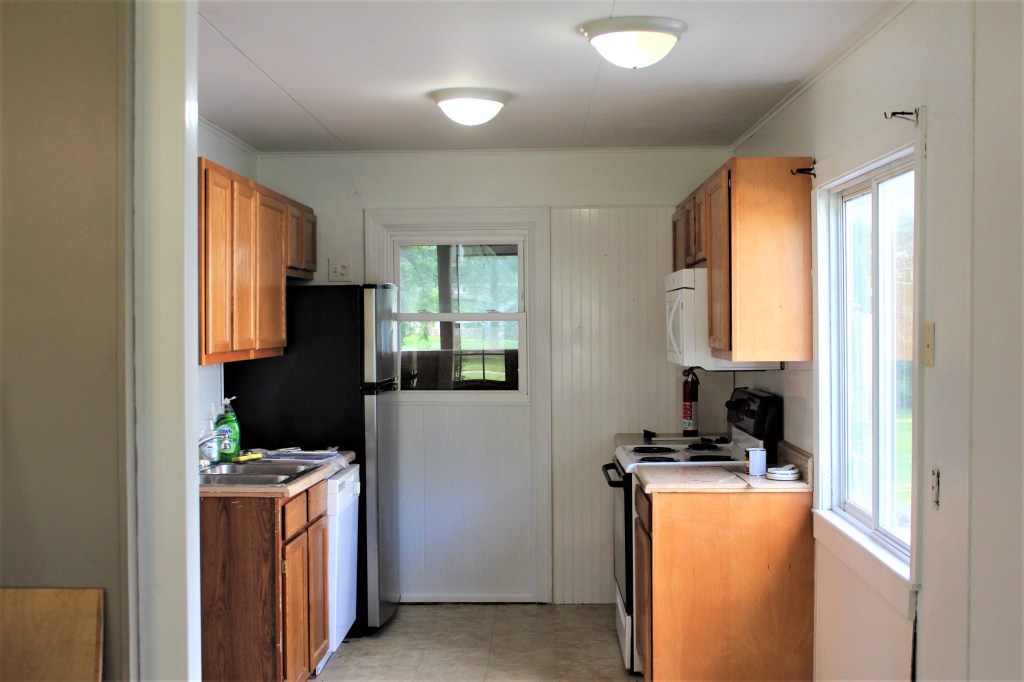
We had an electrician move the light switch that was above the refrigerator next to the dining window (as it should be when you walk into a room). They also put in new lighting to give things a modern flare. We always use daylight bulbs to make things as bright as possible! Danny laid new ProCore vinyl flooring in the kitchen and throughout the house.
Danny installed Cardell Concepts Cabinets from Menards and had to add new drywall from where the paneling and old door used to be. At some point, it had been converted from a back door to a window, but it still appeared as if the door outline was there.
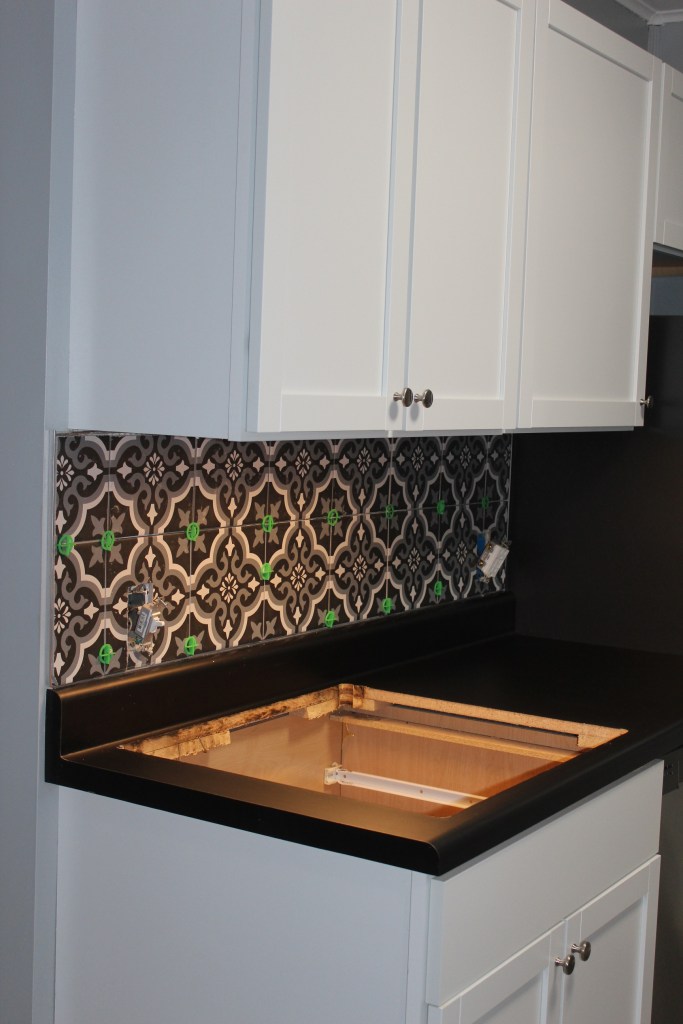
To give the kitchen a pop of design and color, we added simple ceramic Mohawk 12X12 tiles. This helped tie in the black countertops with the white cabinets all together. We’d always recommend tiling in rentals. It doesn’t take too long or cost too much, and well worth the efforts.
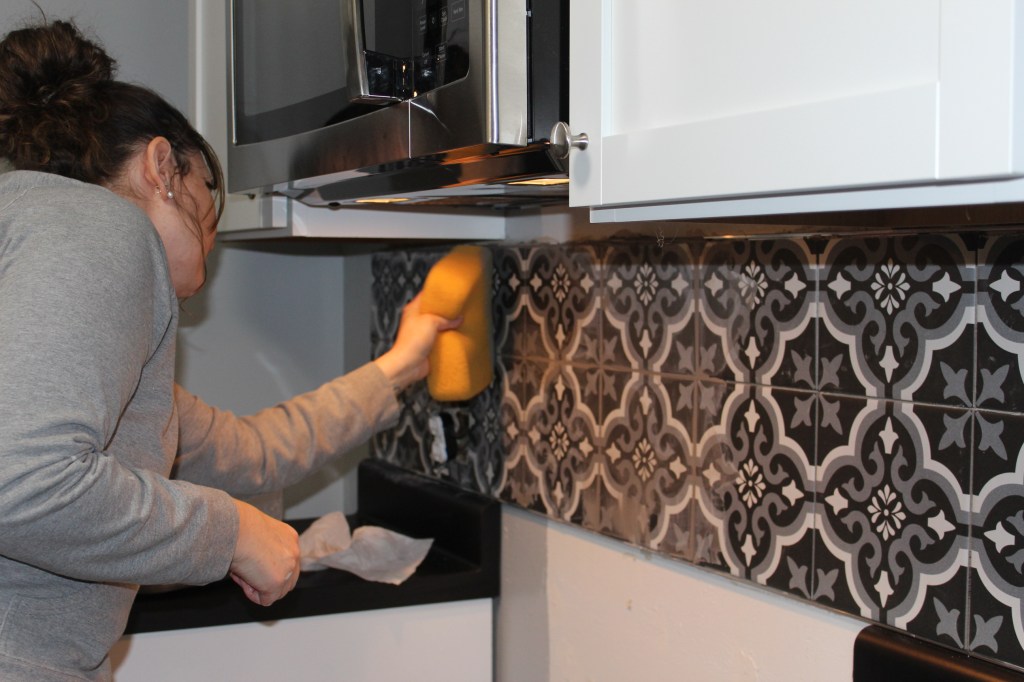
After the tile is set and dry, we add grout with a float, then use a wet sponge to wipe up any of the access amounts left behind.
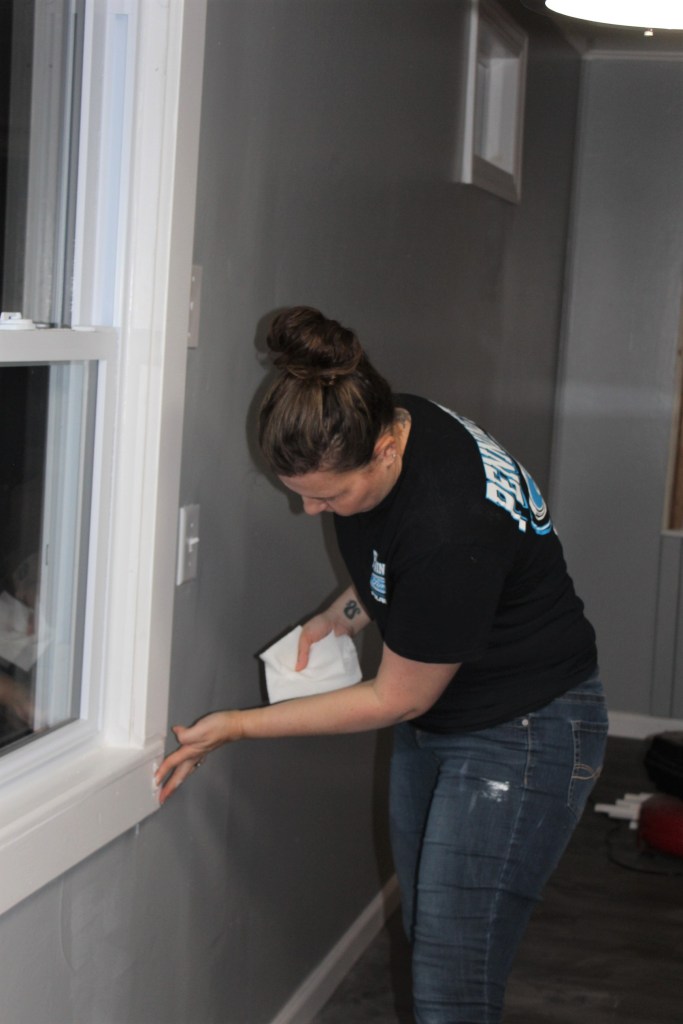

Finishing touches are so important! We always apply caulk and fresh paint to ALL surfaces! After the flooring and cabinets were in, Danny added the baseboards, as I finished caulking and painting the window frames.
Thank you to everyone is following along and who have subscribed to our blog! We appreciate your support!!
BEFORE AND AFTER: BEDROOMS

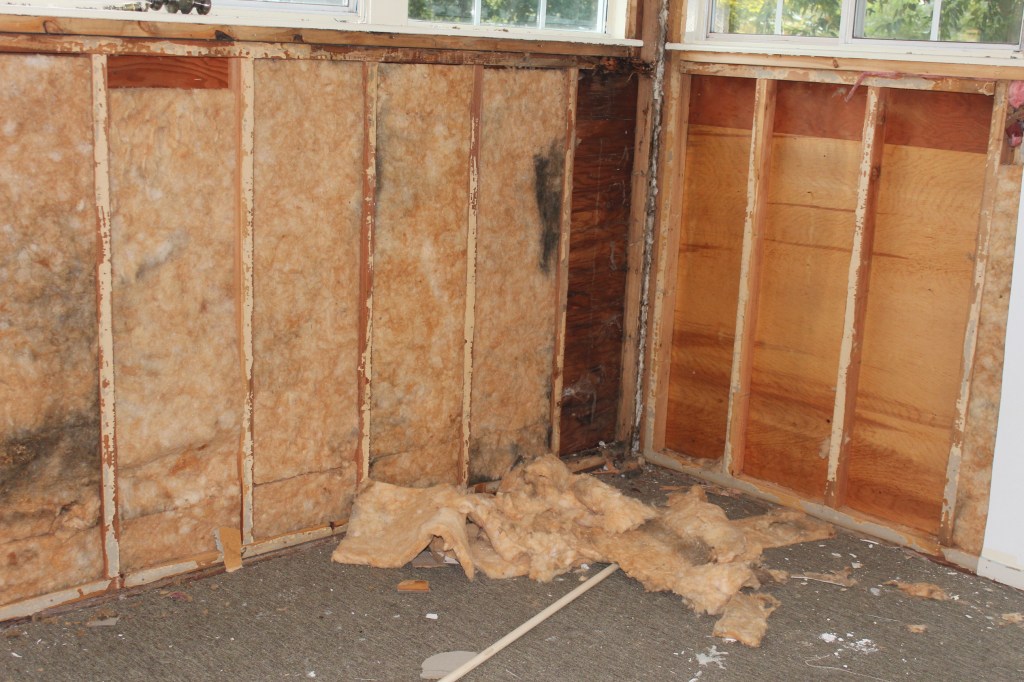
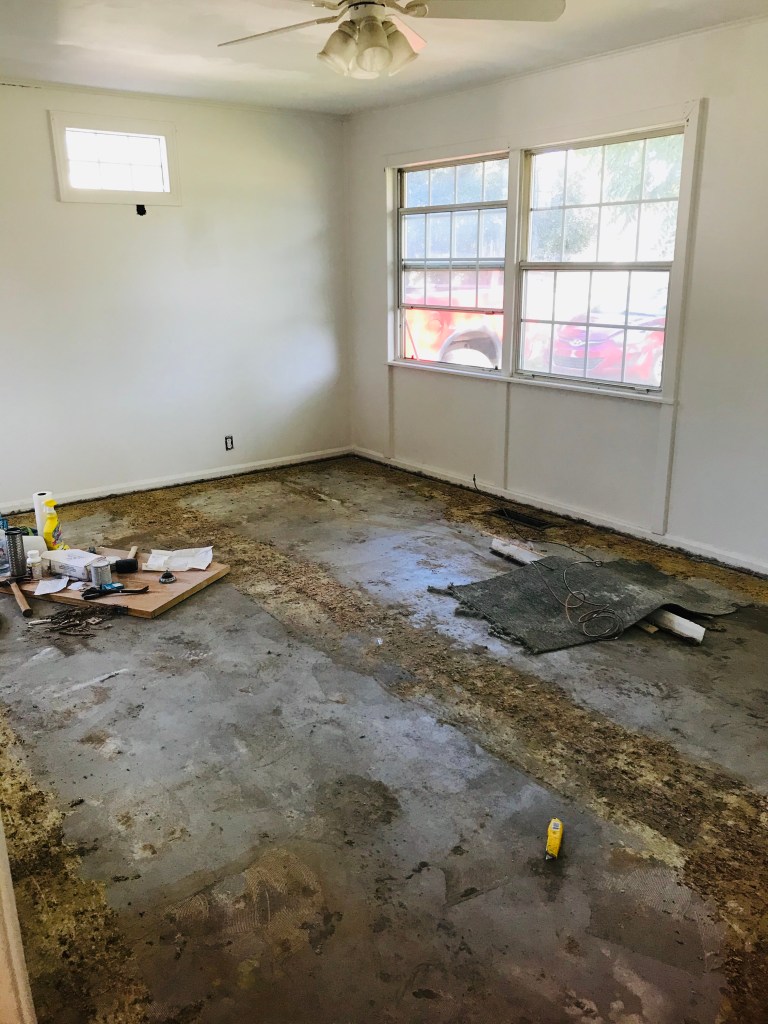
The first “surprise” we ran into was found while we were still taking down molding and getting ready to patch walls. I noticed that one of the walls was very soft to the touch. I immediately called Danny in the room so he could take a look.
We knew we’d have to patch walls, paint, rip out the carpet, fix the closets, add baseboards, but we weren’t expecting to have water damage behind the walls, but with a soft wall we knew we were going to have to replace this drywall. Danny had to take out the old drywall so he could replace it with new. When he took the old drywall out he got an “extra” little surprise when he found crawling, white bugs and mud tubes everywhere.
They were TERMITES!! We immediately cut down the brush that was growing in the fence line to reduce the “food source” and called an exterminator out the next day.
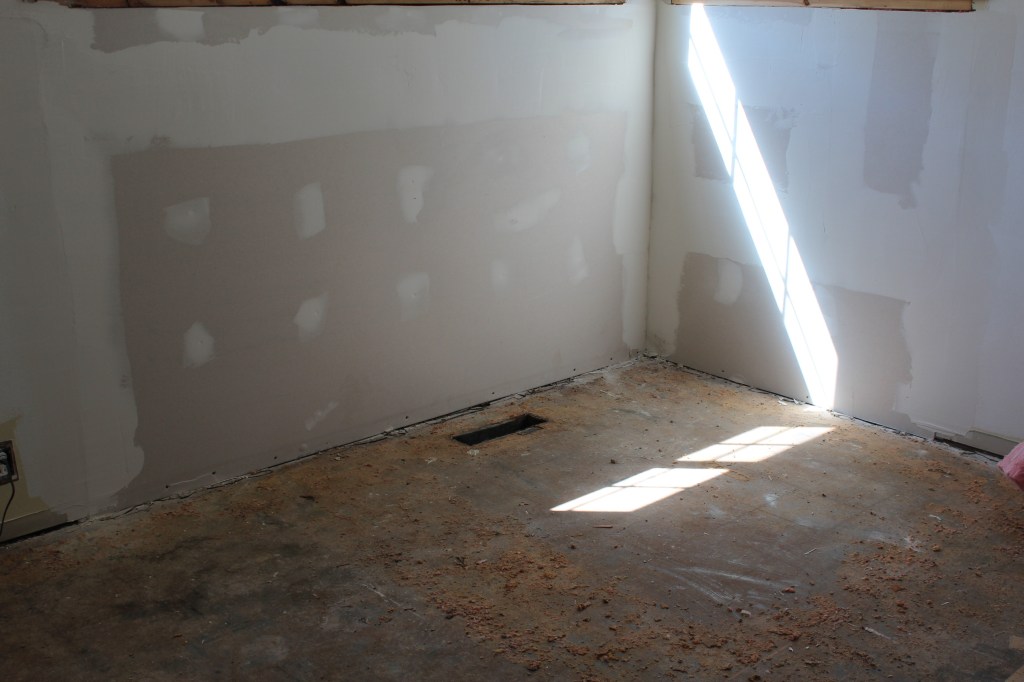
We then replaced a few 2×4’s in the wall, added new insulation, replaced the drywall, finished with mud and lastly, painted the walls.
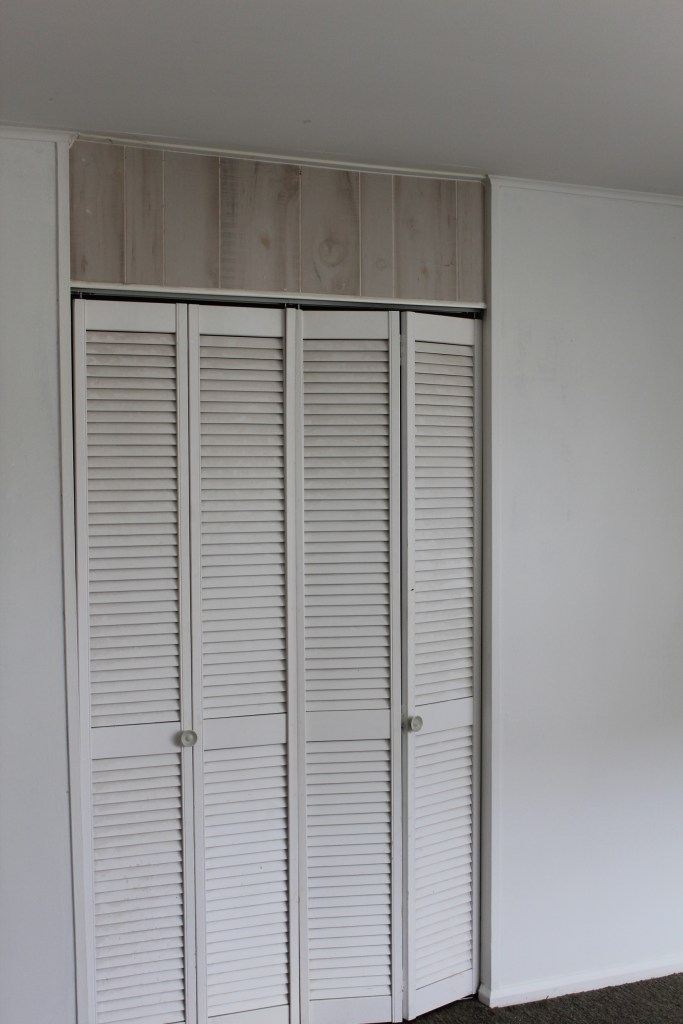
The paneling over the closet doors had to be fixed. We pulled the paneling off and took out the 1×4 frame that it was put in with. We replaced the frame with 2×4’s and covered with drywall. This really helped make the closets look like they should.
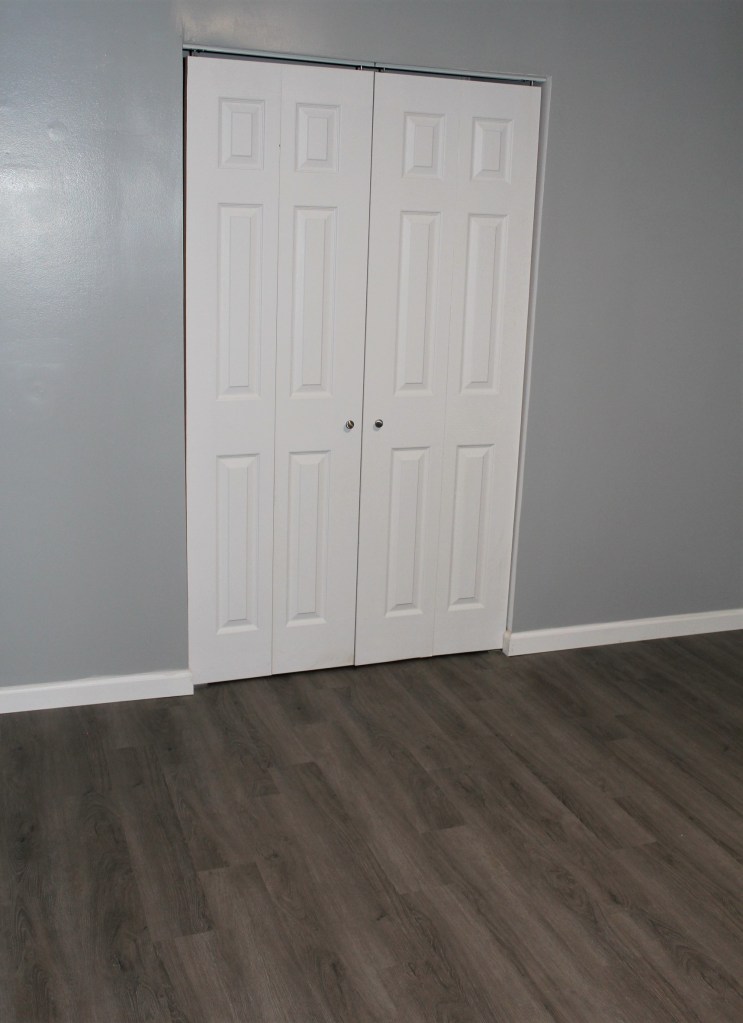
We finished the closet out with a set of bi-fold doors and two simple door knobs
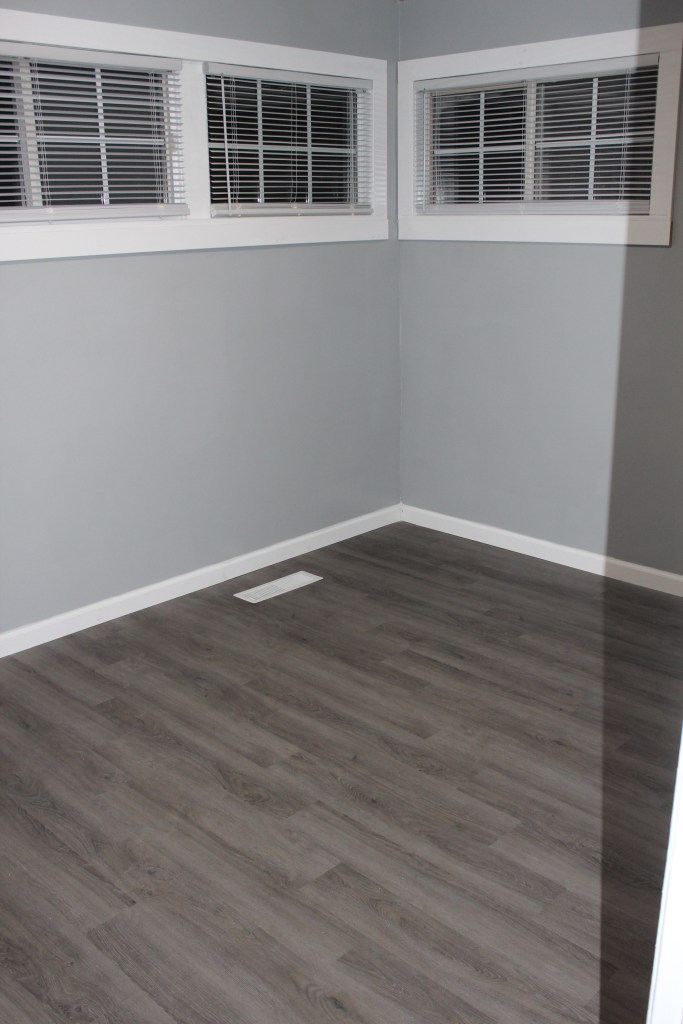
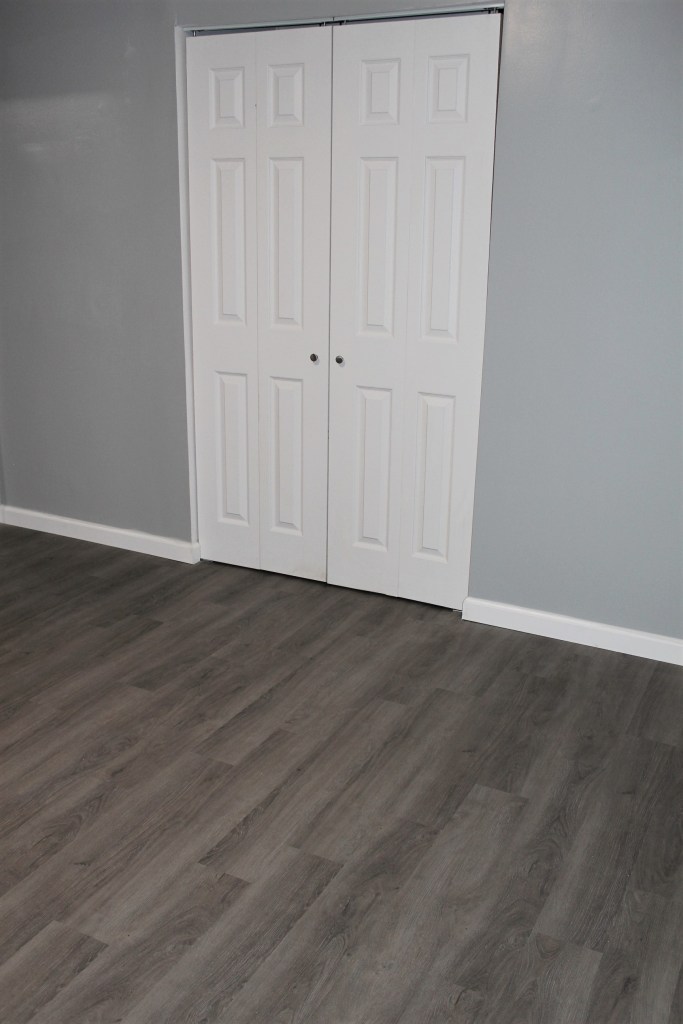
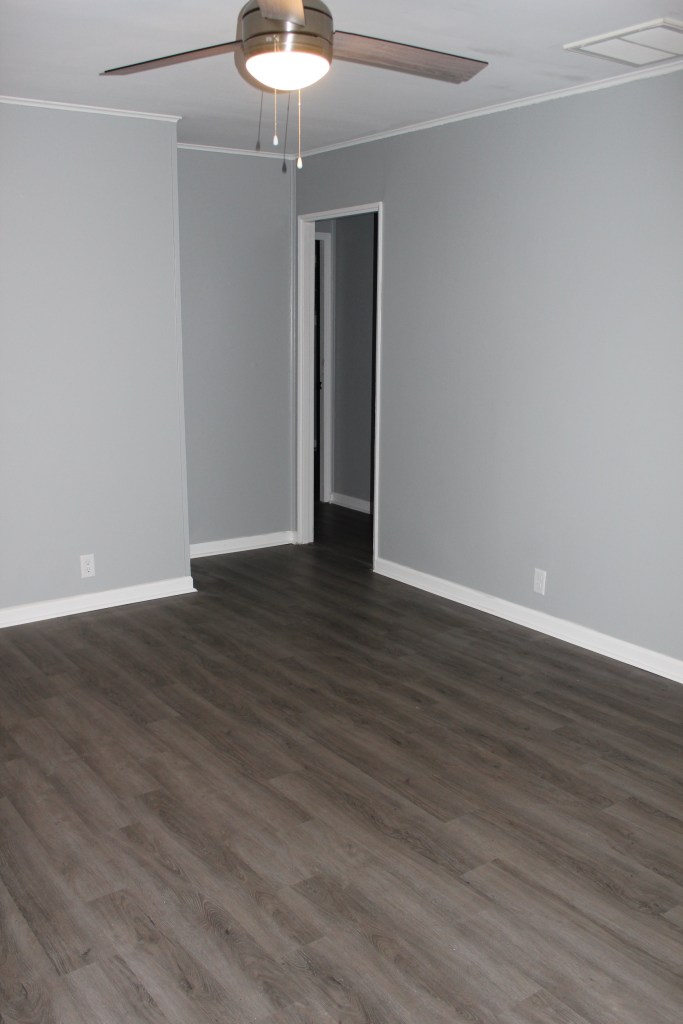
We installed ProCore Legacy Oak Vinyl Flooring from Lowes, baseboards, window frames, blinds, closet doors, and floor registers. Paint and caulk was used to complete the rooms!
Be sure to subscribe to our blog and receive the latest posts! THANK YOU to those who already are! We appreciate you and your support!
