Our Unbelievable Journey
A couple getting out of the rat race through flipping homes and investing in real estate.
MAXIMIZING SPACE IN A SMALL HOUSE

One thing Zella noticed about the back entry of this rental was how wide the hallway was and how small the kitchen space was. So, she “suggested” I build in a pantry closet with shelving to allow for storage space. I want to share how I accomplished this and the end result of this specific process. We believe it would add value to the property, not so much in financial gain, but to the tenant by maximizing the space.
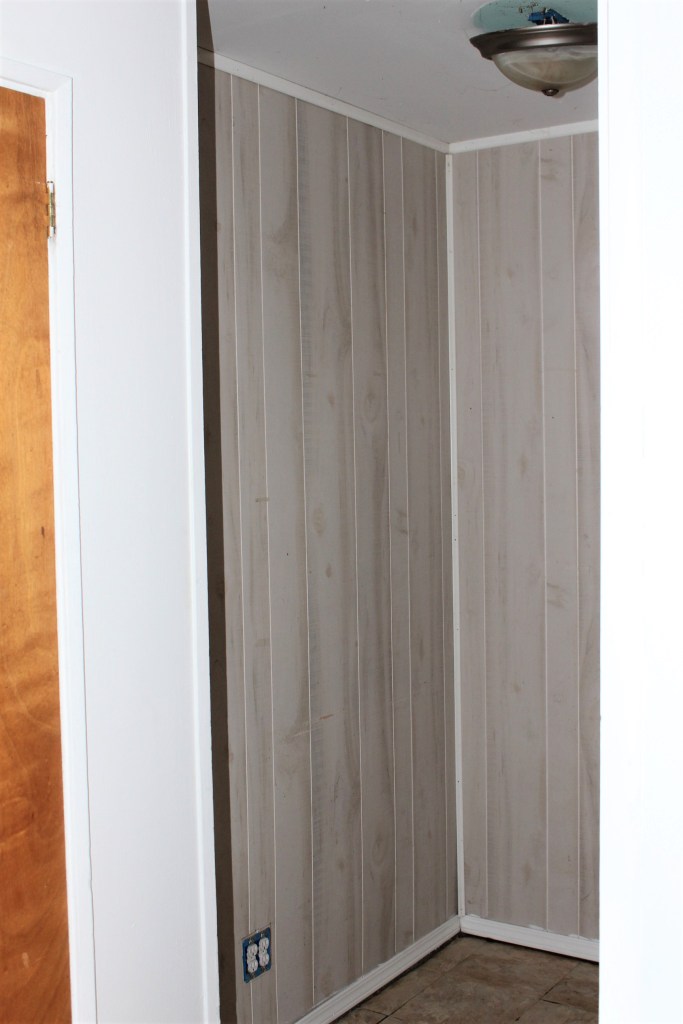
Obviously that “awesome” paneling had to come down first, so we pulled all of it out along with all of the molding. Once the paneling was down we found that no drywall was ever installed, the paneling was put up directly over the stud walls! At this point, there was no other option but to add drywall in the hallway. Then I could proceed to build the frame for the closet.
During the planning phase of this project we noticed that we were not going to be able to carry the closet all the way back to the back door. You can see in the after photo that we had to leave a little nook back in the corner in order to leave a little space to be able to change out the back door when that time comes. If we went all the way down, as we intended to, it would make changing out the back door very difficult.
I installed the foot of the walls by using a masonry bit and a Dewalt 7.8 amp hammer drill to drill into the concrete floor of the house. I secured the foot of the wall to the floor using Tap-con screws. After the foot of the wall was installed, I built the rest of the framing for the walls up to the ceiling.


Once the framing was in, we installed new drywall over the closet frame and started the drywall finishing. Mudding in such a confined area is never fun, bet we managed to get all of the joints taped and finished. At this point we also had an electrician at the house changing out all of the switches and outlets and installing new lights, so we had him move the hall light about 18 inches towards the front of the hall to make everything a little more symmetrical.
After the walls were in, we installed a bi-fold door. This was my first time framing in a closet and I made a few mistakes during the process. One of the biggest mistakes was not taking the drywall and mud thickness into consideration. You want the rough opening to be 36″ wide x 80″ tall, but after hanging and finishing the drywall I ended up with a rough opening of 34 3/4″ wide x 79″ tall. This meant that I had two options for the closet door. I either had to order a custom door to fit my opening (and wait two weeks for it to come in!) or I was going to have to customize a door to fit. A custom door was also more than two times the cost and we really didn’t have the “extra” time. so I decided to just buy a door and cut it to fit.
This style door comes hollow, built on a frame of solid wood or pressed fiber board. In order for me to make the doors work I cut equal parts off of both sides and from the top and the bottom. Once I had the doors cut to size, I took the rest of the pressed fiber board out and cut solid wood to pieces to fit inside the doors. Once the doors were reinforced I drilled holes for the installation hardware and hung them.
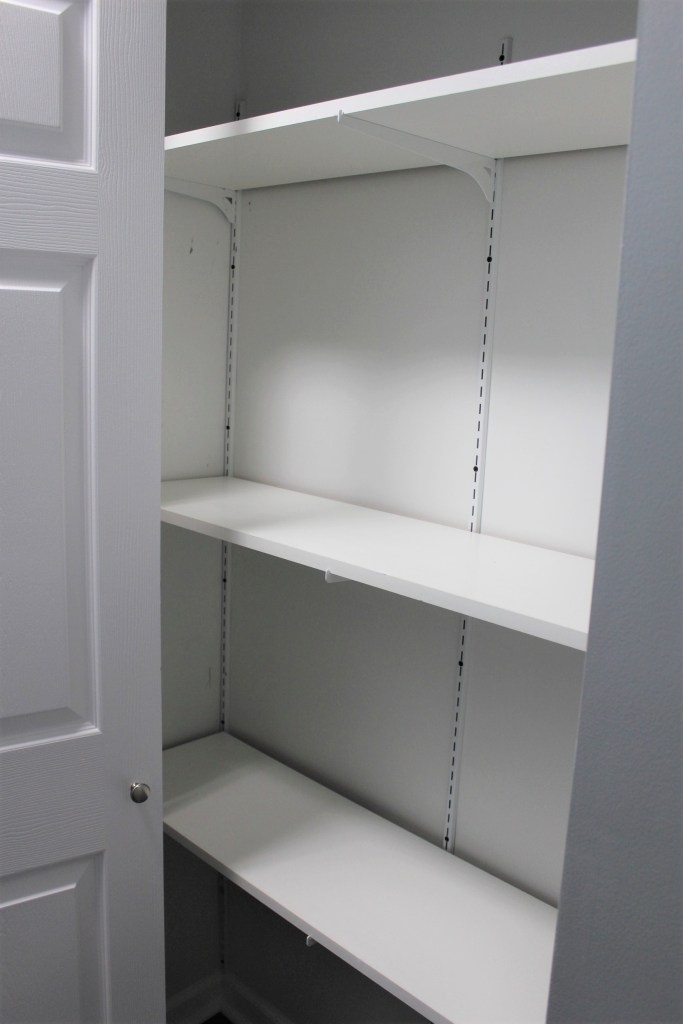
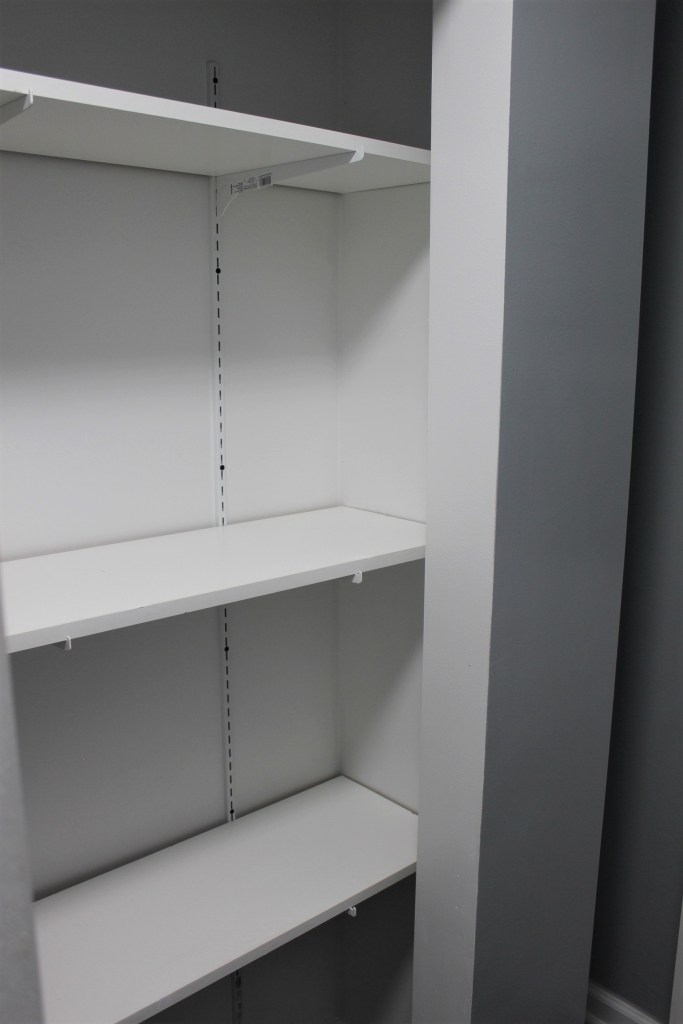
After the door was installed I went to Lowes and bought
- 3 BlueHawk Shelf Bracket Tracks
- 9 BlueHawk Shelf Brackets
- 3 BlueHawk Melamine 11 inch Shelves in 8 foot lengths
I mounted the tracks on the studs in the closet, cut the shelves to fit inside and mounted them using the shelf brackets.


Tools I used for this project:
- Tape Measure
- 4 foot level
- Speed Square
- Square
- Hammer Drill
- Cordless Drill
- Cordless Circular Saw
- Miter Saw
- 6 inch Drywall blade
- 8 inch Drywall blade
- 12 inch Drywall blade
- Pancake Air Compressor
- Brad Nailer
Be sure to subscribe and follow along to our blog and thanks to all of those who have already done so! We appreciate your support!
