Our Unbelievable Journey
A couple getting out of the rat race through flipping homes and investing in real estate.
ONE STEP CLOSER TO COMPLETION

The front and back door were replaced last summer so we decided to take the opportunity, while we had the time, to go ahead and paint the front door to make it pop with color! Of course, I am the “professional painter” out of the two of us! We love this color because it’s dark, but its eye-catching! We picked up this Pittsburgh paint from Menards – the color is Midnight Hour. Consider having a nicer door with a window for natural light and paint it an appealing color since it’s the first thing your tenants will see when arriving to see the property! They say that the eyes are the windows to the soul, but the windows to the soul of a house is the front door.
We noticed that the washer/dryer hookup was old, rusted, and leaking. On top of that, the toilet was running for an extended period of time after flushing. In this case, it was best to just use a plumbing service to come and take care of these two items in one day (while we were both at work). If you do go this route, be sure you’re familiar with your service provider! We’ve learned this the hard way!


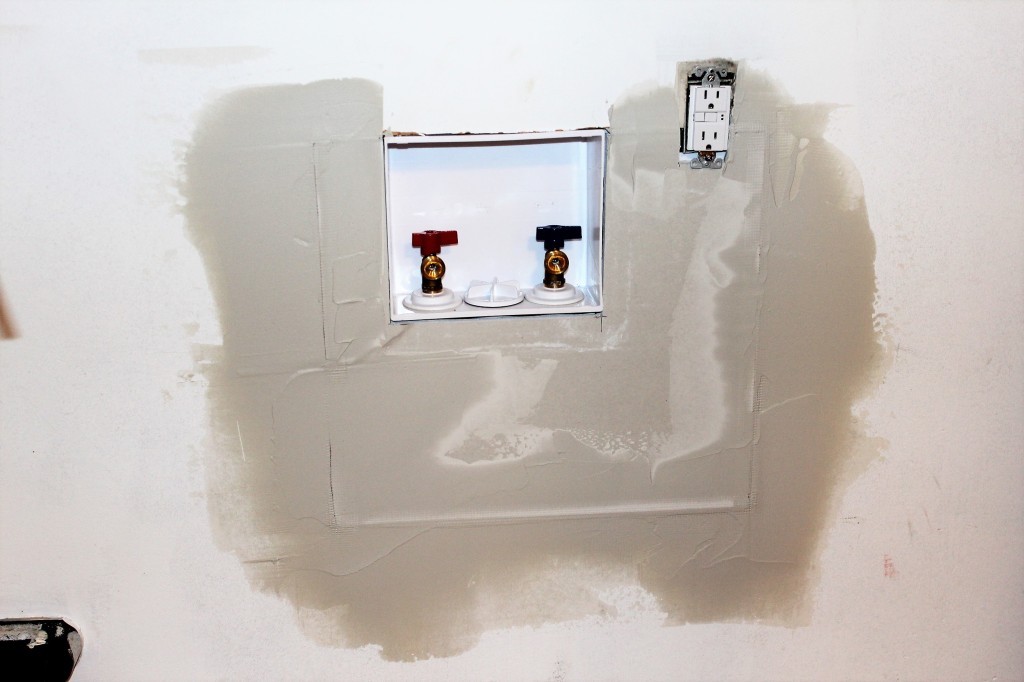
So, in order to fix the section of the wall that was cut away to fit in the new washer hookups, we needed to get a piece of drywall. We picked up a small 24″ x 24″ repair piece from Lowes. Danny measured and cut the piece to fit, taped the seams with drywall tape, and finished the seams out with several layers of mud. For a more detailed look at finishing drywall see our prior post, “Maximizing Space in a Small House” from December 20, 2020!

The painting never seems to end. Usually Danny is working on some project which leaves the “chore” of painting to me. I like to make sure our properties look fresh and clean! One of the most important aspects is to have nice clean walls and baseboards. I usually start with cutting in the top of the wall and then cut in around the baseboards, door frames and window frames. If Danny has time between projects sometimes he’ll help me by rolling the walls.
I make sure Danny does NOT cut in or paint tight spaces, especially since I do not tape off anything prior to painting!


It’s always exciting to get to the point where we are adding in the finishing touches. Small things can make such a huge impact. NOBODY wants to step into a shower that has old ugly caulk that has mold or mildew stains on it. The best thing to do us cut the old caulk out and get the area as clean as possible. Once the area is clean and ready, using a tub and bathroom caulk, you’ll run a line of caulk around the tub and shower surround to make sure no water can get in behind the walls. Make sure to use an even pressure on the trigger of the caulk gun and run that bead at an even pace to get a good seam. Once you have the bead in place run you finger over the bead to smooth it out and push the caulk into the line. You want to make sure that you are sealing the gap up so water does not have a chance to get in. Typically Zella would do this job too, but with so much painting, she delegated this job to me:)
We always install a shower rod, liner and a nice white shower curtain in the bathroom. This helps make the bathroom appear nice, clean and crisp. Not only does this help to make the bathroom look refreshing, it also makes sure that tenants have what they need to minimize damage being caused by water getting everywhere!
Be sure to stay tuned for next week’s post, where we cover “how to” spruce up worn out hardwood floors with a few easy steps! Thanks so much for your support and to all of those who are following along! Subscribe to receive the latest updates of when a new post comes out!

Well done!
LikeLike
Thanks! We’re working very hard!
LikeLike
Really like the door color! Zella, I’m in awe of your painting skill- not taping anything off would save so much time!
LikeLike
Thanks Sally! I love this color too! It’s almost changes in the sun:) Can’t wait to show you guys the finished products!!
LikeLike