Our Unbelievable Journey
A couple getting out of the rat race through flipping homes and investing in real estate.
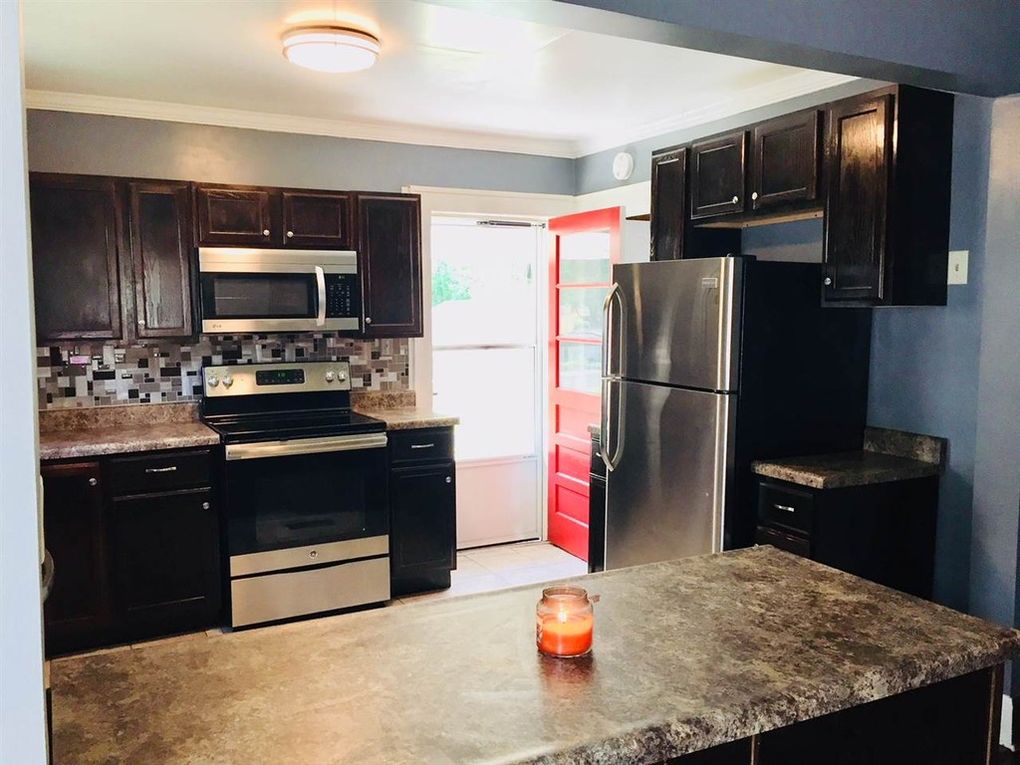
time for the kitchen part I

Before 
After
Once the Bathroom was completed the next project to take on was the kitchen remodel. The kitchen still had the original cabinets that were built to fit the space. Much like you will see in everything else, we did this remodel on a tight budget and did the work ourselves. It was important to give the space a nice facelift without spending a ton of money.
Naturally, the first part of every project means you have to tear out the old in order to put in the new. This is where may have jumped the gun a bit! Danny took out the overhead cabinets and the base cabinets and it was at this point we stopped and realized that we were going to still need at least a sink. So we just cut the countertop to fit back onto the 36 inch sink base and we left that in place. We literally had food and dishes sitting in boxes in the dining room (and everywhere else) for a month! Lesson learned. Don’t tear out the old unless you are ready to replace it with the new!!
The second part of the project was tackling the old “decorative” drop-down, ceiling tiles. Once the ceiling tiles were removed we could see that the drywall behind those tiles would need replaced. Danny picked up the new drywall sheets from Lowes in our old red Ford pickup truck and started the drywall installation on a Saturday morning. Another lesson we had learned at this point- sometimes spending a little money on tool rentals can be very much worth it. We rented a drywall lift. However we didn’t take into consideration that the kitchen only measured 13X11 so maneuvering a 4×10 sheet of drywall and the lift in that space was really a challenge!
We both despise finishing drywall. The work, the mess, the dust! The dust is probably the worst part of the process. However, if you can live through the mess it’s all so worth it on the other side!
While we were working on the drywall and sticking with the tight budget, Danny had picked up unfinished, oak cabinets at Lowes and had started staining and finishing them in the garage. This process took a couple of weeks to complete but they looked great when they were done! The process can be a little mundane but if you do it right the results can come out looking fantastic.
Step one is the sanding. Ugh, more dust… You have to sand every surface to make sure you remove all of the scratch marks and imperfections in the wood. Step two is stain. We decided to use the Minwax Polyshade Stain and Finish in Espresso. These cabinets took two coats of stain and came out with a deep, rich color. Once the stain was dry, Danny sanded all the surfaces lightly with a high grit sandpaper and wiped the surfaces clean. The next step is the clear coat. He put three coats of Minwax Polyurethane on the cabinets making sure to sand and wipe in between each coat. We thought this process would take a few days but actually took about two and a half weeks! That’s hard to swallow when you have already taken your cabinets out!!
Install day for the kitchen cabinets unfortunately was a day that I had to go to work so Danny made a few mounting jigs to help hold the cabinets in place while he installed them. Once the cabinets were in and the plumbing was all re-installed he mounted the counter tops. We decided to place a wide crown molding up since there was an unfinished gap from where the ceiling and walls met. Danny had never installed crown molding before so there were extra trips to Lowes and A LOT of videos on YouTube watched!
Day two he finally got a couple of good cuts and molding started going up. He figured out that the molding had to be cut at the correct angle and you cut it backwards and upside down on the saw. Not confusing at all, especially when you have an older house and the walls never meet at a 90 degree angle. Danny also figured out how to cope the molding to get it to fit together better. We learned that you have to be willing to accept defeat but be willing to come back the next day and try again. Even if that means you have to go back to Lowes to buy more molding because you made too many mistakes.

Please be sure to follow us on our blog and sign up to receive email notifications every time we release a new post!
