Our Unbelievable Journey
A couple getting out of the rat race through flipping homes and investing in real estate.
OUR FIRST PROJECT…OUR BATHROOM REMODEL

When we first moved into Sunset, we had no shower for a year. It only had a bathtub, in the 1950’s a lot of homes still didn’t have showers installed. Danny made a make shift shower using a camping shower head and a shower curtain liner with 2X4’s. He simply tapped in to the existing false wall where the plumbing for the tub was located, framed in the area where the shower water line would run and covered that new frame with a shower curtain to keep the water in the tub area. We used this for another year before really starting this project. Let’s also not forget to mention this is a 2 bed 1 bath house!
This bathroom was 4 ft by 11 ft (Jack and Jill style) and we decided on a walk in shower, all tile. We wanted it to look rustic with different wood types. We had some old barn wood and used lath wood that was behind the drywall when tearing the walls out. Bead board was used on the ceiling with old 1X3 strips, painted white.
Demo consisted of taking out the existing cabinet and sink, medicine cabinet, cast iron tub and the fixtures. Once that was out of the way we tore the wall covering off! Say goodbye to grandma’s faux tile flowered walls! Behind those coverings were plaster and lath walls. The plaster and lath quickly came out and we were back to the studs. Talk about an oh sh*t moment!
We very quickly found out that when doing a project that you have never done before, YouTube is your best friend! Danny watched video after video trying to figure out how to make the shower pan. We needed to research what products needed to be used in order to make the shower water tight. We needed to know how to lay tile. Needless to say there were quite a few days when we spent time undoing something we had just done in order to make it right.
We were planning on going without a shower for a couple of weeks, but this turned into a 3 month project!! There is nothing wrong with the idea of driving out to the family farm that is surrounded by vegetable fields, pulling into where the farm market is and running in to take a shower real quick. Let me tell you, after a couple of weeks it starts to get old, and we did this for 3 months! Never-mind the fact that for a week we had no toilet and I had to go to the neighbor’s house often. On top of that, while Danny was installing tile, he would have to put the toilet back on and then take it back off until the tiling was completely finished.
Danny decided to go with the Schluter Kerdi Shower System to waterproof the area. This product was really easy to use and install. I would very much recommend it especially if you have never waterproofed a shower or bathroom before. There were multiple trips to Lowes to pick up the shower system, concrete, Mapai mortar and grout. The plan was to cut any of the tiles needed by hand. That plan quickly went out the window. Like when we had to cut the first tile. We invested less than $100 (and I do mean that it was an investment) in a Skil 3540 Table Wet Saw. That decision saved us a lot of time and even more headache! We also picked up some of the necessary tools we would need to start this project like trowels, float, sponges, buckets, mixer blade and knee pads.
We installed the Schluter System using the mortar. Once that was dry we started cutting and installing the tile. The tile we picked up on sale at Menards almost 6 months before we started the project. I think one of the biggest tips we picked up on is to lay your tiles out and have a plan for how they will fit. You don’t want to end up with a tile in the corner that is 2 inches wide because you didn’t plan the layout. For the tiles around the shower head, Danny just used a cut off wheel and slowly cut a circular shape to make the hole. He did the same thing for the shower handle and the toilet.
At this point we are several weeks in and the frustration of living in a house with no working bath is starting to take it’s toll. We are wishing we could just take a shower in our own house and we felt like we were still miles away from getting done.
Once the tile was laid, we were on to grout. Danny had never laid tile before and this is when he made a BIG mistake. He didn’t realize that grout dried so quickly. Once he had covered 2 and a half walls completely he decided to wipe off the excess grout only to find that it had completely dried to the tile!! He did some research and tried multiple ways to try to get the dried grout off of the tile. The best option was with a Nylon Abrasive Wheel and the only place that carried them was Menards (which was an hour away)! This was by far the biggest error in the project. I remember Danny coming outside at one point and he was covered in white dust from head to toe! He looked like a ghost! After many days and many wheels, long hours, sore muscles and almost burning up a new drill the grout had been ground away. When the grout was in, we moved to the wood.
This barn wood held a special place in our hearts as it originally came from one of the old out buildings on the family farm. We loved the look that it brought to the space! Once the barn wood was in, we mounted the old lath board horizontally and put a clear coat on it. We decided to use bead-board on the ceiling to give it a little flair and keeping with the rustic look. We then installed the toilet, the cabinet, sink, mirror, lights and fixtures and FINALLY we had a wonderful shower to use in our own house! And what a shower it was!!!

Bathroom Before 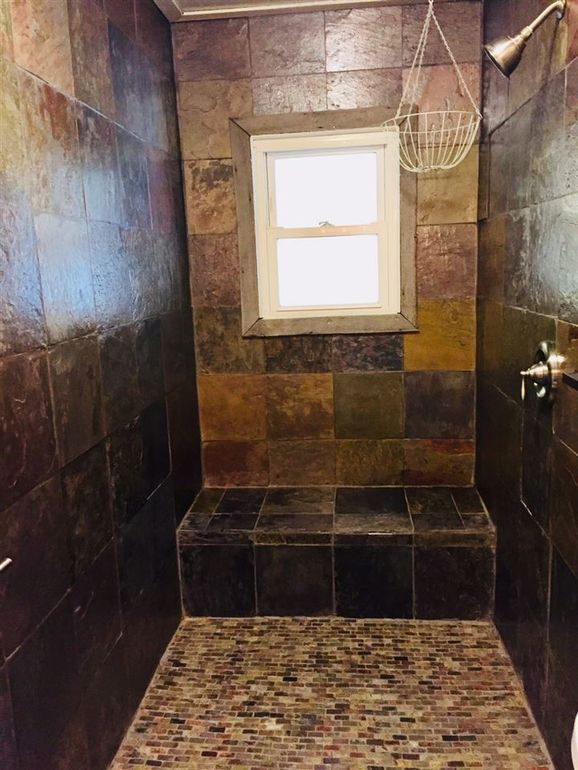
Bathroom After 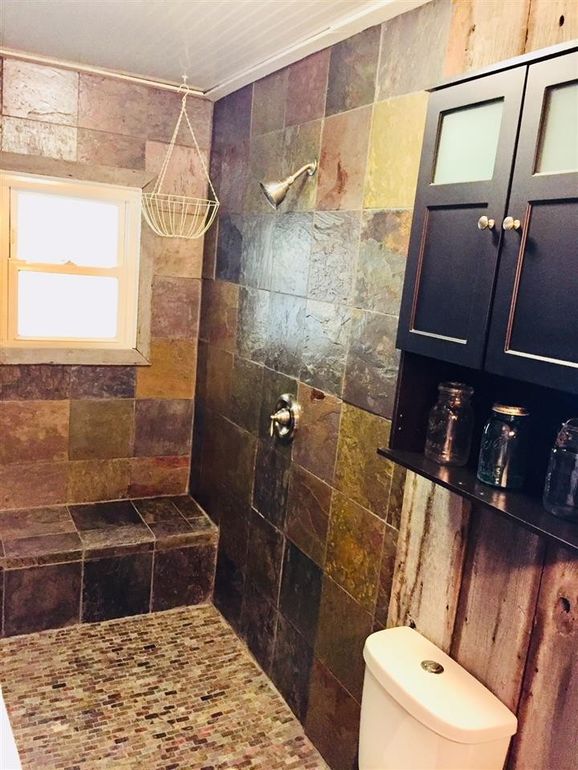
Complete tile shower & floor with tile bench 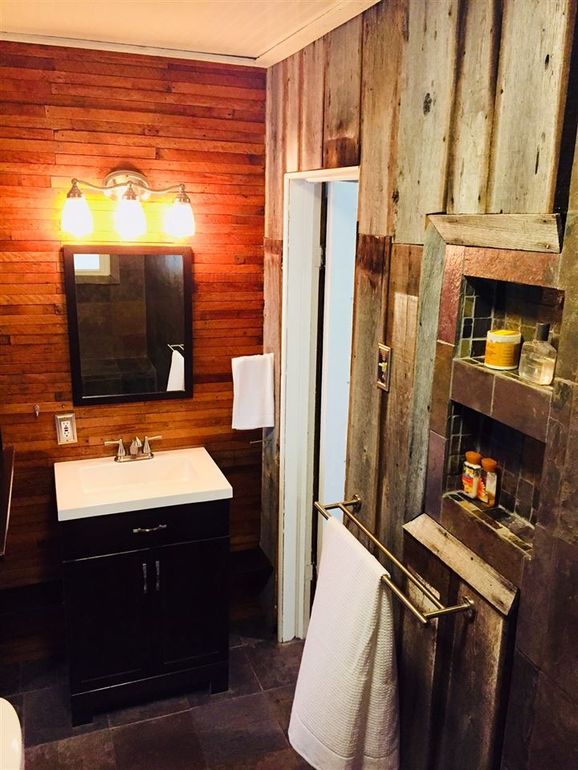
Barn wood & lath board walls with tile built-ins 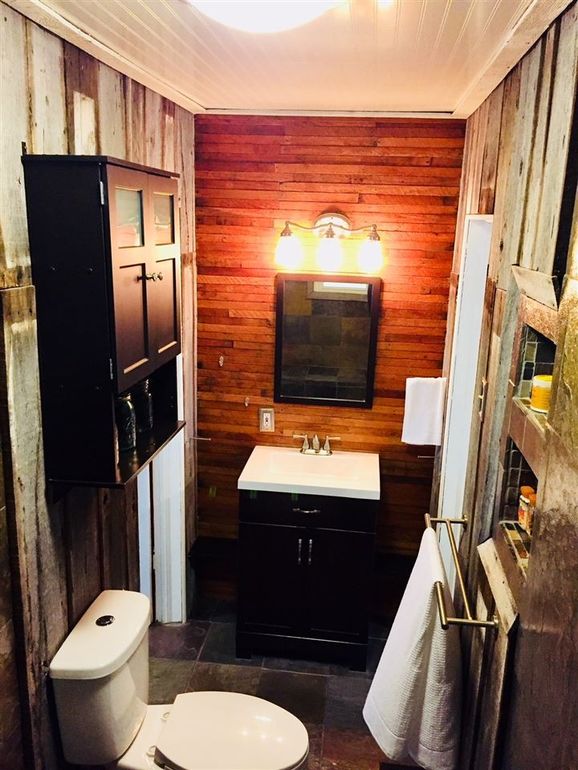
New vanity, toilet, cabinet, light fixtures

Pingback: THE INCONVENIENCES YOU LIVE WITH WHEN RENOVATING YOUR ONE AND ONLY BATHROOM – Our Unbelievable Journey